
Keeping your plastic cups free from mold is crucial for providing safe and enjoyable beverages. Mold can form quickly in moist environments, making it essential for businesses like bubble tea shops, restaurants, and food trucks to have effective cleaning strategies. This article will guide you through each step of the process, from initial scrubbing techniques to disinfection methods, ensuring a comprehensive approach to mold removal. We will also touch upon the importance of inspection and replacement, emphasizing the health and safety of your customers and your establishment. Let’s dive into the essential chapters that will elevate your cleaning practices.
From Stain to Sanitize: A Thorough Path to Cleaning a Moldy Plastic Cup
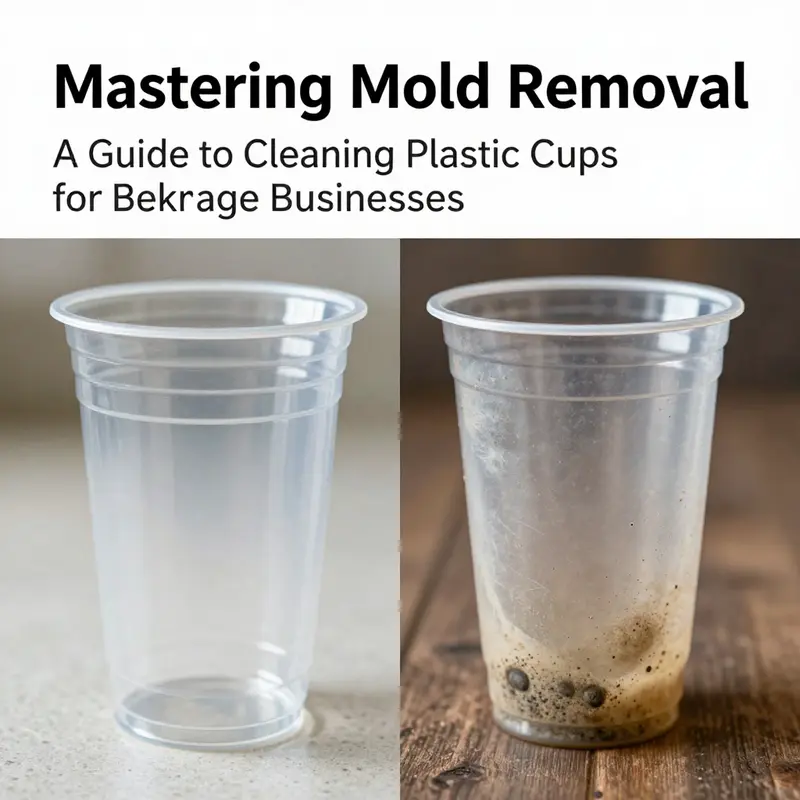
A moldy plastic cup is more than an unsightly stain; it signals moisture, warmth, and a porous surface that can harbor mold. The goal is to remove spores and odors while preserving the cup’s integrity, and to know when cleaning is not enough and replacement is wiser. This chapter describes a practical, layered approach to bring a cup back to safe use or to help you decide when to retire it.
Rinse and inspect. Begin with a thorough rinse under running water to remove loose debris and surface spores. While rinsing, inspect the cup and its lid for cracks, scratches, or rough patches where mold can hide. Discard any parts that show significant damage, since they can shelter microbes despite cleaning.
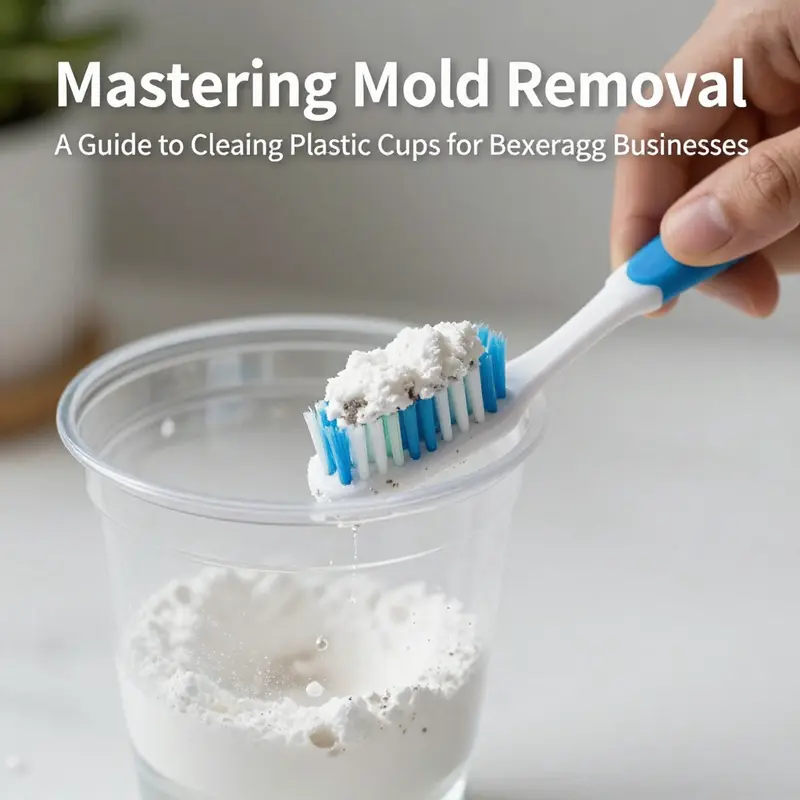
Disassemble and scrub. Remove lids, seals, gaskets, and any removable components. Scrub interior and exterior surfaces with warm water and mild dish soap using a bottle brush or sponge. For stubborn stains, a paste of baking soda and water can be applied, left briefly, then scrubbed with circular motions. Baking soda acts as a gentle abrasive that helps lift residues without scratching the plastic.
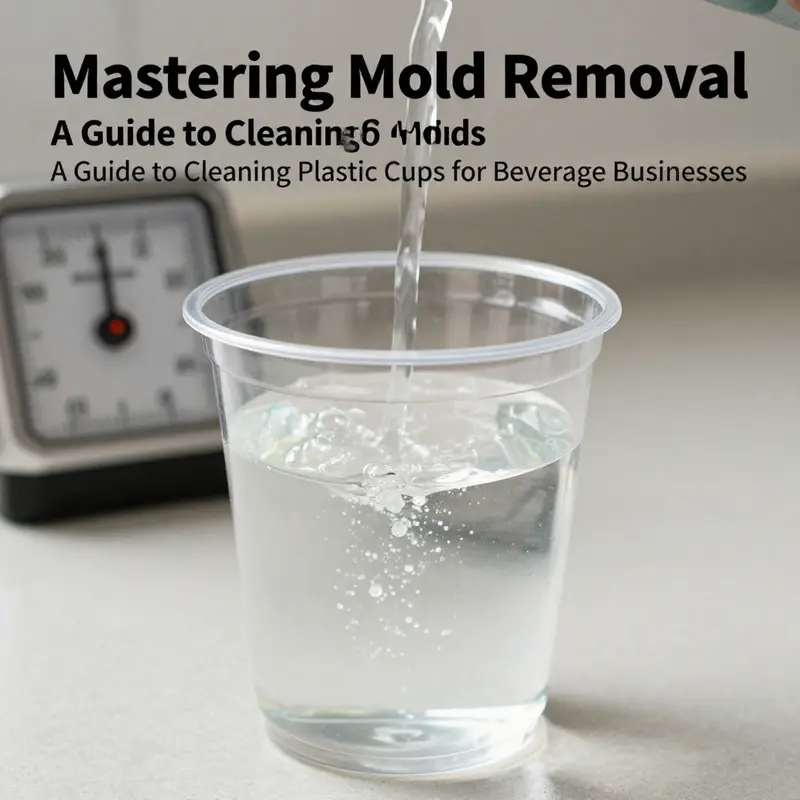
Soak for disinfection. After scrubbing, a soak in undiluted white vinegar for about 30 minutes helps inactivate mold and neutralize odors. This step should be tailored to the material of the cup and followed by a thorough rinse to remove vinegar residue.
Rinse, brighten, and final wash. Rinse again with clean water. If odors persist, rub the interior with a lemon half to freshen and aid mild deodorizing. A hot water rinse with a little dish soap can help remove any remaining cleaners and residues.
Optional disinfection cautions. Some sources mention using 75 percent isopropyl alcohol for additional disinfection. If you choose this step, do not rely on it as routine care; alcohol can affect certain plastics and seals. Always rinse thoroughly afterward.
Drying and assessment. Dry the cup completely, including removable parts, by air drying in a well ventilated area. Inspect for any signs of lingering odor, discoloration, or texture changes. If musty odors or dark spots persist after cleaning, the safest choice is to replace the cup rather than risk continued contamination.
When replacement is wise. Replacement is prudent when deep contamination is evident or when the plastic shows repeated degradation, cracking, or persistent biofilms that cleaning cannot remove. Health authorities note that toxins may be embedded in porous plastics, and surface cleaning cannot guarantee safety in such cases.
Balanced judgment. The aim is to reduce microbial presence and odors without compromising the cup or giving a false sense of safety. If doubts remain after cleaning, favor replacement with a container more resistant to moisture and microbial growth. For broader context on mold and materials used in kitchen items, consult reputable guidelines from public health agencies.
From Dull Stains to Safe Sanitation: Thorough Soaking Solutions for Moldy Plastic Cups
Mold creeping into a plastic cup can feel like a quiet warning. A musty scent, a stain that won’t fade, or tiny dark specks peeking from the lip of the cup can signal more than an unsightly surface. For many households, a plastic cup is a daily tool, a quick sip between tasks, a kid’s snack cup, or a reusable favorite. When mold takes hold, it isn’t simply a matter of scrubbing away a blemish. Mold can cling to porous microtextures of certain plastics, and some mycotoxins can become embedded, especially if the cup has seen moisture, heat, or wear over time. The risk is not only cosmetic. Prolonged exposure to mold spores, especially for those with sensitivities, allergies, or compromised immune systems, can provoke coughing, wheezing, nasal irritation, or skin reactions. In the context of a family kitchen, these concerns become practical, everyday safety questions: How can we clean a plastic cup with mold effectively? Which methods are gentle enough to protect the plastic while strong enough to reduce mold presence? And when should a cup be retired rather than renewed? The guiding idea behind an effective cleaning approach rests on two pillars: first, breaking the mold’s grip with cleaning power that is compatible with the plastic, and second, ensuring the surface is dry, odor-free, and free of residues that could rework as a harbor for future growth. Reading the recipes for soaking in the sources provided, one can weave a coherent practice that balances efficacy with material care, treats odor as a signal rather than an aftertaste, and keeps moisture from becoming mold’s ally again after cleaning.
A practical cleaning path begins with a careful assessment of the cup’s condition. If the plastic shows deep discoloration, a rough or pitted surface, or persistent odors despite repeated cleaning, the safest option is to replace it. Deep contamination can embed toxins that resist ordinary cleaning, and older plastics may have degraded to a point where clean surfaces are no longer reliable. Yet for cups that appear structurally sound, the soaking approach—applied with calm, deliberate steps—offers a robust route to mold removal while preserving the cup’s usability for days, weeks, or even months of further use. The methods below are presented as a unified sequence rather than a rigid ritual, because practice often reveals that combination approaches work best: a soak to soften and loosen, followed by mechanical scrubbing, then a thorough rinse and drying. In this narrative, the focus remains on safe, practical, home-based strategies that minimize risk to people and to the cup itself.
Consider the first instrument in the mold-removal toolkit: white vinegar. A 1:1 mix of white vinegar and water creates a soak that targets both the mold and the odors it leaves behind. The acetic acid in vinegar penetrates surface films and helps to dislodge residues that cling to the interior and exterior of the cup. Soaking for about half an hour is a practical window; it is long enough for the acid to work, yet short enough to keep the plastic from swelling or warping in most common polycarbonates or acrylics. After soaking, a gentle scrub with a soft cloth or a brush can lift any stubborn spots without abrading the surface. A thorough rinse under clean water follows, and then the cup should air-dry completely in a well-ventilated space. The aroma of vinegar will fade once the cup is fully dried, but if any residual odor lingers, a secondary pass with lemon juice can help. The bright acidity of lemon not only helps dissolve remaining stains but also leaves a fresh scent that can reassure users about the cleanliness of the cup. In the broader cleaning practice, this vinegar soak functions as a gentle, non-abrasive baseline that is unlikely to damage most common plastic formulations when used with common sense and a careful rinse.
The second approach introduces a baking soda-based strategy that works on both physical removal and odor absorption. A thick paste made from baking soda and a touch of water can be smeared directly onto the moldy areas. Baking soda acts as a mild abrasive, which helps lift the mold off without scratching the plastic’s surface. Allow the paste to sit for about 15 minutes, then scrub with a toothbrush or a soft-bristled brush. The mechanical action of scrubbing, combined with the paste’s boundary-cleaning properties, makes it possible to remove surface films that vinegar alone might not fully eradicate. After scrubbing, rinse thoroughly with warm water to wash away the paste and dislodged particles. Baking soda’s porous nature helps absorb lingering smells, contributing to a cleaner overall result. This step can be particularly useful for cups where the interior texture or seams collect moisture, since it focuses on rapid deodorizing in addition to surface cleaning.
A more potent option, used with care and proper ventilation, is a diluted bleach soak. The classic 1:10 bleach-to-water ratio provides robust disinfection, capable of tackling residual mold spores that may cling to crevices or seals around lids and rims. Soaking for a limited period—often just 10 to 15 minutes—can deliver disinfection without subjecting the plastic to prolonged chemical exposure. It is absolutely critical to rinse the cup extremely thoroughly after bleaching to remove all traces of the chemical. Residual bleach can be harmful if ingested or used in subsequent contacts with food and drink. Moreover, never mix bleach with ammonia or vinegar in the same cleaning incident; the combination can generate hazardous gases. For many plastics, a brief bleach soak followed by a meticulous rinse can be a last resort, but it should be used sparingly and with explicit attention to the cup’s material tolerance.
A fourth soaking option involves alcohol, specifically a 75% isopropyl solution. Alcohol is a fast-evaporating and highly effective mold-killer, particularly useful for hard-to-reach areas such as the interior of a straw or the narrow channels around a cup’s seals. The advantage here is that alcohol evaporates quickly and leaves little residue, reducing the likelihood of clingy cleaning agents interfering with future use. However, frequent or aggressive alcohol use can accelerate plastic aging in some polymers, causing minor warping or clouding over time. When using an alcohol soak, ensure good ventilation and avoid leaving the cups soaking too long if the plastic appears to soften or warp. For routine maintenance, this method offers a strong option for spot-cleaning or for disinfecting parts separated from the cup, such as lids, seals, or detachable straw components.
Beyond soaking, the natural force of sunlight provides a non-chemical ally in the mold-cleaning repertoire. Direct sun exposure for 4 to 6 hours can deliver ultraviolet radiation that helps kill surface mold. This approach is not a soak, but it complements soaking by driving away moisture and reducing surface organisms. After sunlight exposure, wipe away any dead mold particles with a damp cloth and let the cup dry in a well-ventilated area. The sun’s effect is strongest on surface contamination and is less reliable for deeply ingrained mold or porous plastics. Yet when combined with a subsequent rinse and air-dry, it can contribute to a more hygienic finish.
In practice, a well-structured cleaning sequence blends these strategies to balance efficacy with material care. Start with a vinegar soak to weaken mold attachments and neutralize odors. Rinse, then apply a baking soda paste to lift stubborn spots, followed by a thorough rinse. If any odor or discoloration persists, a cautious bleach soak—only if the cup’s material will tolerate it—can be considered, paired with an extra rinse and an extended air-dry. Alternatively, for disinfecting hard-to-reach areas, an alcohol soak can be used in combination with rinsing, especially when the cup includes components like lids or seals that are difficult to scrub effectively. Finally, consider sunlight exposure as a supplementary step when weather conditions permit, to help reduce surface moisture and microbial load before a final dry.
The discussion cannot skip a critical caveat that runs through every cleaning choice: material compatibility. Not all plastics respond the same way to powerful cleaning agents. Some polycarbonates and acrylics tolerate vinegar well, while others may experience crazing, clouding, or a softening effect if exposed to acidic solutions or high heat. A few plastics may degrade under frequent use of bleach or strong solvents, compromising structural integrity and potentially releasing microplastics or residues into future beverages. Therefore, before you begin any cleaning protocol, inspect the cup for signs of wear and consult the manufacturer’s guidelines if available. If you observe cracking, a rough texture, significant discoloration, or any persistent odor after multiple cleanings, it is wise to replace the cup. Mold toxins such as aflatoxins can be deeply embedded in porous materials, and replacing the item reduces long-term risk. In such cases, moving toward a non-porous, inert alternative—such as glass or stainless steel—can be the safest long-term solution, especially for households with sensitive individuals or recurring mold concerns.
Throughout this process, safety remains paramount. Ventilate well when using stronger cleaning agents, wear gloves to protect your skin from potential irritants, and avoid mixing chemicals in the same container or consecutive steps without thorough rinsing. A calm, patient approach reduces the risk of chemical interactions and helps preserve the cup’s integrity. It is easy to rush a cleaning and miss a careful rinse, which is why the final drying stage deserves as much attention as the cleaning itself. An upside-down position in a well-ventilated area ensures the cup drains completely, and the air circulates to prevent any residual moisture that could re-ignite mold growth. The goal is not merely to remove visible mold but to create a dry, clean, and neutral environment inside the cup so that future use does not invite a fresh cycle of contamination. When this framework is applied consistently, mold doesn’t simply vanish from a single surface; it becomes a managed problem that can be addressed with a disciplined routine.
One practical tip that emerges from experience is to keep a cleanup routine simple and repeatable. For example, after a day’s use, a quick rinse, a light air-dry, and a stored upright in a dry cabinet reduce the chances of mold gaining a foothold. When germ-prone conditions exist—such as a kitchen with high humidity or cups that frequently accumulate residual beverages—establishing a regular cleaning ritual helps prevent the buildup of spots and odors that complicate later remediation. In this sense, the chapter’s soaking solutions are not merely reactions to mold; they can be integrated into a preventive practice that makes daily use safer and less stressful for the household.
If you are considering where to source the kinds of cups used in your home, you can find options designed for easy cleaning and disposal without compromising safety. For instance, there are disposable clear plastic cups suitable for casual gatherings, picnics, or children’s parties. These items are convenient for when a thorough cleaning cycle isn’t practical, but they also remind us that the same principles of cleanliness apply regardless of the cup’s lifecycle. In this context, you might consider simpler, easier-to-clean options for certain uses, reserving the reusable plastics for situations where you can commit to a proper cleaning routine. If you want a practical example of a disposable option, you can explore a line of clear plastic cups intended for party settings, which may be found here: disposable clear plastic cup for parties.
Finally, the chapter must acknowledge that mold dynamics in plastics can be subtle and context-dependent. What cleans successfully in one cup might fail in another, depending on the exact polymer composition, the cup’s age, and how it has been stored. The presence of tiny scratches or wear around the lip can create micro-nooks that harbor mold and resist surface cleaning. That is why the process emphasizes thorough rinsing and complete drying. It also suggests keeping a critical eye on odors and visual changes after cleaning. If the odor persists after multiple cycles of cleaning, or if the cup shows any uncommon changes in color, texture, or taste, replacing it with a new cup—preferably one with a longer shelf life or made from a material less prone to in-porous mold retention—becomes a sensible choice. The overarching aim is not to demonize mold, but to implement practical, repeatable steps that protect health while respecting the material realities of plastic cups used in ordinary kitchens and homes.
For readers who want further guidance on safe household mold remediation, the Centers for Disease Control and Prevention provide a comprehensive overview of best practices and cautionary notes. While mold scenarios vary, the core principles—clean, rinse, dry, and replace when necessary—remain consistent across recommendations. Deliberate cleaning in well-ventilated spaces, careful handling of cleaning agents, and a cautious approach to longstanding or extensive mold exposure can help keep homes safer and more comfortable. In this broader context, the chapter’s soaking-centric approach to cleaning plastic cups stands as a practical, accessible entry point for households seeking to manage mold without sacrificing usability or safety. It demonstrates that even common, everyday items can be restored with a measured, informed method that respects both people and the material world they inhabit.
External resource: https://www.cdc.gov/mold/cleaning.htm
Eradicating Mold from a Plastic Cup: A Safety-First Path from Scrub to Sanitize

Mold in a plastic cup can happen in the quiet corners of a kitchen cabinet or the dim shelf of a dorm room, especially when cups are reused for multiple beverages or stored damp. The sight can be off-putting, but it also invites a careful, deliberate cleaning approach. The aim is not merely to lift visible mold stains but to reduce the risk of lingering spores and potential toxins, all while preserving the integrity of the plastic. This chapter follows a practical, evidence-informed path that blends physical cleaning with disinfection, a process designed to be thorough without relying on harsh or inappropriate chemicals. It also emphasizes the decision points—when to push a cup back into service and when replacement is the safer option for health and peace of mind. The ideas here flow from a basic premise: mold thrives where moisture and organic residue meet porous surfaces. Plastic cups—especially those with minor scratches or wear—can harbor microscopic irregularities that give mold a foothold. A well-planned sequence targets both surface mold and any microscopic spores that cling beyond the obvious stains. In pursuing this path, the goal is not to achieve factory-grade sterility but to reach a practical, safe level of cleanliness that makes reuse reasonable and reduces health risks for a household or a workplace that handles food and drink.
The first moment of decision is historical rather than dramatic: you choose to treat the cup with care rather than rush to use it again. This choice sets the tone for a cleaning ritual that respects the material while acknowledging the stakes. A clean cup is more than a polished surface; it is a barrier against potential exposure to mold spores and, in some cases, to more persistent mycotoxins that may become embedded in porous plastics after long exposure. The steps that follow form a cohesive sequence rather than a patchwork of quick fixes. They are designed to work in concert, each step reinforcing the one before and preparing the cup for the next stage of cleansing and drying. The approach is deliberately conservative: avoid bleach unless the cup manufacturer explicitly approves it, avoid hot water that could deform the plastic, and avoid methods that leave behind residues that could contaminate future drinks. This measured sequence is the best practical path for most non-porous plastics that carry a mold reminder.
The heart of the process begins with a careful physical removal of visible mold and residue. A soft brush, such as a toothbrush, is an essential tool here because it can reach into the crevices around rims, lids, and any textured surfaces where mold tends to settle. The choice of abrasive is deliberate: baking soda acts as a gentle, natural abrasive that lifts mold from the microtextures of the plastic without introducing harsh chemicals. A slurry of baking soda and water or a mild dish soap solution creates a dual-action start. The baking soda helps loosen deposits while the soap dissolves oils and organic matter that provide a nourishing substrate for mold. Work the inner surfaces with deliberate, circular strokes, paying attention to the rim and any seams where water can trap. Rinse with warm water between cleaning passes to keep the surface energized for the next phase. The emphasis at this stage is to remove what you can see and physically dislodge what you cannot, creating a clean stage for disinfection to do its quieter, more robust work.
Following this initial scrubbing, the cup moves into a soak designed to target mold spores and residual odors without introducing aggressive chemicals. A 1:1 mixture of white vinegar and water is used for soaking, and the duration is typically at least 30 minutes. The acetic acid in vinegar is a mild biocide that is effective against many mold spores and is known for neutralizing odors associated with damp, moldy conditions. The soaking step is not just about disinfecting; it also helps dissolve any stubborn residues that cling to the interior and around the base of the cup. If the odor persists after the soak, you can gently re-scrub and re-soak, or consider using a slightly warmer solution to enhance its cleaning power. Heating the solution slightly—just enough to feel warm, not hot—can increase effectiveness by boosting molecular interactions, though you should avoid boiling to protect the plastic. After soaking, a thorough rinse under clean, running water is essential to remove both vinegar and loosened residues. The vinegar step is a bridge: it helps prepare the cup for a more aggressive disinfection without leaving harsh chemical residues that may linger on a surface that will later hold beverages.
If mold remains after the vinegar soak, a second tier of disinfection becomes appropriate. Hydrogen peroxide is a powerful disinfectant that is generally safe for food-contact surfaces when used properly. A 3% hydrogen peroxide solution can be applied to the interior of the cup, allowed to sit for 10 to 15 minutes, and then rinsed away with clean water. This step adds a robust chemical disinfection that is unlikely to leave harmful residues, and it also benefits the environment by breaking down into water and oxygen. The use of hydrogen peroxide is a pragmatic choice because it provides a different oxidative mechanism than vinegar, which helps to cover a wider spectrum of potential contaminants that might survive a milder soak and rinse. Care should be taken to avoid mixing hydrogen peroxide with vinegar directly, as this can generate gases and odors that are unpleasant; use one method at a time and rinse thoroughly between steps. After this disinfection, the cup is rinsed again with clean water to ensure all residues are removed and the surface is ready for the next phase.
Beyond chemical disinfection, natural light and UV exposure can contribute to reducing mold spores and odors, offering a supplemental, low-chemical sanitizing step. Placing the cleaned cup in direct sunlight for a period—typically four to six hours—can help minimize remaining spores and freshen the cup. Ultraviolet light is known to disrupt the reproductive cycles of mold and can reduce odors that cling to plastics after moisture exposure. This step is particularly effective for certain plastics, such as polypropylene, which tolerate UV exposure reasonably well. It is not a universal remedy; some plastics may become brittle or discolored with prolonged UV exposure, so it is wise to assess the cup’s material and condition before committing to a long sun-drying session. If the cup has any signs of degradation or if you notice any hazy films after UV exposure, shorter exposure times or discontinuation of this step are prudent. The sunlit phase is a gentle, natural adjunct to chemical disinfection, offering a final push toward a drier, less odorous surface.
Drying is not simply the last step; it is a crucial stage that prevents rehydration of residual spores and the regrowth of mold. After the sun, a final rinse with fresh water helps remove any lingering residues and dislodged particulates. The next phase is drying: place the cup upside down in a clean, well-ventilated area where air can circulate freely. The goal is to remove moisture thoroughly, since moisture left in the cup is the surest invitation to new mold growth. Air drying in a warm, dry room—away from direct drafts that could blow dust onto the surface—helps ensure that any remaining moisture evaporates without promoting new deposition. If available, a clean, dry towel can be used to pat the exterior dry, followed by a few minutes of air drying to ensure all interior surfaces are completely dry. The emphasis on thorough drying cannot be overstated; mold thrives where dampness lingers, and a dry cup is a sturdy deterrent against reoccurrence.
The narrative would be incomplete without a careful inspection that considers two categories: the immediate cleanliness and the longer-term viability of reuse. After cleaning and drying, inspect the cup for odors, discoloration, or lingering black spots. Persistent issues can signal deeper contamination that cleaning cannot fully remove. If there is any sense of ongoing odor, unusually deep staining, or tiny black spots that seem embedded in the plastic, the prudent choice is to replace the cup. Mold can produce toxins such as mycotoxins that penetrate even seemingly intact plastic in some cases, particularly if the material has sustained scratches or other damage that opens microchannels. In such circumstances, replacement is the safest option. The decision to discard should be guided by both the visible condition and the material’s integrity after cleaning. If you choose to reuse a cup after cleaning, reserve it for non-food contact uses or designate it for decorative or non-ingestive purposes to minimize health risk while your cleaning skills accumulate and the cup’s sanitization duties are redefined.
All steps described here aim to give you a practical, safe framework while respecting the plastic’s nature and limitations. It is also essential to keep in mind certain universal cautions: avoid bleach on most plastic cups unless the manufacturer explicitly approves it, as chlorine bleach can degrade plastics and may leave residues flavored or tainted for food contact. Do not use hot water above 70°C (158°F) with heat-sensitive plastics, which can warp, warp, or leach chemicals. If the cup is scratched or visibly worn, mold can hide in imperfections, and cleaning may not reach all pockets of contamination. In such cases, replacement is the saner choice. Finally, while these steps are grounded in widely accepted cleaning principles, it is wise to cross-check with authoritative sources on household mold remediation to align the practice with current safety recommendations. The broader context of public health guidance emphasizes both cleaning and environmental controls to minimize mold exposure in living spaces, which reinforces the practical caution that a mold-challenged cup may be safer to replace than to continue using.
For readers who need a visual anchor in everyday use, consider a common, reusable approach that keeps the experience straightforward: when in doubt, opt for a clean slate. It is helpful to keep a few simple guidelines in mind for future cups. First, rinse promptly after use and dry completely before storage. Mold thrives in moist conditions, and a habit of air drying helps prevent accumulation on the next cycle. Second, store cups in a dry cabinet rather than a damp space, where residual moisture can linger and invite microbial life. Third, if a cup has any scratch or crack that creates a micro-harbor for mold, or if its surface shows a roughened texture or stain that refuses to fade, replacement is a sensible safety choice. These habits reduce the need for aggressive cleaning methods that can wear down the plastic over time and safeguard against long-term deterioration that might compromise food safety.
In keeping with the idea that cleaning should be both effective and sensible, it can be useful to think of the process as a layered defense rather than a single heroic action. The initial scrubbing serves as the foundation, lifting grime and loosening colonies. The fermentation of spores and residues is then addressed by vinegar’s mild biocidal action, followed by a more robust disinfection with hydrogen peroxide. UV exposure offers a final, low-chemical nudge toward sanitization when appropriate. Finally, thorough drying closes the loop, preventing moisture from reopening the door to mold growth. The logic of combining mechanical, chemical, and environmental strategies mirrors best practices in broader mold remediation: you disrupt the material’s capacity to harbor spores, kill those that linger, and remove moisture to prevent regrowth. If any step fails to meet your expectations, or if the cup shows signs of stubborn contamination, do not hesitate to replace it. The aim is to protect your health while using materials that remain safe for future beverages.
To bring in a practical, product-aware note: if you come across these cups in everyday shopping or want to keep a reserve for quick cleanup, consider options designed for easy handling and reliable disposal. For a straightforward reference to a clear disposable cup range often used in casual settings, see this product page: disposable clear plastic cup for parties and events. While you perform your cleaning, this link can serve as a reminder of the simple baseline materials that work well for normal, non-mold-prone needs and provide a contrast to the more cautionary approach required when mold is present.
The overarching message is clear: mold in a plastic cup calls for a careful, multi-step response that emphasizes thorough cleaning, careful disinfection, and prudent decision-making about replacement. The steps outlined here are not a ritual merely to satisfy curiosity; they reflect a practical balance between achieving a hygienic surface and preserving the integrity of the plastic. They acknowledge the realities of household or workplace environments where moisture cycles and food contact surfaces intersect, and they respect the limits of what cleaning can attain when mold has taken hold in scratched or aged plastic. The result is a careful path that reduces health risks while providing a clear framework you can apply again and again when needed.
External resource for broader context: authoritative guidance on mold remediation in households can help inform safe cleaning practices beyond the kitchen cup. See the Environmental Protection Agency’s mold and mildew removal guidance for extended reading and safety considerations: https://www.epa.gov/pesticide-registration/mold-and-mildew-removal-home
null
null
Final thoughts
Cleaning plastic cups with mold requires a structured approach that covers scrubbing, soaking, disinfecting, and inspecting. Implementing these procedures not only enhances the cleanliness of your beverage service but also helps to uphold food safety standards that protect your customers and business reputation. Always prioritize the health and safety of your patrons by thoroughly cleaning and inspecting your utensils. By following these guidelines, you can ensure that your plastic cups remain safe for use and contribute positively to your brand image.