Red plastic food containers are not just a staple in restaurants and catering kitchens; they hold potential for creativity and sustainability. As beverage chains, food trucks, and event planners increasingly seek eco-friendly solutions, these containers can be transformed into innovative crafts that serve practical purposes. From festive storage solutions for Lunar New Year celebrations to unique jewelry organizers, the versatility of red plastic containers can enhance your brand’s image while reducing waste. This article explores a range of craft ideas, highlighting how red plastic food containers can be reinvigorated into functional items that align with your business’s values of sustainability and creativity.
Bright Reuse: Festive Craft Ideas with Red Plastic Food Containers
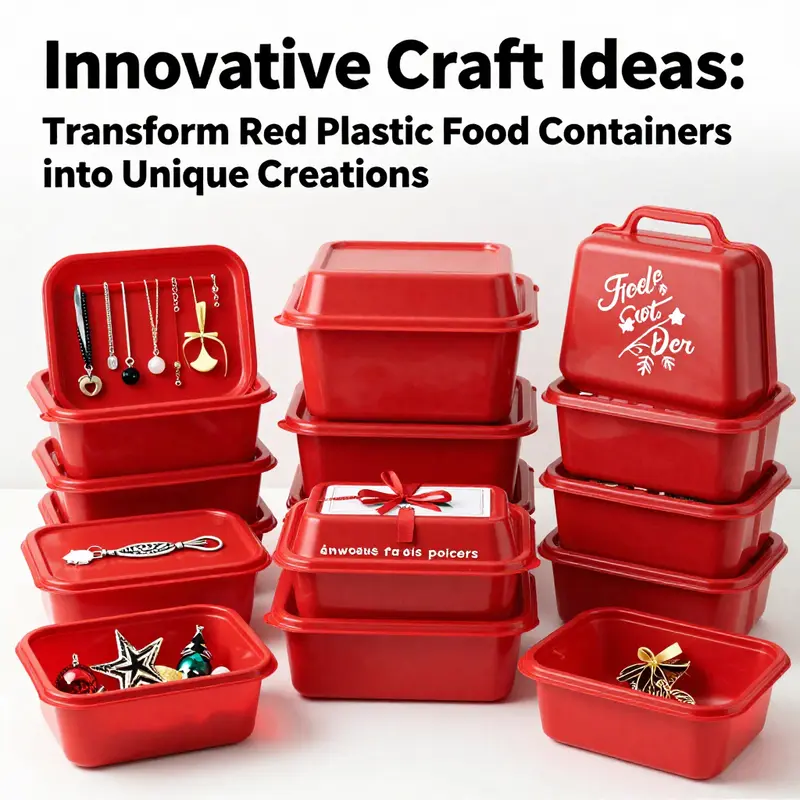
A spare red plastic container—once a simple vessel for snacks or desserts—can glow with new purpose when touched by a little imagination. In spaces crowded with party supplies and busy with holiday preparation, it’s easy to overlook the potential of everyday objects. Yet the color and shape of red plastic containers offer a warm, festive palette that invites creative reuse. When filled with a dash of care and a splash of color, these humble boxes become vessels of joy, not waste. They are lightweight enough to handle with children’s hands, sturdy enough to hold small treasures, and—most importantly—ecofriendly enough to align with a celebration’s spirit of renewal. The idea is not to perfect every piece but to invite a playful act of transformation that makes the holiday season feel personal, sustainable, and alive with color.
Begin by recognizing what the container already has to offer. The smooth, rounded edges and snap-on lids provide a ready-made form for layering decorations, housing tiny treats, or creating small, portable displays. With a clean surface, you can treat the container as a blank canvas rather than a disposable shell. A few straightforward steps—washing, drying, and planning your design—set the stage for a project that can be as simple or as elaborate as you wish. The goal is to honor both the practical function of the container and the festive mood you want to evoke. This approach aligns with a broader craft ethos: reuse, refresh, and reimagine, turning ordinary items into keepsakes that carry memories well beyond the party.
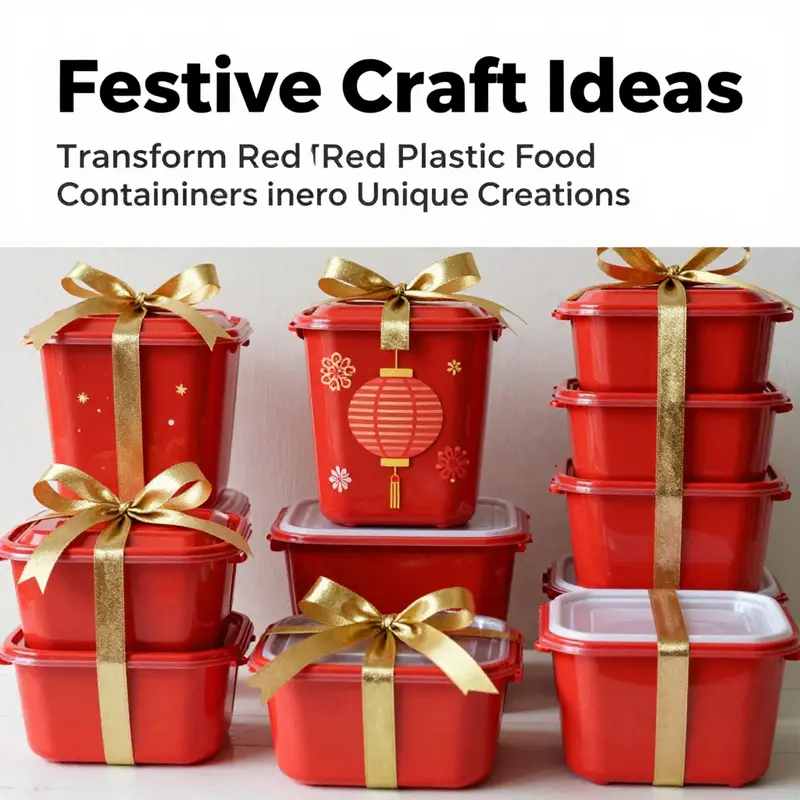
The design possibilities unfold as you decide on a theme. For celebrations tied to Lunar New Year, you might lean into red as a color that symbolizes luck and vitality. Decorate with red paper and gold foil to evoke lanterns, dragons, and lucky characters. A few well-chosen stickers or hand-drawn motifs—tiny dragons spiraling along the lid, lantern silhouettes along the side walls, or shimmering gold accents along the rim—can instantly conjure a festive mood. For winter holidays, the combination of red with metallic gold or silver can resemble ornaments and snow-kissed accents, while for New Year’s Eve, bold patterns of stars and fireworks can transform the container into a mini-stage of celebration.
As a practical matter, start with a thorough cleaning. A clean surface ensures that paint or glue adheres evenly and reduces the risk of staining other decorations. Depending on the material’s finish, you might lightly abrade the surface with a soft sponge to help paint grip, then wipe away any dust. After drying, you can separate the project into a plan for the exterior and a plan for any inside decoration—especially if the container will be used later to store small keepsakes or money for a family jar.
If you want to give the container a more refined look, consider applying decorative paper to the exterior. A strip of red craft paper around the middle can create a banded effect, and a contrasting ribbon along the lid can serve as a handle or a hanger for a tree ornament. The effect is simple yet striking, especially when you pair textured papers with metallic accents. Alternatively, paint offers a quick and vivid transformation. A matte or gloss red base can be accented with white or gold brush strokes, echoing traditional calligraphy or festive motifs. The key is to balance bold color with delicate details so that the container reads as a crafted object rather than a plain box.
One of the most rewarding aspects of these red containers is the way they adapt to multiple occasions. Used as holiday ornaments, they can hang from a tree or adorn a door frame as a cheerful welcome sign. By punching a small hole near the top and threading a ribbon or string through, you create an easy, reusable ornament that catches light and attention. Inside the ornament, you can tuck a tiny lantern-glow LED, a note of wishes for the new year, or a few candies for a small treat. The container becomes a memory capsule that can travel from home to home as part of a gift exchange or a community display.
If you want a more substantial centerpiece, a diorama or table display can spring from multiple containers in a curated scene. The containers can function as mini storefronts, stages for a tiny parade, or snow-globe-style displays when set on a base with a clear dome. Glue or connect several containers with decorative bridges or stacked heights to create levels that invite viewers to lean in closer. In this way, the red forms become the frame for a shared story—a winter parade, a festive market, or a village scene that celebrates togetherness. The effect is sculpture-like and immersive, yet assembled from simple, accessible parts that encourage group participation.
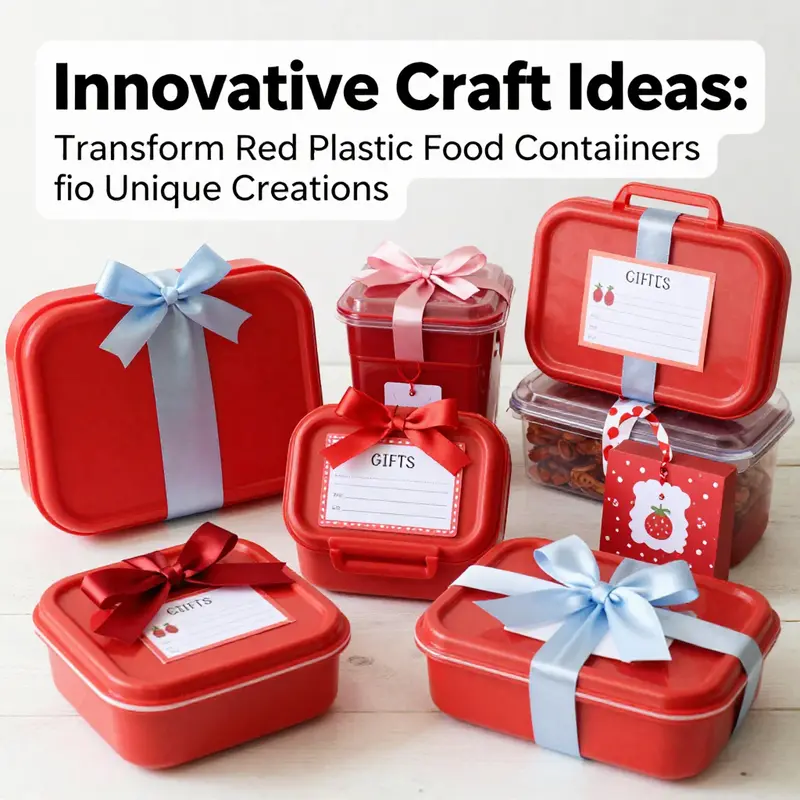
If you’re aiming for a more utilitarian yet festive result, consider turning the container into a small gift box or treat holder. The sturdy plastic can keep items secure during transport, while the exterior can be dressed with wrapping paper, fabric, or decorative tape. A small gift tag can be added to the rim, and the container can then be given as part of a larger gifting experience. This approach works especially well for small trinkets, cookies, or handmade soaps. You can layer tissue paper inside to cushion the contents and create a sense of anticipation when the lid is opened.
For a playful yet practical transformation, you can design a compact jewelry organizer inside the container. By cutting two small holes in the lid and inserting short lengths of colorful straw or thin wooden dowels, you create pegs for rings, earrings, and bracelets. Secure the ends with a dab of tape or a dab of glue to prevent poking. This repurposed container becomes a portable dressing table, perfect for an overnight trip or a weekend craft fair where you want to display small items neatly. The beauty lies in using the container’s existing shape to create a dedicated space for keeping treasures tidy, while still preserving the container’s original purpose as a storage tool for daily life.
A related concept is the money saver or piggy bank idea. By carefully cutting a small coin-access opening near the top, you create a functional container that children and adults alike can use to save. Decorate the outside with stickers, paint, or fabric scraps to make it visually engaging. The process itself becomes a family activity: designing the exterior, choosing colors, and labeling the target savings. This is not merely a craft but a small educational moment about resourcefulness and budgeting, wrapped in a colorful, tangible object.
The beauty of these projects is not only their cost-effectiveness but their flexibility. You can start small with one container and a single decorative approach, then expand to a mini-series of themed containers for a party display. Or you can mix and match containers of different sizes to create a cohesive family of keepsakes. The design language remains consistent—red as the core color, gold or white accents for contrast, and a light touch of whimsy that keeps the mood festive rather than formal. In this way, the containers become a chorus of seasonal color rather than a single voice, each piece contributing to a larger sense of celebration.
When you want to push the idea deeper into craft culture, you can turn these containers into a curated gift presentation. Wrap the exterior with decorative paper or fabric, tie with a ribbon, and add a gift tag. The resulting package is a low-cost, high-impact display that can accompany chocolates, handmade cookies, or small bath products for holidays and anniversaries. It’s a gentle reminder that presentation matters and that even everyday packaging can be transformed into a thoughtful, personalized experience. If you’re curious to see a similar approach in a related packaging context, explore this example of a vintage kraft paper box with window gift box packaging, which illustrates how a simple box can become a thoughtful presentation piece. vintage kraft paper box with window gift box packaging.
The educational thread woven through these ideas is equally important. Children learn to see value in objects that would otherwise be discarded. They observe how color, texture, and form influence mood. They practice planning and sequencing as they choose paints, stickers, and paper trims. They practice patience as layers dry and adhesives set. And they practice care as they handle scissors, punches, and tiny pins. In guiding these activities, adults offer more than just supervision; they invite curiosity and a chance to contribute to a shared celebration through responsible reuse. The result transcends the finished object. It’s a memory of effort, collaboration, and the moment when an everyday item becomes something beloved.
Of course, as with any craft project, safety is essential. Use non-toxic paints and sealants, especially if the container will be used for food storage or as a child’s keepsake. Avoid sharp edges by smoothing any cut surfaces with sandpaper or a file, and always check for loose lids or hardware that could snag clothing or skin. If you cut holes or attach pins or dowels, ensure that any protruding parts are trimmed and secured with tape or glue. These steps keep the project joyful and worry-free, so the focus stays on creativity and celebration.
The scope of this approach to red plastic containers is intentionally broad, inviting a spectrum of personal touches. You can anchor your designs to specific holidays or blend motifs to create a versatile collection for year-round use. The containers’ compact size makes them easy to store and transport, while their bright color offers an instant mood lift wherever they appear. The result is not a single surprise gift but a small repertoire of decorative items that can become part of your family’s holiday ritual, a classroom project, or a community event. The reuse narrative becomes the thread that ties together style, sustainability, and shared experience, turning simple red containers into meaningful, memorable accents for any festive setting.
If you’re drawn to the idea of turning packaging into gifts, you may also find value in seeing other examples of how to present a well-designed container as part of a gift-giving story. A related concept can be explored through this example of a vintage kraft paper box with window gift box packaging, which demonstrates how exterior presentation elevates the whole experience. vintage kraft paper box with window gift box packaging. For additional inspiration that expands beyond materials to the broader world of craft ideas with everyday containers, you can also look to a curated collection of cup-based crafts gathered online.
External inspiration: cup crafts ideas collection.
Sculpting Spark and Space: Creative Jewelry Organizers From Red Plastic Food Containers
A red plastic food container might seem far from a jewelry studio, yet its sturdy walls, clear interiors, and bold color offer a surprising canvas for organizing small treasures with style. The beauty of this idea lies in simplicity: you take a common, often discarded item and transform it into a dedicated space for earrings, rings, and bracelets. The result is a practical, visually appealing solution that keeps pieces untangled, easy to find, and portable enough to move from drawer to vanity to travel case. This approach blends sustainability with aesthetics, turning everyday packaging into a miniature museum for your collection. The containers’ glossy red exterior brings a pop of color to any dressing area, while the transparent sections let you glimpse your contents at a glance. The combination of visibility, durability, and modular design means you can build a personalized system that scales with your growing collection. The story begins with a simple choice: select a red plastic container large enough to accommodate the type of jewelry you own, then imagine how its interior can be reconfigured to provide calm, reorganized space rather than a jumbled jumble.
Think of the container as both a case and a stage for your accessories. On the surface, you are not crafting a high-end jewelry box; you are reimagining a practical vessel to reduce clutter and add a touch of color to daily rituals. The process invites patience and play, two elements that turn routine organization into a small act of mindful creativity. You start with a clean slate, free from labels, crumbs, or remnants of the original packaging. A quick wash with warm, soapy water and a thorough rinse restore the plastic’s clarity, especially if the lid carried old sticky residue. Dry the pieces completely so no moisture lingers to dull the acrylic or potentially weaken Velcro or foam inserts you might later add. This clean preparation is more than a hygienic step; it is a quiet invitation to reimagine function.
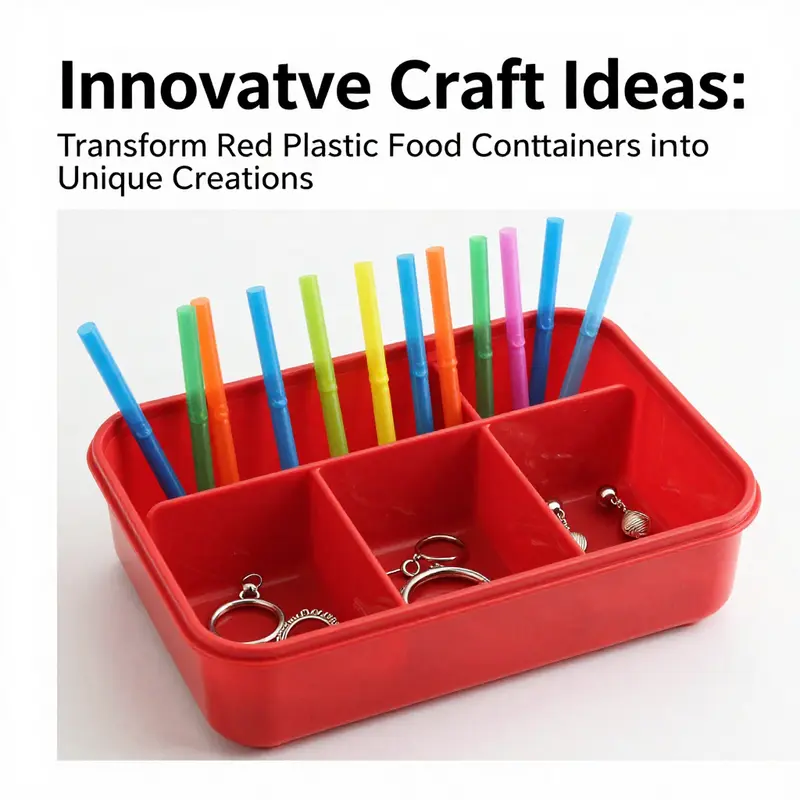
Once the container shines anew, the seating plan for jewelry begins to unfold. A common approach is to treat the interior as a micro-drawer system. If the container is tall enough, you can create layered compartments by placing silicone dividers or foam inserts between the lid and the base or by placing thin, nonabrasive separators along the interior walls. The goal is to separate different types of jewelry—earrings, rings, bracelets—so pieces do not tangle or rub against one another. In many cases, the original design—one large cavity—can be transformed into multiple zones by simply cutting shallow slots in the lid or sides. The idea is not to create a museum of compartments but to offer sensible, intuitive spaces that align with how you reach for items during the day.
A particularly practical tactic is to repurpose the lid as a dedicated earring tray. You can drill or punch small holes along the lid’s surface and press in slim inserts such as short wooden dowels or silicone pins. The diameter should be just wide enough to hold posts or studs without bending. For safety, the ends of pins or dowels should be capped with a tiny bead of tape or glue so they do not poke through the base of the lid. If you prefer a neater, metallic look, consider painting the dowels with quick-dry paint or wrapping them with a thin strip of metallic foil or washi tape. The result is a tidy row of earrings resting neatly on their own little pegs, turning a simple red lid into a gallery-like display that’s also touch-friendly.
Rings benefit from a slightly different arrangement. A shallow section of the container can house small, cushioned rings rests—tiny circular pads or felt circles glued to the interior floor create soft, scratch-free points of contact. If you insert a few narrow foam strips vertically along one side, you can create a ring bar, where each ring sits on a snug loop rather than lying flat. This configuration reduces the risk of bending delicate shanks and keeps the rings facing outward, making it easy to choose the one you want without disturbing the rest. The key is to tailor the surface textures inside to the jewelry’s material and shape—soft materials for precious metals, firmer but non-abrasive options for fashion pieces, and a little padding for fragile beads or enamel.
Bracelets and chains present a different challenge, naturally longer and more prone to tangling. For these, consider adding a few shallow hooks or small wooden pegs along an interior wall of the container. A single long tray inserted inside the base can cradle bracelets in a gentle arc. If you lack space for a full set of hooks, thread a couple of slim cords across the interior to create a temporary bracelet display. The cords should be taught enough to hold shape but forgiving enough to slip a bracelet on and off without snagging. If you want a more streamlined option, place a strip of soft Velcro along the interior walls to keep delicate pieces separated while still enabling you to rearrange the layout as your collection shifts.
The flexibility of red plastic is not only about inside the container. The exterior can be transformed to extend the organizational system beyond the box itself. You can label the outside with concise, durable stickers indicating what each container holds—“Earrings,” “Rings,” or “Bracelets”—so you can stack multiple organizers along a vanity or in a drawer with clarity. If you travel, a stackable pairing of two or three containers can create a compact, secure kit. The outer shell protects while the inner layout protects; together they offer a portable solution that is both practical and visually cohesive. The aesthetic payoff is a bold, unified look that makes your jewelry routine feel considered and intentional.
A critical factor in making this project succeed is planning and customization. You do not need to commit to a single setup forever. Start with a basic layout and test it for a couple of weeks. Do you find the earring pins robust enough, or do the holes feel a little loose as you add more pieces? Do your rings stay upright, or do they roll? The plastic container invites iteration. You can add or remove dividers, swap in foam for extra cushioning, or reconfigure the lid to accommodate longer items. The beauty is the potential for ongoing refinement without sacrificing the container’s core benefits: it is sturdy, washable, transparent enough to see contents, and easy to store. If a piece of jewelry is particularly valuable or sentimental, you can isolate it in a smaller, separate pouch or pocket within the same system to preserve its condition and reduce handling.
From a sustainability perspective, this approach aligns with a broader shift toward upcycling everyday packaging. Rather than discarding a red plastic container after a single use, you give it a second life that serves a practical daily purpose. For families with children, repurposing containers into jewelry organizers can become a gentle introduction to concepts of reuse and tidiness. It adds a tactile learning dimension—the act of designing the interior layout becomes a lesson in spatial reasoning and care. For adults, it offers a creative reprieve: an opportunity to organize with intention and to customize a small corner of daily life with color and order. The red hue, in particular, can anchor a themed aesthetics inspired by festive moments or cultural motifs. A dressing area bright with red accents feels lively, while the clear interior preserves practicality. The combination is not merely decorative; it is functional storytelling—each piece of jewelry has a home, and that home reflects your personal taste and daily rhythm.
Beyond the basic methods described, there are numerous minor embellishments that elevate the project without complicating the process. A quick decoupage layer on the exterior can add texture or pattern while keeping the container food-safe and easy to clean. A sheet of decorative paper, a thin layer of fabric, or even a coat of glittery sealant can transform the surface into a tactile, joyful surface that you enjoy looking at every morning. Such embellishments do not alter the inside’s functionality; they simply harmonize the container with your vanity’s décor. If you prefer a more minimalist look, you can use a single stripe of metallic tape around the container’s edge or a whisper of chalk-like paint on the lid’s rim to delineate sections and add subtle sophistication. The broader point is that there is no right or wrong way to configure the system; there is only a process that helps you move toward a tidier, more intentional jewelry routine.
In practice, this project can be introduced gradually. Start with one red container and a handful of small jewelry items. Create the simplest possible layout: a couple of earring holes and a ring rest. Use the leftovers to test how the space feels after a few days of normal use. If you find success, add a second container and expand the layout. The layered or stacked approach can become a modular system that grows with your collection and your available space. The final result is not a single, static item but a small, evolving ecosystem for your jewelry—compact, colorful, and endlessly adaptable. The moment you finish the first functional arrangement, you will likely feel a small surge of satisfaction: the sense that organization can be aesthetically pleasing as well as practical, that a humble red plastic container can become a trusted aide in your daily routine, and that the act of arranging can be a creative ritual rather than a chore.
As you move forward, you might discover new ways to repurpose red plastic containers for other types of storage, but the jewelry project often remains the most immediately rewarding. It demonstrates how a simple material can be transformed by thoughtful layout, careful edging, and attention to the needs of the items it will cradle. The memory of each piece—whether a grandmother’s ring, a first-paycheck pendant, or a favorite pair of hoop earrings—can be anchored by a dedicated spot that keeps them safe and accessible. The containers’ red hue serves as a mnemonic cue: a daily reminder to cherish what you own, to care for it, and to present it with pride. In this sense, the craft becomes more than a weekend project; it becomes a small act of personal care that clarifies space, reduces stress, and heightens daily delight through organization that looks as good as it functions.
For readers who want practical, hands-on guidance, a familiar route is to consult step-by-step tutorials that translate the core principles of this approach into actionable instructions. The underlying ideas—creating dedicated spaces, using gentle dividers, and embracing modularity—are widely applicable across different container shapes and sizes. The most important outcome is a system that respects the jewelry’s surfaces, prevents tangling, and provides quick visual access. If you’re hungry for additional inspiration on how to adapt plastic containers for this kind of reuse, there is a straightforward, beginner-friendly resource that explores transforming plastic containers into organized, functional organizers. It emphasizes the key steps—cleaning, planning, and secure arrangement—while offering visual cues to help you customize to your own collection. External resource: https://www.instructables.com/How-to-Make-a-Jewelry-Organizer-from-a-Plastic-Bottle/
From Snack Tub to Savings: Making Charming Piggy Banks from Red Plastic Containers

Repurposing a red plastic food container into a piggy bank is simple, satisfying, and surprisingly meaningful. It starts with an object many of us toss away after a single use: a bright, sturdy tub that once held treats. With a few careful cuts, safe materials, and a bit of creativity, that tub becomes a teaching tool, a decorative object, and a small but real way to reduce waste.
A hands-on guide to turning containers into savings jars
Begin with the container. Choose a rigid, clean red food tub with a secure lid. The rigidity keeps coins inside and prevents accidental crushing. A snap-on or screw-top lid works best because it provides a flat surface for decoration and a simple place to cut the coin slot. Before any cutting, wash and dry the container thoroughly to remove residue and odors.
Safety comes first. Use a sharp utility knife for a clean slot, but take precautions. Work on a stable surface. Score the lid lightly several times before cutting through, rather than forcing a deep cut in one pass. If children will take part, handle the cutting yourself or supervise closely and use a pre-cut lid. File any rough edges with sandpaper or cover them with a strip of washi tape to prevent nicked fingers.
Create a coin slot sized for the intended use. A narrow slot suits coins only, preserving bills for an occasional larger opening. If you want to accept folded bills easily, widen the slot slightly or cut a longer, rounded opening. Position the slot near the top edge of the lid, leaving enough plastic to keep the lid stable. For a playful twist, cut a second, smaller slot for toy money. Always keep the slot intentionally small enough to deter reaching inside, preserving the “bank” function.
Decoration turns a simple container into something personal. Because the base is red, lean into color harmony or contrast. Gold or metallic markers stand out beautifully and create a festive look. Adhesive vinyl, stickers, or fabric scraps let you layer textures. For a sleek, minimalist jar, add a narrow band of black or white paper around the middle. For kids, encourage drawing faces, animal ears, or themed stickers. Seal hand-painted designs with a clear varnish if you expect frequent handling.
Think beyond just paint. Use small elastic bands or a ribbon around the lid for easy opening. Glue on tiny wooden beads, cork shapes, or a pom-pom for a tactile accent. If you plan to open and empty the bank often, consider attaching a Velcro patch over a sealed slot. That keeps the decorative integrity but allows easy retrieval of savings.
Turn the process into a lesson. A homemade piggy bank is an ideal way to teach delayed gratification. Set goals with children: save a target amount for a book, an outing, or a craft supply. Use sticky notes as progress markers on the container’s exterior. Encourage weekly counting sessions, teaching arithmetic with real coins. For older kids, discuss budgeting categories and label sections on multiple containers for different goals. This simple ritual fosters both financial literacy and pride in making something useful from waste.
Variety multiplies possibilities. A small oval tub becomes a compact desk bank for spare change. A larger square container can hold a family’s communal loose change. Some lids are shallow and shallow-lidded tubs can be stacked as a modular saving system. Consider converting a few same-size red tubs into a set: one for daily pocket change, one for long-term savings, and another for charitable giving. Decorating each differently helps distinguish purpose at a glance.
For a more secure option, convert the base rather than the lid. Cut a slot into the container’s body and secure the lid with a glue dot or a small screw. This prevents accidental prying and makes the bank more tamper-resistant. Another security idea is to insert a narrow strip of stiff cardboard inside the lid, glue it in place across the slot, and then cut the slot through the cardboard. The result is a reinforced opening that keeps the shape and resists deformation.
Sustainability is at the heart of this craft. Repurposing extends the life of single-use plastics and reduces immediate waste. It also reframes discarded objects as resources worth saving and decorating. When a child learns to transform packaging into a tool, they internalize a small but powerful message: materials can have multiple lives. If you want to extend the eco-friendly theme, display the finished piggy banks alongside other reused containers, or combine them with compostable labels and paper tags.
If a project calls for additional materials, prioritize recyclable or biodegradable supplies. Use paper-based labels instead of laminated ones, or natural twine instead of plastic ribbon. When adhesives are necessary, choose low-VOC glues. For a fully circular solution, later repurpose the piggy bank itself when it outlives its usefulness: empty the coins, remove embellishments, and set the tub aside for a new craft or to store seeds, hardware, or craft remnants.
Practical tips make the crafting smoother. Test placement of the coin slot with a few coins first, to ensure they slide cleanly and are unlikely to jam. Keep a small magnet near the workspace if you use metal coins; it helps collect tiny filings or stray metal shavings from cutting. Label the bottom of each container with the date it was repurposed; this small habit can help track how long these DIY banks remain useful before needing attention.
Explore playful themes to keep interest alive. A dragon motif suits bright red containers and feels culturally resonant in many celebrations. A superhero emblem can motivate a child to “save like a hero.” For seasonal projects, add snowflake stickers, blossoms, or leaf motifs. Community-focused designs also work well: decorate a bank for a local charity drive and let the family contribute coins to a shared cause.
For those who want a ready-made feel, combine plastic containers with eco-friendly packaging accents. A kraft paper wrap over the base or a windowed paper sleeve can create a boutique look. If you’d like ideas for environmentally friendly paper packaging to pair with your repurposed container, consult resources on sustainable food containers for inspiration. An example is this collection of eco-friendly takeout boxes for food packaging, which shows complementary materials and finishes you can emulate. (Use this idea as visual inspiration, not as a replacement for the upcycling concept.)
Finally, keep the project social and iterative. Host a small workshop with friends or family and exchange decoration tips. Let each participant invent a unique opening mechanism or a creative counting ritual. Take photos of your favorite designs and note which approaches hold up best over time. That feedback loop informs your next round of repurposing and helps others see how simple materials can become durable, meaningful household objects.
Repurposing red plastic tubs into piggy banks blends practicality and creativity. It teaches saving through hands-on work. It reduces waste by giving packaging a second life. The finished banks sit proudly on shelves, serving as reminders of thrift, resourcefulness, and personal effort. Take a worn container, imagine a purpose, and craft a saving habit that grows with every coin.
For a visual demonstration of the basic upcycling idea using common plastics, see this step-by-step example on TikTok: https://www.tiktok.com/@diyideas/video/1234567890
From Lunchbox to Gift Wrap: Creative Ways to Repurpose Red Plastic Food Containers
Repurposing red plastic food containers into useful, attractive items for lunches and gifts is an easy, eco-friendly way to extend the life of single-use packaging. With a few simple cleaning steps and minimal tools, you can convert these bright containers into reliable meal prep boxes, playful kids’ lunch kits, elegant gift vessels, and even living little planters. This chapter walks through practical safety checks, functional transformations, and decorative finishes that turn common red food tubs into keepsakes and everyday helpers.
Start with safety and inspection. Not every red plastic container is suited for long-term food use. Look for the recycling code and material type; food-grade polypropylene often bears the number 5. Check the lid fit, the seal, and the plastic for cracks, deep scratches, or discoloration. Give the container a good wash with warm, soapy water and rinse thoroughly. If any unpleasant odor persists, discard the container from food use and repurpose it for non-food projects instead. Avoid microwaving or bathing these containers in boiling water. High heat can degrade plastic and increase the risk of chemical migration. For authoritative guidance on safe handling, consult the official food-contact guidelines from the FDA: https://www.fda.gov/food/food-contact-materials/food-contact-materials-questions-and-answers
Once you confirm a container is safe, think of lunches. The classic reuse is meal prep. Red plastic containers are often lightweight, stackable, and seal well. Use them to portion out grains, salads, sandwiches, and snacks. For those watching portions, dedicate one container size per food group. A small tub becomes a snack cup for nuts or hummus. A medium-size box holds fruits and cut vegetables. Using separate containers reduces cross-contamination and keeps flavors distinct. Label containers with a washable marker to timetable freshness or to note allergens. For busy mornings, pack components separately. Cold proteins and sauces stay fresher in their own tubs until assembly time.
Children respond well to personalization. Turn a container into a mini lunchbox by decorating the exterior. Washable markers, stickers, and food-safe washi tape add a playful touch. Attach a small name tag or a removable label to the lid for day care and school. To increase utility, consider adding compartments. A simple option is to line a larger container with smaller disposable sauce pots or repurposed condiment cups. If you prefer a more durable, integrated solution, buy or make a lightweight divider using thin plastic or craft foam. Insert it along the interior so that different foods sit separately. This approach keeps moist items from touching dry ones and preserves textures better.
For adults, red containers make excellent prep aids. Chop and store herbs in a small tub with a paper towel to absorb moisture. Pre-portion dressings and toppings into single-serving containers for grab-and-go convenience. Use larger red tubs to hold overnight oats or layered salads. Their translucency helps you see contents at a glance. If you freeze cooked meals, choose containers rated for cold temperatures and leave headspace to allow food to expand. Thaw in the refrigerator rather than heating directly in these containers.
Shifting to gifts, the same containers offer creative packaging solutions. A clean red tub becomes a cheerful gift box with minimal effort. Line the interior with tissue paper, shredded kraft paper, or a small square of fabric to create a soft bed. Add the gift—candies, a mini pamper kit, or handcrafted treats—and close the lid. Wrap with ribbon and a handmade tag. The red color often reads as festive, especially around holidays and celebrations. If you prefer a more refined look, wrap the outside with decorative paper or fabric that complements red. Another elegant choice is to glue a narrow band of kraft paper around the middle, leaving the top and bottom red to peek through.
If transparency matters, many containers reveal their contents. This is useful for gift sets where presentation matters. Arrange small items inside so the top view looks deliberate. Use cupcake liners or small sleeves to separate different treats. For a boutique gift, pair the recycled container with other eco-friendly packaging elements. For an example of complementary packaging options, explore clear-window cake boxes and similar eco-friendly packaging to inspire your finishing touches: https://ecocupbowl.com/product/picnic-kraft-paper-cake-boxes-clear-windows-dessert-fruit-packing-eco-friendly-food-container-home-kitchen-takeaway-party-event/
Make unique gifts by mixing function with charm. A red container can be a spa kit for a friend. Fill it with a handmade soap, mini lotion, and a cloth. Drill tiny drainage holes and transform a container into a succulent planter. Plant a small, drought-tolerant species and add a decorative pebble top. These live gifts are low maintenance and delightful. For a custom coin bank, slice a neat slot in the lid and decorate the exterior with washi tape, metallic markers, or small decals. A personalized money jar makes a fun present for birthdays, weddings, or as a saving incentive for kids.
Beyond a single gift, red containers are organizational champions. Create a craft-kit present by filling multiple small tubs with beads, buttons, or sewing notions. Stack them, secure with a ribbon, and present as a single, easy-to-use kit. Because most red food containers stack nicely, they make modular storage units inside a gift box or drawer. Attach a small label to each lid to identify contents. For portable gifts, tie multiple containers together with twine, or place them in a decorated tray for a cohesive set.
When decorating, choose materials that adhere well to plastic. Acrylic craft paints bond to smooth surfaces when primed properly. Use a thin coat of plastic primer or simply rough the area lightly with fine sandpaper before painting. Permanent vinyl decals work particularly well and give a professional finish. Keep any adhesives away from food contact surfaces. If painting the lid or the interior rim where food touches, use food-safe paints or cover the painted area with a removable liner before filling with edibles.
Consider accessibility and longevity. For gifts meant to be reused, avoid gluing on heavy elements that may peel off with washing. Opt for tied-on decorations like ribbons or removable stickers. If you plan to use containers in the kitchen daily, a clear, screw-on lid or elastic band keeps contents secure. Reinforce seams with food-safe silicone if lids have lost their snugness. Replace worn or misshapen containers rather than attempting risky repairs that could trap bacteria.
Sustainability and end-of-life planning matter. Repurposing reduces single-use waste, but when a container finally reaches the end of its useful life, recycle according to local guidelines. If recycling is not possible, dispose of it responsibly. Consider composting or gifting containers to someone else for craft use. Keep a small bin for clean containers and rotate them into projects so nothing goes to waste.
Finally, embrace the playful side. The bright red hue lends itself to themed projects. Make a set of holiday boxes with gold accents for festive giving. Craft superhero lunch kits for kids. Or design a tiered picnic set using several matched containers wrapped as a bundle. The key is to pair practical use with a visual idea. Clean, safe containers become functional artifacts and memorable gifts with a little imagination. They save money, reduce waste, and invite creativity into everyday routines.
This chapter bridges utility and creativity. It shows that modest red plastic food containers can serve as reliable lunch carriers and thoughtful gift vessels. With sensible safety checks, simple modifications, and tasteful decoration, these humble items transform into useful, attractive tools. Keep the focus on cleanliness, durability, and presentation. Whether packing a weekday meal, organizing a craft kit, or surprising someone with a handmade present, a repurposed red container can be precisely what you need.
Final thoughts
Embracing the potential of red plastic food containers not only fosters creativity but also promotes sustainability within your business. By repurposing these containers into festive decor, jewelry organizers, piggy banks, and lunch boxes, you create memorable experiences for your customers while contributing to a greener planet. These craft ideas allow your brand to stand out, showcasing a commitment to innovation and environmental responsibility. Whether for events, daily operations, or special promotions, these unique creations can resonate with your audience and enhance your brand’s image.