For beverage chains, restaurants, food trucks, and catering services, maintaining a spotless and odor-free kitchen environment is crucial not just for health standards but also for customer perception. Odors lingering in plastic food containers can present a significant challenge, detracting from the quality of service and potentially influencing customers’ enjoyment of products. This article delves into four effective and scientifically validated methods for eliminating those unwanted smells. From the classic baking soda soak to the natural benefits of sunlight exposure, each chapter will offer actionable insights tailored for your food-serving business. Discover how these strategies can enhance your operations and keep your containers fresh, ensuring that your offerings remain as appealing as your brand promises.
Beyond Masking: Baking Soda’s Quiet Power in Demolishing Odors from Plastic Food Containers
Odors in plastic containers are not merely annoying reminders of past meals. They reveal how smell molecules can cling to a plastic surface long after the food is gone. Oils and fats leave a slick film; spices leave aromatic residues; and once the container cools, those molecules settle into the micro-pores of the plastic, where heat, moisture, and time can help them linger. This is why a simple rinse often fails to restore the container to its fresh, neutral state. The good news is that baking soda provides more than a temporary fragrance; it acts as a chemical agent that can neutralize odor-causing molecules at their source. When you combine baking soda with warm water and a touch of dish soap, you’re not just washing away surface grime. You are facilitating a reaction that helps break down and neutralize the molecules responsible for stubborn smells, particularly those linked to oil and grease. In effect, baking soda works with the physics and chemistry of the container’s material to reduce odor buildup at a molecular level, which is why it remains one of the most effective methods for restoring the scent of plastic storage. This approach aligns with what researchers and cleaning science have repeatedly shown: deodorizing is more about molecular intervention than masking odors with a fragrance of citrus or perfume.
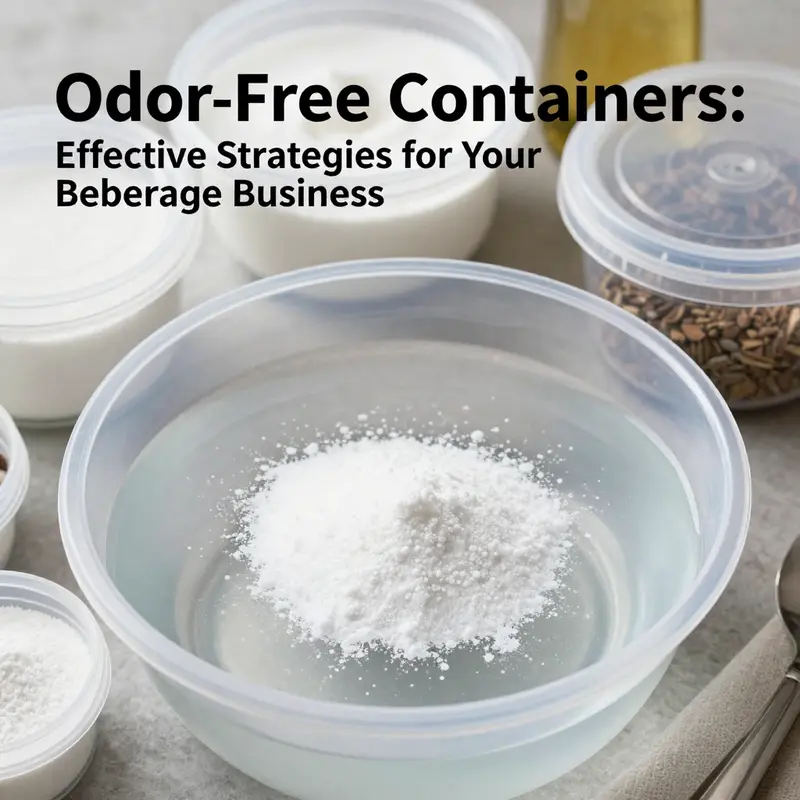
The practical essence of the baking soda method is straightforward, yet its effectiveness comes from thoughtfully combining several elements: the chemical properties of baking soda, the mechanical action of washing, and the comforting stability of warm water. First, you prepare a cleaning bath by dissolving 1 to 2 tablespoons of baking soda in warm water and adding a dash of dish soap. The warm water acts as a mobilizer, helping grease loosen from the plastic’s micro-texture. The dish soap introduces surfactants that emulsify fats, allowing them to break free from the interior’s nooks and crannies. This trio—baking soda, warm water, and dish soap—forms a cleansing environment wide enough to address both the oily residues and the more stubborn, non-oily odorants that often haunt containers after storage. In practice, this means submerging the container so that the interior surfaces, the lid, and any creases where seals meet are covered by the solution. Submersion ensures that every potential reservoir of odor is treated rather than just the exposed surface.
The recommended soak time—at least several hours, or ideally overnight (up to about 12 hours)—is not arbitrary. It gives the baking soda enough time to interact with odor molecules trapped in microscopic crevices. During this period, the alkaline nature of baking soda participates in neutralizing acidic odor compounds and, to some extent, disrupting the chemical structures that hold onto greasy residues. The interaction is gradual but cumulative: the longer the container sits in the bath, the more opportunity there is for trapped molecules to be loosened, dissolved, or neutralized. For oil and grease odors in particular, this extended contact is crucial. If a container smells strongly of fish or curry, the sustained exposure helps ensure that the most tenacious oils and sulfurous or spice-derived components are addressed rather than merely pressed back into the plastic for later re-emergence.
After the soak, thorough rinsing is essential. Baking soda residues left behind can themselves become an odor source if left to dry in the container. A clean, running rinse ensures that no abrasive grit remains and that any residual alkaline solution is removed from seals and threads where odors might otherwise linger. A final wipe with a clean cloth can help dry the interior surfaces while removing any film that the rinse may leave behind. It is during this step that many people discover that their initial rinse did not remove all the compound residues; a second rinse with fresh water is often all it takes to complete the deodorizing cycle. Drying is the closing act of the process. A completely dry container is less hospitable to odor molecules seeking a new home in hidden corners. Air drying in a well-ventilated space is ideal, and if storage happens soon afterward, keeping the lid off for a brief period to ensure any remaining moisture evaporates is a prudent move.
The science backing this method is consistent with the broader understanding of how baking soda interacts with odor molecules. Sodium bicarbonate, when dissolved, creates a mildly alkaline solution capable of neutralizing both acidic and basic volatile compounds. Odor molecules are often organic compounds that can either lose or gain a proton depending on environmental conditions; the baking soda solution stabilizes these conditions enough to reduce the volatility and persistence of default odors. Importantly, this is not about perfuming the container. It is about chemically altering the odor molecules so they no longer cling to the plastic surface with the same tenacity. Moreover, by combining baking soda with dish soap, you introduce surfactants that disrupt the adhesive forces between the odor molecules and the plastic. This dual-action approach—chemical neutralization plus physical lifting—addresses odors at multiple points in the odor cascade, reducing the chance that smells will reappear after a day or two.
Consistency matters. The effect is cumulative; repeated, gentle treatments are often more effective than one intense, short soak. If the first attempt yields only a partial improvement, a second soak using the same method can drive the transformation home. It is not uncommon for a stubborn container to respond to a second, slightly longer soak or to a follow-up rinse with a fresh batch of baking soda solution. For especially persistent odors, some home cleaners find it helpful to extend the soak by an additional hour or two or to repeat the process after a day or two, ensuring that previously loosened molecules have enough time to diffuse away from the plastic before the container is reused. The goal is not to erode or over-treat the plastic; it is to furnish the interior with enough contact time to release and neutralize odors without compromising the container’s integrity.
A practical note on materials and aging helps temper expectations. If a container is old, scratched, or manufactured from plastics with lower quality grade, odors can be more stubborn. In these cases, even a thorough baking soda soak might yield diminishing returns. When that happens, it may be time to consider replacement rather than repeated aggressive deodorizing. The decision to replace is not a failure of technique but a recognition of material limits. The science remains clear: baking soda is effective because it acts at the molecular level to neutralize odorants and lift residues when given time and the right cleaning environment. When used properly, it offers a robust, low-cost, low-toxicity solution that aligns with the best practices recommended by odor-control science.
As you apply this method, keep your broader storage habits in mind. After washing and drying, store containers with the lid ajar or loosely closed for a period, especially if you will not use them for a while. This small step helps prevent the re-accumulation of musty or stale air while the container’s interior remains completely dry. If you find that odors persist despite multiple baking soda treatments, you can call upon supplementary approaches that complement the baking soda’s action. A light white vinegar wash can help dissolve oily residues not fully removed by the baking soda bath, while sunlight exposure can provide a natural deodorizing boost by breaking down volatile compounds in the exterior light. Tea or coffee grounds placed in a sachet within a dry container can further absorb lingering odors, and a lemon juice treatment can contribute both degreasing power and a fresh scent. The key is to view these methods as a toolkit rather than isolated miracles; each seems to work best when used in a thoughtful sequence that respects the container’s material and the nature of the odor.
In closing, baking soda stands out because its efficacy is grounded in chemistry and practical cleaning science. It neutralizes, lifts, and eliminates odor molecules rather than simply masking them with fragrance. The recommended 1–2 tablespoons of baking soda in warm water, paired with a splash of dish soap and a careful, multi-hour soak, creates a powerful cleaning bath that penetrates the interior’s micro-pores and helps restore the container’s neutral, clean scent. When combined with thorough rinsing and complete drying, this approach minimizes the likelihood of odor rebound and reduces the need for repeated masking methods or harsh chemicals. It is a patient, reliable method that respects the integrity of your plastic containers while delivering tangible odor reduction for everyday food storage. For a broader understanding of how baking soda works at the chemical level and why it remains a staple in odor management, see an external resource that explains the science behind this common kitchen compound.
External resource: https://www.britannica.com/science/baking-soda
White Vinegar: A Gentle, Scientific Path to Odor-Free Plastic Food Containers
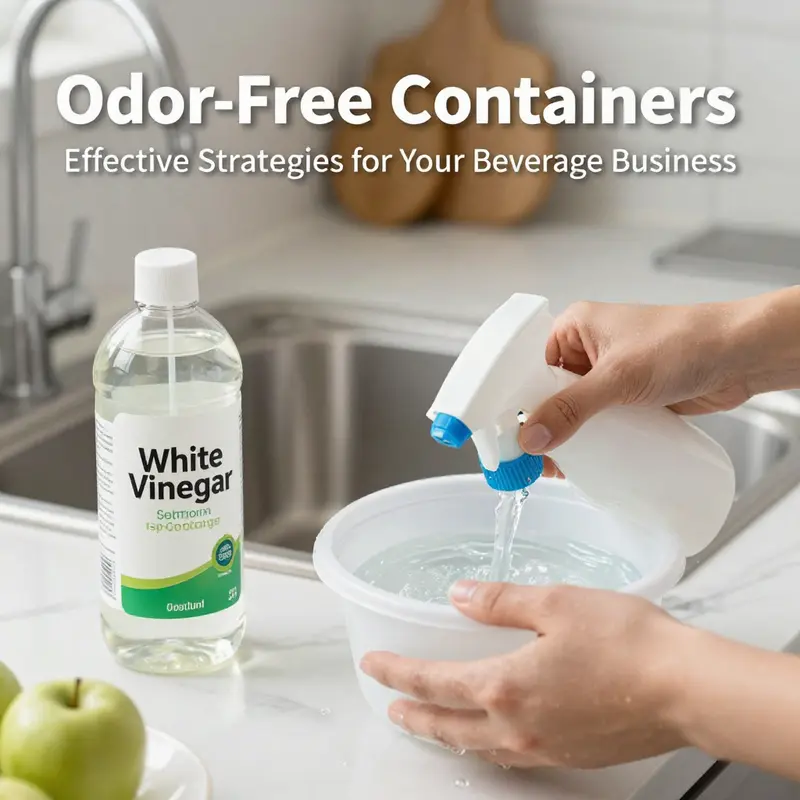
Odor control in plastic containers often hinges on what you can’t immediately see as much as what you can. Tiny pores in the plastic, little crevices around the seal, and lingering oil residues can harbor volatile molecules long after the food disappears. White vinegar, a staple in many kitchens, offers a practical, science-based approach to breaking down those stubborn odors without resorting to harsh chemicals or expensive treatments. Its acetic acid acts as a natural solvent and neutralizer, working with the very structure of common plastics like polypropylene and polyethylene to dissolve and flush away the compounds that make containers smell like old meals, fish, curry, or garlic. The result is not just a quick breath of freshness but a more thorough cleansing that reduces the odds odors will rebound with the next storage session. And because vinegar is inexpensive and readily available, it becomes a first line of defense for most everyday odor challenges, especially when you’re dealing with persistent but not perilous smells that linger after a standard wash.
The chemistry behind this approach is elegantly simple. Odor molecules produced by oily foods tend to cling to surfaces and into tiny pores. Acetic acid disrupts the lipid-based residues by slightly altering their surface properties, making the molecules easier to rinse away. In plastics, where micro-voids can trap microscopic droplets of oil or protein, the acetic acid helps emulsify and lift those residues, reducing the chance that the odor reformulates as soon as you close the lid. The benefit isn’t limited to fishy or oniony aromas; even more neutral odors, often described as a generic “plastic” smell, can be softened when the odor molecules are loosened from their hiding spots and carried away by a thorough rinse.
One reason white vinegar is so popular is its flexibility. You can tailor the strength to the odor you’re facing, and you can adjust based on the container you’re treating. For lighter, everyday smells, a diluted solution provides all the necessary deodorizing power without stripping away any color or gloss finish on your container. For tougher odors—think curry, fried foods, or strong oils—you can step up to a more robust treatment. This adaptability is valuable because plastic isn’t a single, uniform material; it comes in different resins and shades, each with slightly different interactions with acids. In general, the PVC, PP, and PE families respond well to vinegar because their surfaces tend to be a bit more forgiving than some high-scratch or heat-sensitive plastics. Still, a precaution remains essential: avoid testing vinegar on colored plastics if you’re unsure how the pigment will react. A quick, inconspicuous wipe with a diluted vinegar solution on a small, hidden corner can spare you a larger fading issue later.
To begin, you’ll want a straightforward, repeatable process that you can trust. Prepare a solution that is safe yet effective: a ratio of white vinegar to water at 1:3 works well for most odors. This keeps the acidity at a level that cleans without being overly aggressive. If the odor is unusually strong or the container has absorbed odors over a long period, undiluted vinegar is acceptable for a targeted treatment, but you should use it with care. Because you’re dealing with a reusable household item, you want to prevent any vinegar taste from lingering in the container. The goal is to neutralize and remove—not to impart a new scent.
Once your solution is ready, you have two practical paths: soak the container or wipe down its interior, and which you choose depends on the odor’s depth and your time constraints. For most typical aromas, pouring the solution into the container and letting it sit for a couple of hours often does the trick. For more stubborn odors, an overnight soak gives the acetic acid a longer window to loosen residues, especially in hard-to-reach corners around the lid and seal. If you’re dealing with a particularly tight seam around the lid or a gasket that traps odors, a cotton swab dipped in vinegar can be used to reach those crevices. The swab method is labor-efficient and reduces the risk of over-wetting the outer shell while still delivering a thorough, surface-level cleansing. The key is to coat all surfaces evenly so that the odor molecules encounter the solvent everywhere they might have lodged themselves.
After soaking, the rinse is the stage where patience pays off. Rinse the container multiple times with clean water, spinning it to flush every corner. A second, thorough rinse helps remove any lingering acetic residue, ensuring that you don’t transfer a vinegar scent into your next meal. If your kitchen has a dedicated rinse basin or running water that’s easy to control, you can set up a quick ritual: rinse, inspect, rinse again. A final air-dry session is essential. Drying is not just about removing surface moisture; it’s about letting residual vapors dissipate in a well-ventilated space. If you’re working in bright daylight, a few hours outdoors can leverage the sun’s heat to accelerate evaporation and help break down any lingering organic traces further. However, beware of extended direct sun on delicate plastics. Prolonged exposure can cause warping or fading in some containers, particularly those made from more heat-sensitive polymers.
For particularly persistent odors, the narrative does not end with a single vinegar treatment. You can implement a complementary sequence of deodorizing steps without having to discard the container. One practical strategy is to follow the vinegar soak with a baking soda treatment. Baking soda excels at neutralizing acidic and basic odor compounds, and when used in a separate step—dissolved in warm water and used to rinse or soak—can address any residual odors that vinegar alone didn’t fully eliminate. The two-step approach leverages complementary chemical properties: vinegar disrupts and neutralizes, while baking soda adsorbs and buffers, reducing the chance of odors returning once you seal the container again. It is important, however, to avoid mixing the two directly inside a sealed container. The fizzing reaction between acetic acid and baking soda can be vigorous and may pressurize a tightly capped bottle or create a messy spurt when opened. Using one method after the other, with a thorough rinse in between, delivers the most reliable results.
You might also consider a citrus note to cycle back into your routine after a vinegar treatment. Lemon juice can be used as a post-wash rinse or as a light wipe to add a fresh scent and perform a light degreasing action. The lemon introduces citric acid and essential oils that help dissolve residual fats and mask any faint vinegar tang. While lemon is a pleasant addition, it’s not a substitute for the vinegar’s odor-lifting power. Each component complements the others, and when used in measured steps, they broaden your deodorizing toolkit without turning your kitchen into a chemistry lab.
A caveat worth noting concerns storage and age. If you’ve noticed that even after multiple deodorizing sessions an odor persists despite clean surfaces, it may indicate deeper wear in the container or seal integrity. Scratches and micro-abrasions can harbor residues that resurface when you close the lid. In such cases, replacing the container becomes a practical choice. Old, scratched, or low-quality plastics can accumulate odors in places that are physically difficult to reach, and no amount of rinsing will fully reclaim those micro-environments. If you reach that point, consider upgrading to a container with a more resilient surface or different polymer, while continuing to apply the vinegar method to any new acquisitions to extend their odor-free life.
In telling this story, the practical thread often centers on how to integrate the vinegar method into a broader habit of odor management. The method doesn’t exist in a vacuum; it thrives as part of a routine that emphasizes thorough cleaning, careful drying, and mindful storage. A container stored while damp is a recipe for renewed odors as quickly as overnight oils can begin to break down anew. The goal is to build a simple, repeatable ritual: rinse with clean water, treat with a vinegar solution, rinse again, dry completely, and store in a dry, ventilated space. If you follow this sequence, you’ll find that odors recede, and the containers feel fresher for longer intervals between uses. The rhythm is easy to learn and scalable—from small snack cups to larger lunch boxes—without requiring specialized equipment or exotic ingredients.
If you’re curious about other eco-conscious storage options that complement a odor-management routine, you can explore additional items in our product catalog. For a concrete example of how our range can align with practical home care, take a closer look at the aluminum-based offerings that emphasize durability and reuse in everyday storage. The product page features practical design elements that echo the same spirit of simplicity and longevity that makes vinegar-based deodorizing so appealing. This is not about replacing plastic storage but about expanding your toolkit so you can select the right container for the right job while maintaining odor control as a routine practice. You can explore more about this option here: aluminum-plant.
A final note ties this discussion back to the broader body of knowledge on odor removal. White vinegar is not a miracle solvent that erases every scent in every circumstance. It shines when used thoughtfully, with attention to the material, the odor’s depth, and the potential interactions with other cleaning steps. For the most authoritative, science-informed context that supports the approach described here, refer to expert guidance that consolidates practical steps with the chemistry behind them. This alignment with established guidance helps ensure you’re applying a method that has both empirical support and real-world practicality. If you’d like to see a more formal treatment of odor-elimination strategies that corroborates the vinegar-based approach, you can consult comprehensive resources such as The Spruce Eats, which offers a detailed guide on eliminating plastic container odors and provides step-by-step instructions that mirror the intentions outlined in this chapter: The Spruce Eats guide.
The process I’ve described here emphasizes a balance between accessibility and effectiveness. Vinegar is cheap, non-toxic, and familiar to most households, making it an approachable first choice. It also dovetails nicely with other practical strategies you might already practice, such as thorough rinsing and adequate drying, and it can be integrated into a broader habit of sustainable storage. In many kitchens, this approach replaces fast fixes with a more enduring solution that reduces the need for repeated replacements or aggressive chemical cleaners. The emphasis remains on cleaning in a way that respects the container’s materials, preserves its function, and keeps your food storage as neutral as possible in scent and taste. As you try these steps, you’ll likely notice the difference in the feel and smell of your plastic containers, even before you reach the final rinse. The odor won’t vanish in a flash, but with patience and consistency, vinegar becomes a reliable ally in the ongoing effort to keep plastic food storage fresh and inviting.
Sunlit Odor Erasure: A Gentle Daylight Approach to Freshen Plastic Food Containers
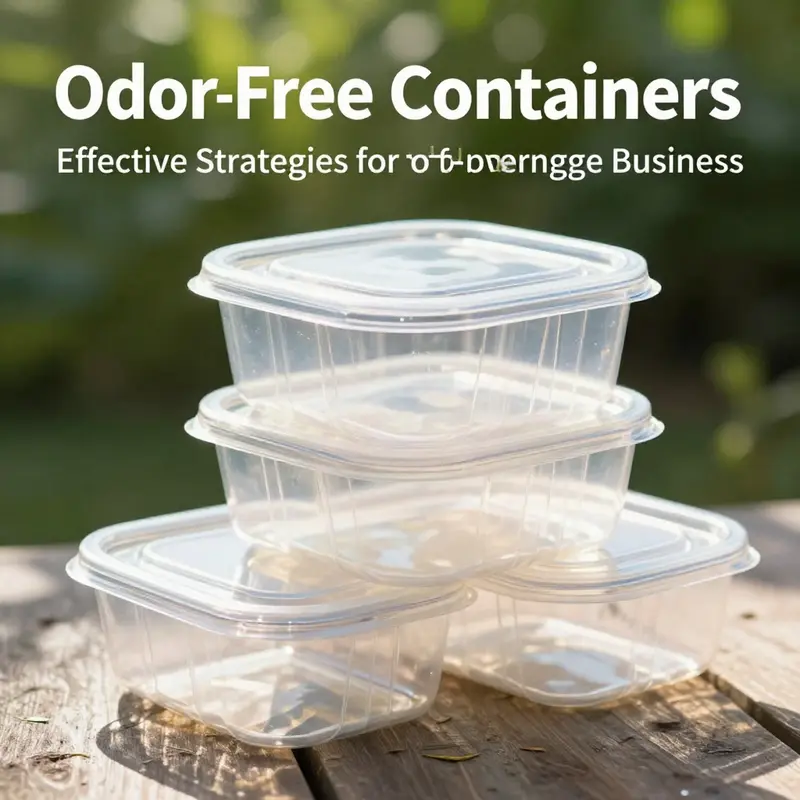
Sunlight has long been a quiet, natural ally in households seeking a chemical-free path to cleanliness. When we talk about odors inside plastic food containers, daylight offers more than a warm glow; it presses a slow, steady reset button on the scent molecules that cling to the walls and seams. This chapter travels through how to use sun exposure as part of a broader odor-elimination routine, why it works, and how to do it safely so your containers stay intact and ready for another round of use. The core idea is simple: heat and light can help volatilize and break down odor compounds, giving you a container that smells closer to neutral rather than like yesterday’s leftovers. Yet like all natural methods, sun exposure benefits from restraint and context. It is most effective as part of a thoughtfully layered approach that respects the material you’re dealing with and the particular odor you want to vanish. In other words, sun exposure should be one part of a small toolkit rather than a lone silver bullet. When used correctly, it can lift stubborn aromas—especially new containers carrying industrial solvent notes or recent purchase scents—without introducing new residues into your kitchen routine.
At its core, the science behind sunlight’s deodorizing effect rests on a combination of photolysis and thermal dynamics. Ultraviolet rays in sunlight have the ability to break down certain organic compounds, including some odor-causing molecules that cling to plastics after use. Simultaneously, the heat from the sun nudges volatile molecules toward the surface where they can escape more readily when the container is opened or wiped down. This is why you may notice a discernible lightening of smells after a period of outdoor exposure, even if you do not add any soap or solvent. It is not magic, nor a miracle cure, but a natural nudge that favors evaporation and molecular breakdown over time. The practical upshot is that a container that smells faintly of yesterday’s curry or a whiff of the plastic itself can be refreshed by a controlled sun session, especially when paired with a complementary, odor-absorbing step.
Yet every plastic is not created equal, and the cautions matter. The most common culprits—polypropylene (PP) and polyethylene (PE)—can warp, dry, or become brittle with prolonged sun exposure. The consequences may be subtle at first—a slight warping along the lip, a vivid change in color if the plastic is dyed, or a texture that feels rough to the touch. The research emphasizes a prudent approach: do not leave containers in direct, midday sun for hours on end. Instead, opt for a shorter, gentler exposure during cooler parts of the day, such as morning or late afternoon, and keep sessions modest. A bright but temperate sun can still do a lot of work without pushing the plastic past its comfort zone. A practical guideline is to place the container upside down or open to air on a shaded surface that receives dappled light. This setup allows UV strands to operate at a distance without the risk of full-on exposure that can warp or dry out the plastic’s interior. And after the sun has done its part, ensure the container is fully dry before placing it back into storage. Moisture left behind is an open invitation to mildew and musty odors that can reappear even after a successful deodorizing session.
The real power of sun exposure emerges when it is integrated with a broader, science-grounded odor-management plan. Consider beginning with a gentle pre-treatment that prepares the surface and creates a cleaner slate for the light to work on. A light rinse with warm water can dislodge loose residues, and a quick wipe with a clean cloth ensures the interior vents and corners are accessible to the rays. From there, a carefully timed sun session can follow, with a monitor of how the odor responds. In some cases, a brief 30-minute sun exposure may produce a noticeable shift for mild odors, while more stubborn fragrances may require a longer, but still controlled, session. The key is to avoid pushing the plastic to its limits while still granting the sun enough opportunity to do its work. If the odor remains stubborn after a single exposure, you can reintroduce a complementary step: a mild soaking with a gentle, food-safe solution and a subsequent sun treatment. For example, a light soak in a baking soda solution can adsorb residual oils and acidic odor molecules, followed by a sun-pass to help volatilize them further. The sequence is important; the combined effect often outperforms any single method on its own.
In practice, the sun-based method is often used as a finishing touch after a more thorough cleansing. A practical routine would begin with a rinse and a wipe-down to remove the obvious food residues. Then, if the container is new or carries a strong solvent-type scent, set it out under indirect sun exposure for a compact window—say 6 to 8 hours in total over a day, broken into shorter intervals if necessary. The objective is to expose the interior to light and a gentle amount of warmth while preventing any cracking or warping. It helps to place the container on a tray or a rack so the sun’s rays reach all surfaces, including the densely grooved edges where odors like to linger. After the sun session, ensure the interior is thoroughly dry. If you don’t see a marked difference, repeat the steps, but always with caution and minimal exposure time. Repeating the process in this measured way often yields cumulative benefits without stressing the plastic.
Of course, sunlight alone may not be sufficient for all odors. Persistent smells—especially those that have embedded themselves into plastic fibers or are tied to lingering cooking oils—often require a multi-pronged approach. This is where combining sun exposure with other natural methods shines. A short soak in warm water mixed with a pale amount of baking soda, for instance, can help neutralize acidic odor molecules and remove residue oils that sunlight alone might not fully address. After the soak, a definite air-out with sunlight can come into play, followed by a final rinse and a thorough dry. This layered approach is not about layering chemicals but about leveraging the strengths of each method at the right moment in the cleaning cycle. The result is a container that not only smells cleaner but also feels more like a fresh starting point for your next meal.
A well-rounded sun-based routine also invites mindful material care. If you’re using containers known to be more sensitive to heat, or if you own several older pieces that show early signs of wear, it’s wise to limit sun exposure and focus on adopting more preventive habits. Proper drying is non-negotiable; residual moisture invites mold in the crevices, and mold odors can reassert themselves even after the container has been through a sun session. You might also consider alternating between light sun exposure and cooler air-drying on days when outdoor conditions are unpredictable. In climates where the sun is intense for most of the year, you can simulate a gentler version of sunlight indoors by placing the container in a bright room with a warm lamp nearby, though the effectiveness of artificial light is not the same as natural UV rays and should be used sparingly as a supplement rather than a replacement.
As you weave sun exposure into your odor-removal routine, you may begin to notice that the method’s strengths lie in its simplicity and its alignment with a low-waste kitchen. There are no harsh chemicals to rinse away, and the process can be completed with tools already in your home. Yet the approach does require patience and respect for the material. Plastic is an excellent medium for storing food precisely because it is durable and lightweight, but it can also trap scents deeply in its microstructures. Sunlight gives you a chance to nudge those scents out without scrubbing harshly or introducing fragrance layers that mix with the original odors. Think of it as a delicate, daylight-driven reset that preserves the container’s integrity while letting your kitchen reclaim its fresh, neutral air.
If you’re curious about the practical impact of sun exposure on different plastics, it’s worth noting the nuanced guidance from reputable sources. The consensus emphasizes that sun exposure can be effective, particularly for new containers carrying industrial or solvent-like smells, but it must be moderated to avoid material degradation. The guidance also underscores that combining sun exposure with other natural methods yields the most comprehensive results. This is not about choosing one method over another; it’s about understanding how light, heat, and adsorption work together to reduce odors in a way that remains gentle on the container. The overall takeaway is clear: sun exposure is a valuable tool in the odor-elimination toolkit when used prudently and in harmony with complementary steps.
To bring a personal, practical tone to this approach, imagine a Sunday afternoon ritual that turns a routine cleaning task into a small act of care for your kitchen environment. You wash the container, wipe its interior clean, and place it on a sunlit balcony or windowsill during the cooler hours of the day. You watch the shadows shift as the sun’s angle changes, and you note the day’s changing odor dynamics as faint wisps of odor molecules begin to loosen their grip. Later, you return to wipe out any remaining residues, rinse again, and dry the container completely before stowing it away. The ritual pays off in a container that not only smells more neutral but also feels more trustworthy for the next portion of food storage. It’s a simple practice that aligns with a broader ethos of using natural, sustainable methods in everyday life.
For readers seeking a visual cue about how natural deodorizing methods can be integrated into a broader strategy, consider one of the links to a product concept that embodies the idea of eco-friendly materials and thoughtful design. Green Soil Lotus product. This reference is provided as a helpful way to illustrate how containers designed with sustainable materials can pair well with gentle, daylight-based maintenance. While the specifics of product design fall outside this chapter’s focus, the underlying principle remains useful: when you start with a container that is well-made and properly cared for, simple natural processes like sun exposure can be more effective and consistent over time. You can explore related material design concepts and the broader category of containers that prioritize quality and longevity at the linked page. The goal is to cultivate a kitchen routine that respects both your food and the tools you rely on every day.
In light of the evidence and practical experience, the sun-exposure method stands as a robust, low-cost, and accessible option for many households. It resonates with a growing preference for natural, non-chemical approaches to everyday problems. Yet it also demands a careful balance: too much sun, too much heat, or exposure on materials prone to damage can negate the benefits. When used thoughtfully, sun exposure can be a credible, gentle method to help refresh plastic containers between uses, especially when odors are stubborn but not overpowering. It is not intended to replace all other steps—soaking, rinsing, drying, and, when necessary, a light lemon or vinegar wipe can all play a role—but it does provide a natural, hands-on option that taps into the environment around you.
In closing, the sun’s role in deodorizing plastic containers is a reminder that sometimes the simplest tools in our environment can offer the most effective solutions. The approach respects the material and the molecules at stake, guiding you toward cleaner storage without adding unwanted chemical residues to your food. By embracing a measured light-and-warmth routine, integrated with careful drying and, when needed, a gentle absorption step, you unlock a pathway to fresher containers that feel as good as new. And as you lend sun-drawn calm to your kitchen, you also participate in a broader conversation about sustainable, low-impact cleaning practices—ones that honor both science and everyday practicality. External research supports this approach as part of a balanced odor-management strategy, and ongoing exploration continues to refine the exact parameters for different plastics and odor profiles. For readers who want to see a broader exploration of natural odor removal, a reputable external reference provides additional context and guidance.
External reference: https://www.verywellmind.com/odor-removal-plastic-containers-4783265
Grounds for Odor Victory: Using Tea and Coffee to Refresh Plastic Food Containers
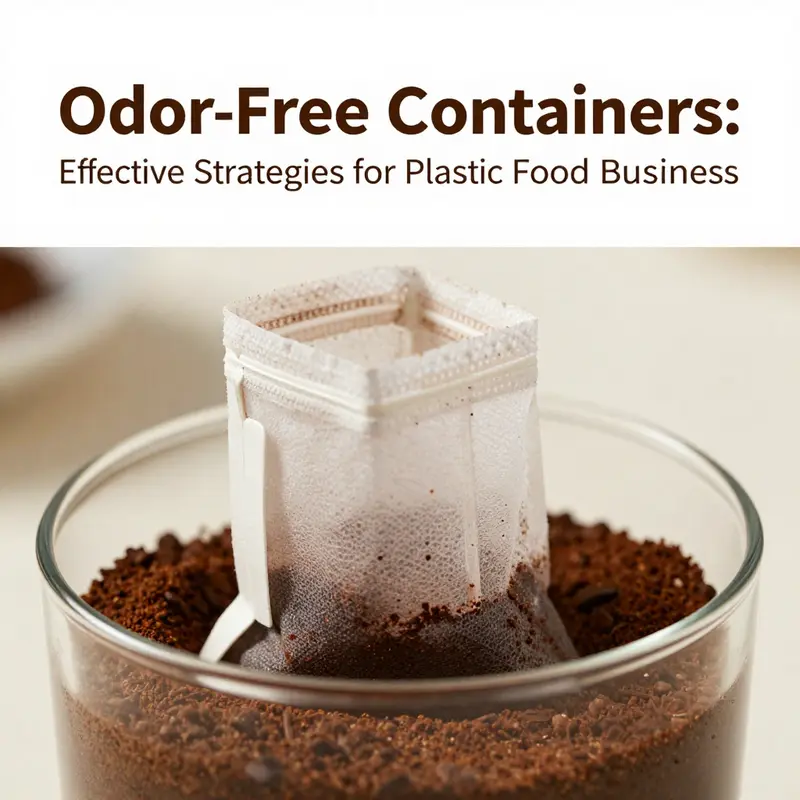
Odors that cling to plastic containers often feel stubborn, almost stubborn enough to outlast everyday washing. The reason is practical and scientific: plastic surfaces are never perfectly smooth at the microscopic level. Tiny pores and irregularities trap volatile molecules from what you stored inside—tea, coffee, garlic, fish, or curry. Those molecules can remain long after the food is gone, yielding a scent that seems to migrate from lid to lip and back again with every breath. In this context, the realm of kitchen odors invites a simple, time-honored trick that avoids strong chemicals and respects the integrity of the container itself. Tea leaves and coffee grounds, dry and unglazed, offer a natural, low-risk way to draw odor molecules out of plastic through a mechanism scientists call adsorption. In adsorption, the odor molecules attach to the surface of the porous material rather than passing into the material itself. The grounds act like tiny sponges for smells without soaking into the plastic, which helps preserve the container’s original texture and strength. The result is a fresher interior with less of the prior stench carrying over into your next lunch. This is not a miracle fix for every odor, but for many milder to moderate cases, it delivers a noticeable improvement with minimal fuss and no harsh cleaners.
The practical setup is deceptively simple. You begin with a clean, dry container. Any soap residue or water left behind can compete with the grounds for adsorption sites, reducing the efficacy of the treatment. Dryness matters because moisture tends to clump grounds together and creates a different interaction with the plastic surface. Once the container is ready, you place either dry tea leaves or used coffee grounds inside. A breathable approach—whether you seal the container with the grounds inside a loosely closed lid or opt for a small, breathable sachet nestled in the cup-shaped interior—ensures the odor molecules encounter as much surface area as possible. The exact arrangement matters less than two core ideas: allow enough contact time for adsorption to occur, and keep the grounds contained so they can be easily removed later.
Timing is another crucial piece. You’ll often find guidance that suggests a window of several hours to overnight. Ten to twelve hours is a good baseline for routine odors from tea and coffee; if the smell is mild, eight hours may suffice. For more persistent scents, extending the treatment to 24 hours can yield incremental gains. The process is forgiving, but patience matters. Overnight treatment gives the grounds time to interact with a broader swath of surface area, especially on containers where the interior corners and rims are more porous. When you peel back the lid and check the ground–container interaction, you should notice a faint, earthy aroma from the grounds themselves. That aroma is not the odor you’re trying to remove, but a sign that adsorption is at work, drawing molecules from the plastic toward the grounds.
After the allotted time, you discard the grounds and rinse the container thoroughly with warm water and a mild dish soap. Rinsing is essential not just to remove residual particles but also to break any loved or lingering odor compounds that might have clung to the grounds themselves. A good rinse helps prevent a secondary, ground-born scent from replacing the one you aimed to remove. The next step is to dry the container completely. Odor molecules cling less tenaciously when surfaces are dry, and a dry interior reduces the risk of new odors forming while the container awaits its next use. A towel dry followed by air drying for a few minutes is usually enough. This drying phase is as important as the adsorption phase because it ensures the container is ready for storage without inviting moisture-related smells back into play.
It is worth clarifying where this method shines best. The grounds approach excels with mild to moderate odors—think the faint aftertaste of a strong tea, lingering notes from a cup of coffee, or a days-old odor from stored herbs. It is less dramatic when confronted with more pungent, oily, or fishy smells, especially if the oil residues have penetrated deeper into the plastic matrix. In those cases, pairing adsorption with a follow-up rinse or a different tactic—such as a baking soda soak for oils, a vinegar wash for robust odors, or a brief sunlight exposure—can yield better results. The beauty of this approach lies in its gentle profile. It avoids abrasive scrubbing, which can scratch or wear down the plastic, and it avoids chemical cleaners that might leave their own residues or reactions with the container’s seal.
An additional virtue of the grounds method is its safety profile. Tea and coffee are non-toxic and widely available, making this a practical option for households with children or for containers that regularly hold meals. Because the process does not introduce harsh solvents, it aligns well with a cautious cleaning philosophy that prioritizes long-term container integrity. Nor does it require the purchase of specialized products or the use of strong acids or bases that could, over repeated use, alter the plastic’s surface or cheapen the plastic’s effectiveness as a storage medium. The grounds, when used properly, contribute a neutral, mildly aromatic backdrop rather than a strong perfume that might clash with your next meal. This subtlety can be especially welcome when you want a clean interior without masking the actual food aromas you’ll soon store inside.
Of course, the approach is not a miracle cure, and it works best when integrated into a broader odor-control mindset. If a container has a long history of use with powerful or oily foods, or if it has visible scratches that harbor lingering scents, you may need to repeat the adsorption process or combine it with another method. A sequence that some cooks find effective is to start with tea or coffee grounds for a quick refresh, then move to a brief lemon wash to cut grease and lift any residual oils, and finally finish with a baking soda soak if the scent remains stubborn. By layering methods, you leverage the strengths of each approach while minimizing any potential downsides of relying on a single technique. The goal is to preserve the container’s health while quietly lifting away odors, leaving you with a practical, pleasant storage solution rather than a battle against stubborn aromas.
There are practical tips to help this method perform at its best. Ensure the grounds are thoroughly dry before placing them inside the container. Freshly dried tea leaves or properly spent coffee grounds offer more surface area for adsorption than damp or clumped material. If you choose a sachet, use a breathable fabric or paper bag that can hold the grounds while still exposing their surface. If you prefer to place the grounds loose, be mindful of cleanup; you may need a small brush or a quick rinse to remove any stray particles from corners or crevices after the treatment. Conversely, if you use a small, reusable porous pouch, you can reuse the grounds for subsequent odor treatments, provided they remain dry and the scent is not overpowering. In practice, many people find that one or two cycles are enough to restore freshness for moderately used containers, while others with more persistent odors may benefit from repeating the process every few weeks or after particularly aromatic meals.
The broader literature on odor elimination in plastics suggests that this method complements other non-chemical strategies rather than replaces them. You might, for example, begin with a rinse and sun exposure for new containers that carry industrial solvent smells, then move to adsorption with tea or coffee grounds for residual odors, and finally consider a lemon or vinegar routine if needed. The key is to read the odor you’re dealing with and choose a sequence that minimizes risk to the plastic while maximizing your chance of a clean interior. In the long run, adopting such a layered approach helps extend the life of your containers and keeps them feeling like new storage options rather than sources of ongoing scent issues.
If after diligent application and occasional repetition an odor persists, it may be time to reassess the container itself. Repeated odor retention can indicate a material that has degraded, become scratched, or absorbed odors too deeply to escape through surface adsorption alone. In these cases, replacing the container—not with a fancy new model but with a sturdier, higher-quality plastic that resists odor absorption—may be the most practical option. And while replacement is not the first suggestion, it remains a reasonable conclusion when all reasonable cleaning attempts have failed and the smell continues to impact the container’s usefulness. The aim is to maintain confidence in your storage system, not to accept a lingering odor that serves as a constant reminder of past meals. When used judiciously, tea and coffee grounds offer a reliable, natural step in a broader odor-elimination toolkit, one that respects both your kitchen routine and the materials in your cabinets.
For readers who want a concise takeaway: use dry tea leaves or used coffee grounds inside a clean, dry container. Seal the container to create a closed environment, and leave it for 12–24 hours, depending on the odor intensity. Afterward, discard the grounds, rinse with warm water and mild soap, and dry thoroughly before returning to storage. If the smell lingers, repeat the process once or pair it with a complementary method that addresses grease or more potent odors. This approach offers a balanced, accessible pathway to fresher plastic containers without resorting to harsher cleaners or compromising the container’s integrity. It also aligns with a broader philosophy of gentle, practical housekeeping where simple materials from the pantry can deliver meaningful results. In many kitchens, this method proves to be the quiet workhorse of odor management, quietly doing its job while you move on to other tasks.
External reference: For a practical, science-backed overview of the coffee-ground approach, see Real Simple’s guide on removing smells from plastic containers using coffee grounds: Real Simple coffee grounds method
Final thoughts
By employing these effective methods, your beverage shop or food service can ensure that all containers remain clean, odor-free, and ready to deliver the freshest experience to customers. Whether through the powerful deodorizing capacity of baking soda, the natural acidity of vinegar, the sanitizing power of sunlight, or the absorption abilities of tea and coffee grounds, each method presents valuable techniques tailored to your operational needs. Implementing these strategies not only enhances the dining experience but also reinforces your commitment to quality and hygiene. Remember, a fresh-smelling container can elevate the perception of your brand immensely. Keeping your items odorless serves as a foundation for exceptional customer satisfaction and repeat business.