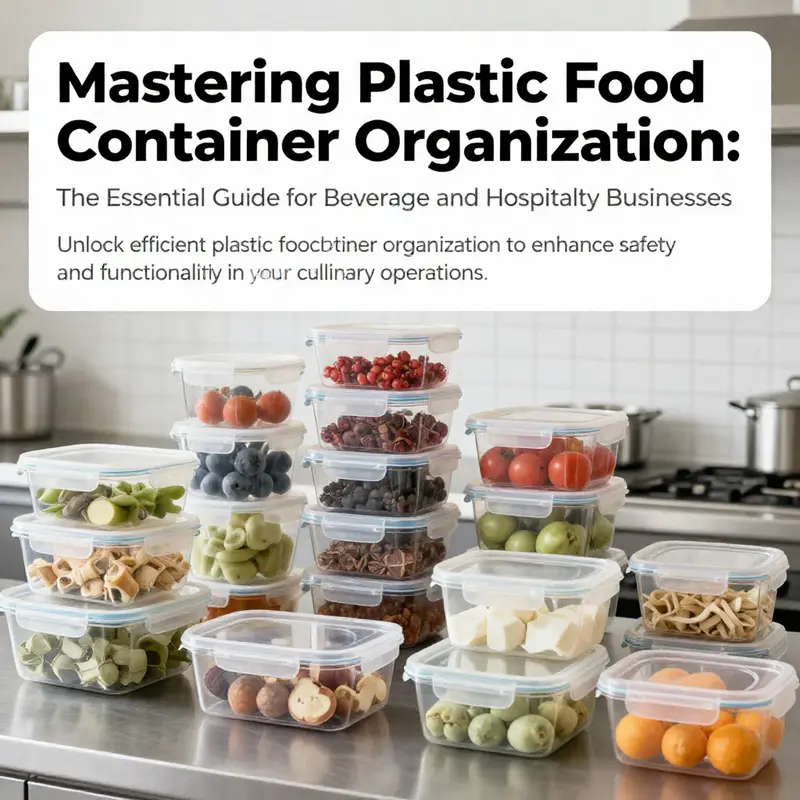
Efficient organization of plastic food containers can significantly enhance the operational flow in bubble tea shops, restaurants, food trucks, and catering services. Cluttered storage can lead to confusion, wasted time, and ultimately, diminished productivity. Understanding how to sort your containers, ensuring safety by decoding plastic types, and implementing innovative storage solutions can create a streamlined, user-friendly system. This guide will delve into effective sorting strategies, safety considerations for plastics, and cutting-edge storage methods, providing you with practical insights that cater to your culinary business needs.
Size Sorted, Function Fueled: Mastering Plastic Container Organization for a Lean, Safe Kitchen
The urge to declutter a kitchen often starts with a single question: how can I make the stuff in this cabinet work harder for me without taking over the room? The answer lies in a deliberate, two-part approach that begins with sorting by size and then layers in a thoughtful classification by use. When you treat size as the foundation and function as the framework, you stop chasing mismatched lids, mismatched bases, and the creeping sense that every container is just a chance for chaos. Instead, you cultivate a system that is intuitive, fast to navigate, and resilient to the daily rhythms of cooking, meal prep, and cleanup. The goal is not perfection in the abstract but reliability in action. A kitchen that runs smoothly is built on clear sight lines, predictable placement, and a repeated pattern of finding, using, washing, and returning containers with minimal friction. This chapter presents a cohesive, practical path grounded in the realities of real-world routines, not in theoretical ideals.
Size is the easiest metric to explain and the easiest to implement. The most practical starting point is to group containers by size and then assign them to zones that reflect how you actually use them. The small, 0.5 to 1.5 cup range is the realm of condiments, single portions, and the last-mile leftovers that you might grab for a quick snack or a single serving. These compact vessels shine on the front edge of a pantry or atop a shallow rack where you can see a few options at a glance. Their seat is not a deep shelf, but a space that invites use without overwhelming your countertop or drawer. In contrast, the medium range of about 1.5 to 3 cups holds the bulk of everyday cooking: portions for reheating, meal-prep components like chopped vegetables, and dry ingredients such as rice or pasta stored for weekly rotation. These containers are the workhorses of weekly routines, so place them in a central, easily accessible zone—typically a mid-level shelf or the middle of a tall drawer where you can lift and reach with one arm.
The large category, 3 cups and up, represents the big-batch and bulk-storage end of the spectrum. These are the vessels you reach for when you’re freezing soups in advance or portioning large quantities of stock or leftovers for future weeks. Their heft and capacity make them best suited for lower shelves or deeper bins where you can drain the weight of the container from your wrists and spine. A thoughtful arrangement here means you can slide the big containers out without wrestling them over a protruding edge or into a cramped nook. When you set up your space with size-based zones, you begin to see a natural rhythm: grab the right size, perform the task, wash, and return to the exact spot that earned it a place in the system. The simplicity of this pattern reduces decision fatigue and frees mental energy for cooking, not organization.
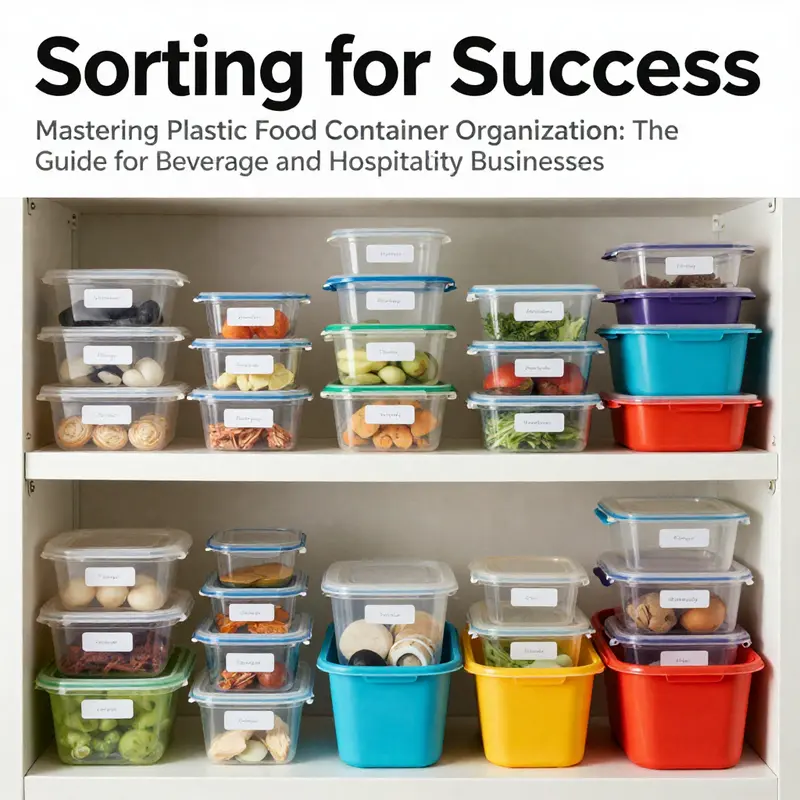
Once you have your size-based framework, you layer in functional categorization. This second axis—what the containers are used for—creates predictable clusters that make sense as you pull items from the cabinet. In practice, you’ll typically establish several core zones that mirror daily life in the kitchen. Meal prep and leftovers form a cohesive group. These are the containers you rely on to portion out meals for the week, store prepped vegetables, or capture last night’s dinner for tomorrow’s lunch. When you gather these in one area, you enable quicker meal planning, less rummaging, and faster cleanup. The “meal prep and leftovers” zone benefits from containers with clear lids and easy-to-read labels, so you can see what’s inside at a glance and know when something needs to be eaten or discarded.
Dry goods and pantry staples represent another essential cluster. These containers must be airtight to lock in freshness and deter pests, especially when stored in a cabinet or on a shelf that’s near your cooking zone. Prioritize seals and clips that are easy to operate with wet or flour-dusted hands, and keep this zone away from moisture-prone areas to minimize condensation that invites mold or spoilage. The refrigerator zone is the next logical cluster. It houses containers that hold marinated meats, chopped fruits, sauces, and prepared vegetables—the items that require a cooler temperature and reliable leak-proof lids. A dedicated fridge section prevents cross-contamination and streamlines your weekday routines, allowing you to grab a container and know it will close securely and resist leaks into the crisper or your other shelves.
Freezer-safe containers deserve their own clear space too. Freezing imposes different demands than refrigeration or pantry storage. You want materials that resist cracking, lids that snap firmly, and markings that help you identify contents and freezing dates. When you separate these items, you avoid the common problem of accidentally using a container that isn’t rated for freezing or that will warp under low temperatures. The final tier—cooking and baking—houses containers large enough for mixing, rising doughs, or holding batters and sauces during prep and service. Although these are not used for long-term storage in every case, they still benefit from a design that makes them easy to clean, stack, and retrieve during the heat of meal preparation.
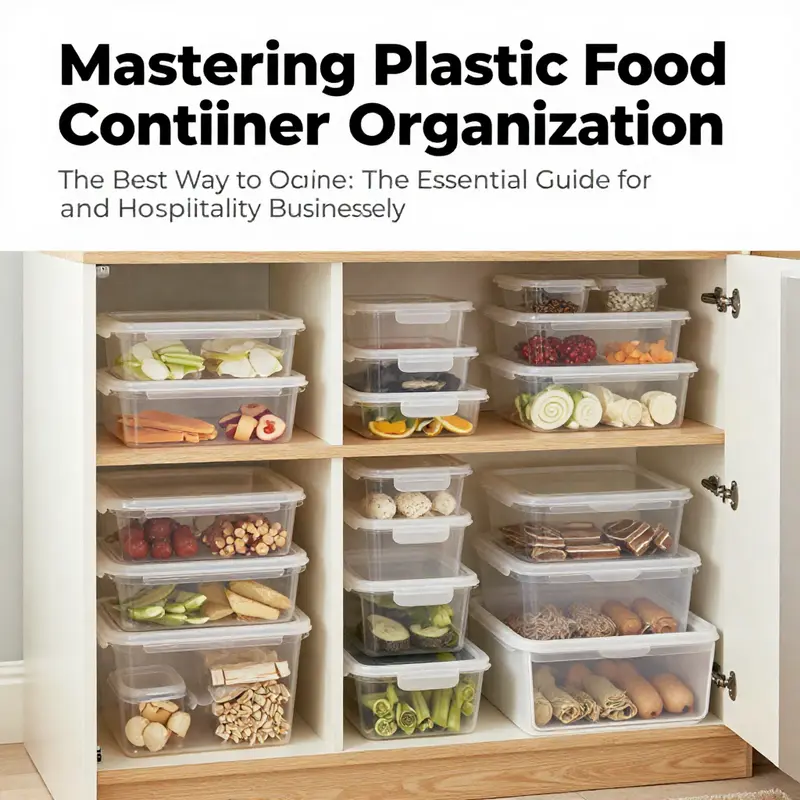
For this size-and-function system to truly work, visibility and access must drive the layout. Clear, labeled bins are your friend here. When you can see a whole group without lifting each lid, you accelerate every kitchen task. Labels ensure you know the contents at a glance, and color coding can quickly differentiate zones without reading words—an approach that speeds up decisions when you’re in a hurry. A practical tip is to use nested designs where smaller containers fit inside larger ones. This nesting practice saves space and reduces the chance of losing lids at the back of a cabinet. If your cabinets lack depth, consider vertical dividers or shelf risers that reveal the entire group and prevent containers from slipping toward the back where you cannot easily reach them.
Lid management is the other critical hinge in this system. The problem of missing or mismatched lids is not merely cosmetic; it creates real inefficiencies and hygiene concerns. A dedicated lid organizer, a tray that keeps lids upright and visible, is a smart, low-cost investment. An even simpler, but highly effective technique, is to store lids upside down on the corresponding container bodies when not in use. This setup reveals the lid shapes that belong to specific bases and makes it easier to pair them during the next use. For a long-term, low-friction solution, consider containers with integrated lids that snap securely onto the base. While this is not a universal fix for every home, it dramatically reduces lid-mismatch occurrences and helps maintain a clean, consistent look in the storage zone.
Labeling and date-tracking are the quiet workhorses of organization. A system that emphasizes speed benefits enormously from consistent labeling. You don’t need elaborate scripts—just clear words and an occasional date reference. Leftovers should be labeled with contents and day of storage to guide freshness decisions. For dry goods and pantry staples, date labeling helps you rotate stock and avoid the “range of mystery” containers that accumulate behind the front row of shelves. Cleaning routines complete the cycle. After each use, containers should be washed promptly, paying special attention to the seal grooves around lids—the crevices where residues and odors tend to linger. A thorough air-dry before stacking prevents mold and keeps your system smelling fresh and ready for the next cycle.
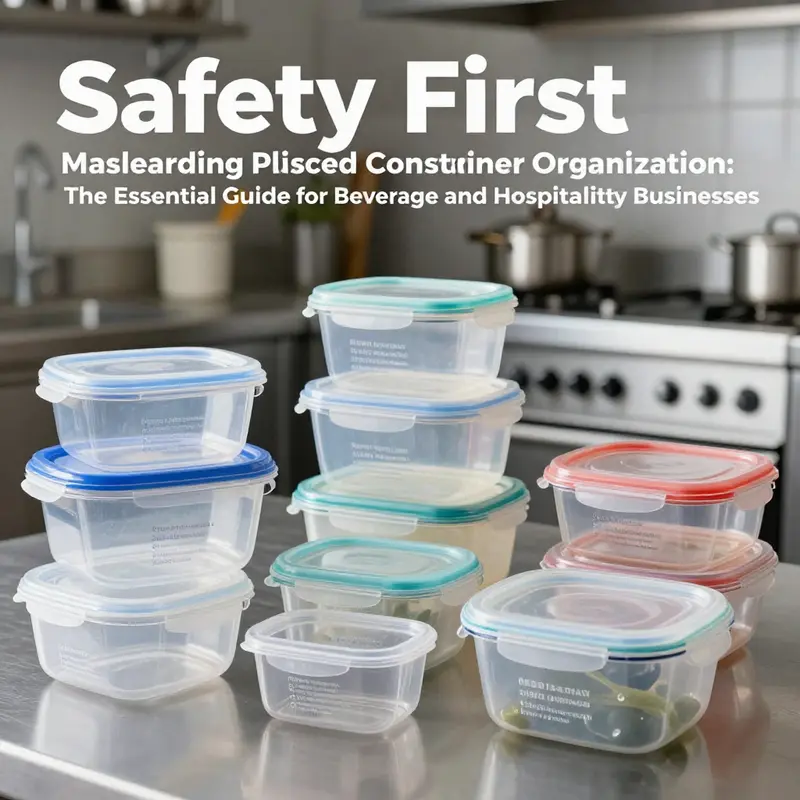
To ensure safety and durability, you should also know your materials. The bottom of most containers bears a recycling code or resin code that signals what the plastic is made from. In common practice, polypropylene, or resin code #5, is a favorable choice for food storage because it holds up to microwaving, dishwasher cycles, and repeated use. It is worth avoiding single-use plastics that are prone to leaching when heated or scratched. Some plastics, labeled with codes like #1 (PET), #2 (HDPE), #4 (LDPE), or #7 (PC and other), are less ideal for long-term food contact. In particular, items made from polycarbonate, often containing BPA, have become a source of concern and are best avoided for direct food contact. Imperfections in containers—cracks, chips, discoloration, or deep scratches—are not just cosmetic. They harbor bacteria and create tiny channels that can trap food particles and chemical residues. Such signs of wear warrant replacement to protect safety and taste. This knowledge becomes part of the routine that keeps your cabinet not only organized but safe for daily use.
The true power of the size-and-function system reveals itself when you apply it to your existing space with honesty about how you cook and eat. The layout should reflect your actual workflow, not an idealized fantasy of a kitchen that never touches the containers. If you routinely meal-prep on Sundays, position the meal-prep zone closer to the fridge and the cutting area. If you frequently bake and mix ingredients, give the cooking-and-baking zone a little extra depth and easier access to large bowls and mixing jars. The aim is to reduce steps, minimize lifting, and keep your most-used sizes and functions in the most reachable positions. A well-executed system will often recalibrate itself after a couple of weeks as you discover which locations feel most intuitive for your routine.
Sustainability has a place in every kitchen conversation, even in storage. Reuse and reuse responsibly by repurposing old containers for non-food uses such as storage for craft supplies, sewing notions, or tools. If a container is made from a material that is compatible with certain recycling streams, clean it thoroughly before recycling and follow local guidelines. While the prospect of dumping everything into recycling is tempting, a mindful approach—considering the container’s life cycle and current condition—helps reduce waste and protects environmental health. If you are testing a new storage approach, a practical benchmark is to refill a container and observe how well the seal holds, how easy it is to clean, and whether the size group continues to serve your weekly rhythm. This kind of ongoing, iterative refinement makes your system more robust over time and reduces the likelihood that you’ll drift back into clutter.
In the spirit of practical endurance, you may extend your system with a dedicated space for bulk or specialized containers. A compact cabinet drawer or a shallow shelf with numbered sections can be used to hold lids, labels, and small accessories that otherwise vanish into the wrong bin. In addition, consider a single, compact, vertical rack for frequently used sizes. The more you can see the exact shape and size you need at a moment’s notice, the less time you will spend rummaging and the more you will enjoy cooking on a busy weeknight. And if your kitchen includes a dining or work area with limited cabinet space, the same principles translate to a slim pull-out organizer that keeps your most-used containers in view and within arm’s reach.
One practical example of making these principles actionable is to link a container group to the daily routine—like a dedicated “lunch box” configuration that pairs a small, secure container with a matching lid and a simple labeling system. This pairing aligns with the meal-prep zone and ensures that what you pack for the day follows a consistent pattern. The same approach can be applied to freezer meals, where large containers are assigned to a separate section and labeled with contents and freezing date so you can pull out a pre-planned supper without hesitation.
If you want a reference point for how containers are perceived in broader packaging and storage contexts, consider exploring a product category that emphasizes ease of transport and durability, such as eco-friendly takeout boxes for food packaging. This category helps remind us that containers designed for daily use, whether for storage, transport, or reheating, benefit from simple, reliable design choices. The core idea—clarity, consistency, and safe materials—translates directly into the home kitchen. A system built on size and function is not about depriving your life of flexibility; it’s about freeing your routine from the friction of misfit lids, inaccessible bases, and the endless search for the right container. When you invest in a well-thought-out framework, you gain precious minutes each day and reduce the emotional burden of clutter. You also build habits that protect your family’s safety by maintaining clean, properly sealed containers and by choosing materials that are appropriate for the activities you perform in the kitchen.
In the end, the best way to organize plastic food containers is not a single trick or a clever hack. It is a deliberate, repeatable process that respects both the physical realities of the containers and the everyday realities of cooking, storing, and cleaning. Size sorting gives you a reliable map of your inventory. Functional categorization transforms that map into a working system you can live with. And a steady cycle of lid management, labeling, cleaning, and mindful material choices keeps the system humming rather than humming away in clutter. With this foundation, your kitchen becomes a place where preparation flows smoothly, waste decreases, and every meal begins with a sense of order rather than a hunt for the right container. The journey to efficiency is ongoing, but every step taken toward a thoughtful, size-and-function-based arrangement is a step toward a calmer, safer, and more enjoyable cooking life. If you’re ready to take the next step, you can start by applying the two-column mindset—size first, function second—and iterating from there. Your cabinets will thank you with greater accessibility, and your routines will gain momentum as the containers shrink from sources of stress to reliable allies in your daily cooking practice.
To illustrate the practical interface between concept and implementation within a real kitchen, the following simplified summary can serve as a quick reference guide. Begin with a quick audit of all containers: note their sizes, their primary uses, and any signs of wear. Reallocate items that do not fit neatly into the size groups or functional zones. Replace damaged pieces and retire any containers that trap food or harbor odors that won’t come out in a thorough wash. Reorganize the cabinet to prioritize the most-used sizes and zones, place the lids in an adjacent, accessible tray, and label contents and dates where relevant. Finally, test the flow for a week. If you notice any bottlenecks—like a frequent need to rummage for a particular lid—adjust the placement or the storage method until the system feels natural. This iterative approach ensures that your organization remains responsive to changing needs, such as new meal-prep habits, new family members, or evolving dietary routines.
For readers who want a practical anchor to further customize their space, consider visiting a source that showcases accessible, versatile container designs in the context of everyday packaging and storage. As a starting point, you’ll find a range of takeout and storage solutions that emphasize durability, easy cleaning, and modular design. These choices resonate with the goals of a home kitchen organized by size and function: simplicity, speed, and safety. Explore the idea that functional containers can be more than just storage—they can be your everyday tools for cooking, planning, and enjoying meals with confidence.
Internal link note: For a practical example of how container aesthetics and design can influence storage decisions in a broader packaging context, you can explore a relevant resource such as eco-friendly takeout boxes for food packaging. This resource provides insight into how designers think about materials, lids, and stacking, which can inspire your home setup without referring to brand names. eco-friendly takeout boxes for food packaging.
null
null
Smart Stacks, Safe Seals, and Sustainable Storage: Organizing Plastic Food Containers for Peak Kitchen Performance
A well-organized collection of plastic food containers does more than tidy a cabinet. It speeds meal prep, reduces waste, and keeps food safer. Start with a simple sorting rule: sort by size, then by function. Group lids with their bases, nest smaller pieces inside larger ones to minimize footprint, and designate zones for refrigerator, freezer, and pantry. Use clear, labeled bins to inventory items at a glance. A dedicated lid zone saves minutes spent hunting tops. For safety, examine containers for cracks or discoloration and prefer polypropylene (#5) for heat exposure and repeated use. Be mindful of heat, avoid reusing single-use plastics for hot foods. Stackable designs save space and preserve lids; vertical dividers help keep pieces upright and easy to grab. In practice, assign a core set for daily use and batch prep, then expand gradually as your cooking needs grow. Consider mixing in glass where appropriate to reduce plastic exposure over time. Finally, adopt a hygiene and reuse plan: reuse containers for non-food tasks when feasible, and recycle clean pieces according to local guidelines. A resilient, well-organized system yields faster meal planning, less waste, and a calmer, more confident kitchen routine.
Final thoughts
Effective organization of plastic food containers is not just a matter of aesthetics; it’s a vital component of operational efficiency and safety in the food service industry. By mastering the art of sorting, understanding the nuances of plastic types, and implementing innovative storage solutions, your beverage or catering business can greatly enhance productivity and safety. Take these insights to optimize your container organization, and remember, a well-organized kitchen is a recipe for success.