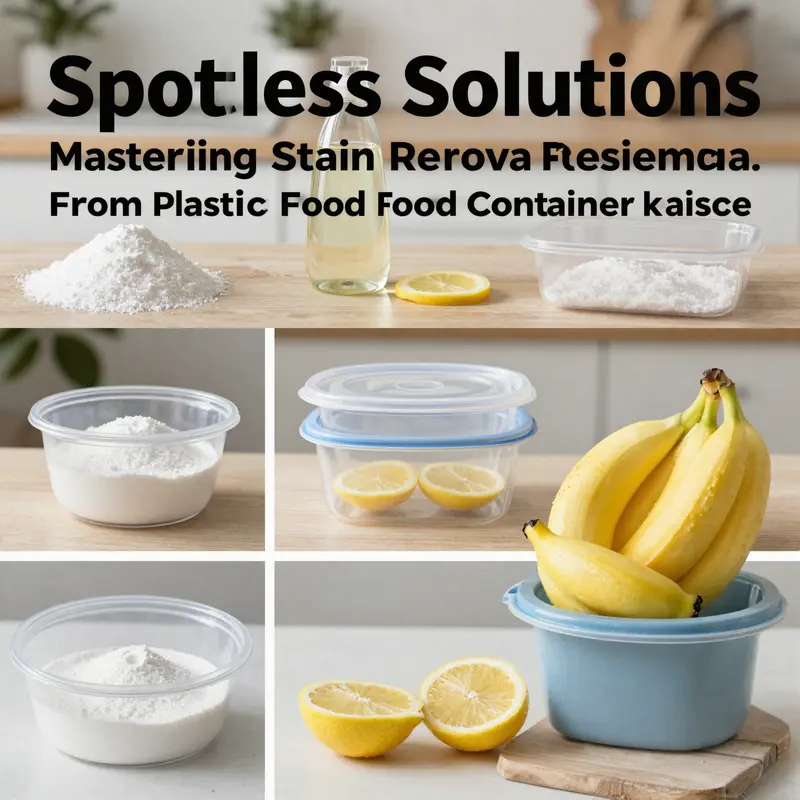
Plastic food containers are essential in the food and beverage industry, from bustling restaurants to catering services. However, stubborn stains can compromise not only their appearance but also their hygiene and functionality. Identifying the best methods to remove these stains is crucial for maintaining high standards of cleanliness and customer satisfaction. In the chapters that follow, we’ll delve into various effective techniques, including baking soda pastes for oil and grease stains, white vinegar solutions for mineral deposits, lemon juice applications for plant-based stains, and harnessing the power of sunlight to fade natural pigments. Each method is tailored to restore your plastic containers while ensuring safety and longevity.
Baking Soda at Work: Restoring Clarity in Plastic Food Containers
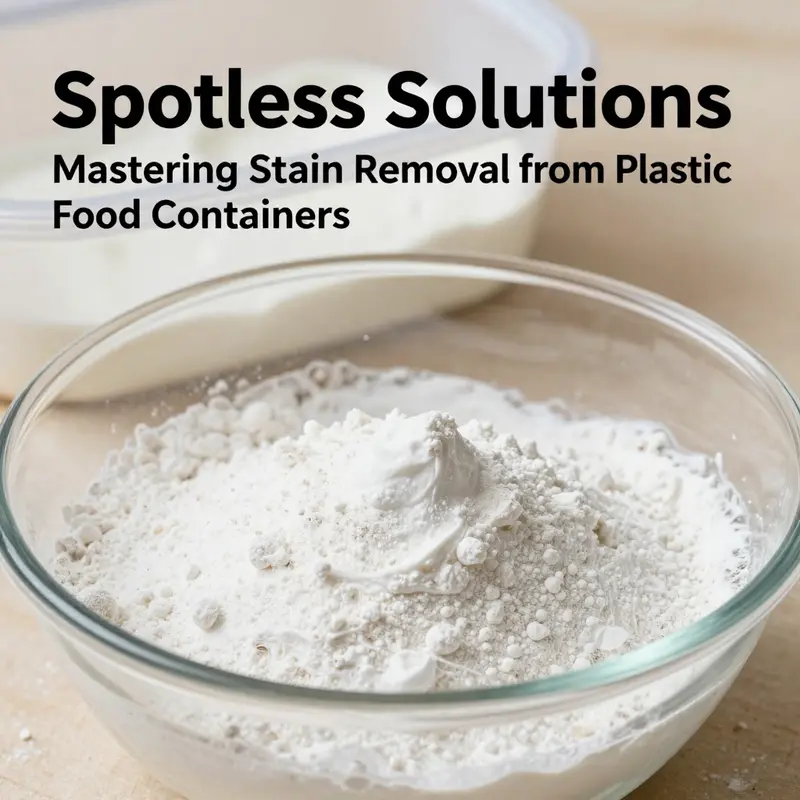
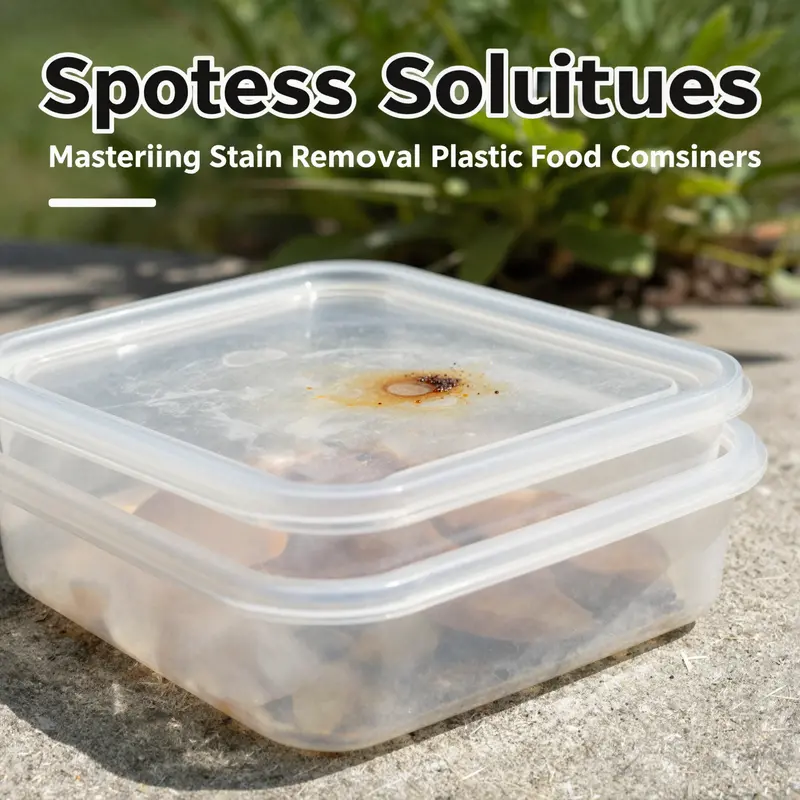
Stains on plastic food containers are a common nuisance that can chip away at the everyday usefulness of a handy kitchen essential. Oil from fried foods, pigments from curry or tomato sauce, and tannins from tea or coffee can leave a haze that makes containers look worn even when they are still clean inside. The goal is not just to erase color but to refresh the surface so it looks and feels like new again, while keeping safety and material integrity in mind. Among the many strategies, baking soda stands out as a quiet workhorse: inexpensive, widely available, and gentle enough for routine use on most common plastics. This chapter explores how to harness baking soda in practical, science-guided ways that respect the container’s material—whether it is PP, PET, or PS—and avoid the pitfalls that can accompany harsher cleaners or aggressive scrubbing.
A unifying thread in stain removal is how a surface interacts with pigmented residues. Many plastic containers absorb oils and pigments from foods. Once these substances lodge in the microtexture of the resin, they can oxidize and settle into visibility as cloudiness or persistent discoloration. Baking soda’s mild alkalinity provides a dual benefit. It helps dissolve oily residues and also slows the chemical changes that turn light into shade by reducing the stickiness of residues that trap color in the first place. This makes baking soda especially effective for common culprits such as curry, tomato sauce, coffee, and tea. Yet the strength of the approach lies not in a single magic trick, but in a small set of techniques that you can apply depending on the stain’s stubbornness and the container’s material.
The first method centers on a baking soda paste. Mix baking soda with a small amount of warm water to form a thick, pasty surface. A typical starting point follows a 2:1 ratio, with two parts baking soda to one part water, yielding a substantive paste that clings to the stained area rather than running away. Apply the paste directly to the stained zones—think the interior bottom where curry oils cling to the walls or the lip where tomato residues tend to accumulate. Let this layer sit for 15 to 30 minutes. The time allows the mild alkalinity to interact with pigments and oils, softening the bonds that hold color to the plastic. After the rest period, gently scrub with a soft cloth or sponge. Avoid anything rough or metal that could scratch the surface. Rinse thoroughly. A thorough rinse is essential not only to remove baking soda remnants but also to ensure the container is ready for food use again. The goal is clean, not gritty, and certainly not contaminated.
For deeper embedded staining or a cloudy appearance that won’t budge with paste alone, a baking soda soak can be surprisingly effective. Dissolve 1 to 2 tablespoons of baking soda in warm water and submerge the entire container. Immersion should cover all stained areas, and the soak time should extend to at least 1 to 2 hours, or longer for more stubborn cases. The alkaline environment helps neutralize acidic residues and lifts embedded oils that contribute to haze and color. After soaking, give the surface a gentle scrub with a soft brush or sponge and rinse well. In some situations, an overnight soak can make a noticeable difference, particularly when the stains have had time to etch into the microtexture of the plastic. It’s important to manage expectations: soaking can address cloudiness as well as color, but it may not restore perfectly uniform clarity if the container has endured severe or long-term staining.
A step that often yields an extra boost is the combination of baking soda with a touch of vinegar. When you add baking soda to the container first and then introduce a small amount of white vinegar, you create a fizzing reaction that helps loosen grime and lift stubborn stains more aggressively than either agent alone. Let the fizzing action work for 5 to 10 minutes before scrubbing and rinsing. This approach is particularly effective for coffee, tea, or grease stains that cling to both the interior walls and the corners of the container. However, exercise caution with heat and materials. Do not rely on this method for containers made of polystyrene (PS) that are particularly sensitive to chemical reactions or for any container where you anticipate a strong effervescence could cause mechanical stress. A simple rule of thumb is to align the method with the container’s material and its tolerance for agitation and alkaline or acidic exposure.
Even with these active cleaning steps, prevention remains the surest defense against future staining. Regular maintenance after washing with warm soapy water helps keep surfaces clear and minimizes the chance of tint buildup. A weekly quick paste application over the most prone areas can act like a polish for the surface, reducing the likelihood that pigments and oils find a foothold in the weeks ahead. After any cleaning, ensure you dry the container completely. Place it upside down on a drying rack or a clean towel so air can circulate, reducing the risk of mold, odors, or residual moisture that can harbor bacteria. In shorter terms, a clean container dried thoroughly is less inviting to staining agents in future use.
Material awareness is the guiding principle behind these baking soda treatments. Plastic containers vary in their composition and how they respond to heat, acids, and abrasion. PP and PET are generally more forgiving than PS when it comes to mild alkaline cleaning methods. The critical caveat with PS is heat sensitivity; high temperatures or aggressive cleaning can warp or warp-like distortions, and certain cleaning combinations may compromise structural integrity. Always check the container’s recycling code and any material labels before you apply heat, soaking, or chemical exposure. This step matters not just for the surface aesthetics but for safety and future reusability. If you’ve ever heated a container to accelerate cleaning, you’ve likely learned the hard lesson of distortions and odors that linger. In practice, the best results come from tailoring the baking soda technique to the container’s material and the stain’s nature rather than forcing one method to fit all.
From a safety standpoint, the guiding principle is to avoid overly harsh chemicals. Bleach or strong commercial cleaners can degrade plastic surfaces and leave residues that are not food-safe. Baking soda, by contrast, is gentle enough for routine use and generally safe for shared kitchen items. A good habit is to test a small, inconspicuous area first if you’re dealing with a container whose age or quality you’re unsure about. Another practical tip is to avoid boiling water or boiling-like temperatures. Hot water can facilitate warping in certain plastics and also increases the risk of coefficient of thermal expansion causing micro-scratches. Warm, not boiling, water is a safer default when rinsing or soaking.
Beyond the mechanics of stain removal, there is a science behind why certain pigments cling to plastic in the first place. Polymers used in consumer containers often have microtextured surfaces that can trap residues. Oils from foods love to migrate into the micro-pores, and over time, those residues oxidize and become more visible as color or cloudiness. Baking soda’s mild base helps to neutralize some of these residues and reduces the surface tension that allows oils to cling. This is why a combination of paste, soak, and occasional fizzing can be more effective than a single approach. In practice, an integrated routine—paste for surface spots, soak for deeper clean, and a vinegar bump for stubborn grime—often yields the clearest results without compromising the container’s integrity.
When you apply these techniques, it is helpful to think of the container not as a single flat surface but as a three-dimensional shape whose corners and edges can trap residues. Pay particular attention to the seams and the base, where oils and pigments tend to accumulate. Use a soft brush to reach corners and a sponge for flat walls. Rinse thoroughly, and if you notice any persistent odor or a faint film after cleaning, repeat the process with a fresh paste or a short soak. The goal is not to achieve a showroom shine in one go but to progressively reduce discoloration and restore the surface clarity.
In terms of long-term practice, consider a few routine habits that reinforce the gains you’ve made with baking soda. Clean containers promptly after use with warm soapy water. Avoid leaving acidic or highly pigmented foods in contact with plastic for extended periods. Remove any clinging residues from utensils before placing containers in the sink or dishwasher, if the latter is appropriate for the material. And for transparency enthusiasts who want to keep their containers looking almost new, a light, weekly application of a baking soda paste can prevent the oils and pigments from seeping into the surface and creating a stubborn haze over time. With these habits, baking soda remains a faithful ally in keeping plastic containers presentable and ready for daily use.
A final thought ties back to the practical choice of approach. If you’re dealing with a notably stubborn stain across a large container, a multi-step routine may feel time-consuming, but the payoff is substantial: you preserve the container’s function, maintain food safety, and extend the life of a staple kitchen item. The technique you choose should be proportionate to the stain, the container’s material, and your patience. In most homes, the paste method combined with occasional soaks and occasional fizzing offers a robust, low-risk path to better-looking plastic containers without resorting to harsher cleaners. And for those who want a deeper dive into the science behind these methods, a detailed guide from a reputable cleaning resource offers additional context and validation for the chemistry at play. As with any cleaning plan, the key is consistency and respect for the material you are caring for, because that respect translates into reliable performance and safer storage for your foods.
For readers seeking a broader scientific explanation of why plastic containers discolor and how mild cleansers work, this external resource provides an in-depth look at the subject: https://www.cleanmyspace.com/cleaning-plastic-food-containers-with-baking-soda/ .
White Vinegar’s Gentle Power: Restoring Clarity to Plastic Food Containers
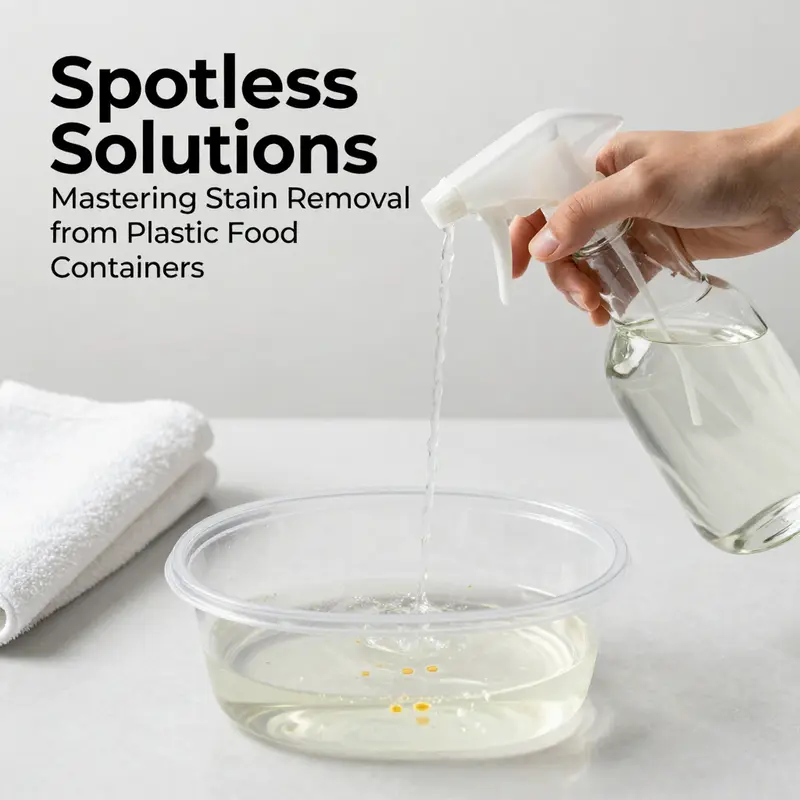
Stains on plastic food containers accumulate with repeated use, especially when bright sauces, dark beverages, or brewed drinks briefly dwell in the walls of the vessel. The ordinary kitchen routine often leaves telltale rings or gradual discoloration that can seem permanent. In many households, people reach for aggressive cleaners or bleach, which can dull the plastic or leave unwanted residues. Yet there is a gentler, effective option that nature provides in plain kitchen staples: white vinegar. Its mild acidity makes it a trustworthy ally for removing oily residues and organic pigments without compromising the integrity of most common food-safe plastics. This approach fits neatly into a broader ethos of safer, more sustainable cleaning practices you can rely on daily. The aim is not to erase every trace of color but to restore the container to a neutral, clean state that won’t taint future foods.
The method is straightforward and designed to work with minimal fuss. Begin with a clean slate: remove any lingering bits of food, rinse the container with warm water, and inspect the stained areas. The vinegar solution you will prepare is simple and gentle—a 1:1 mix of white vinegar and water. This ratio achieves a balance between effectiveness and safety. You do not need to resort to concentrated concentrations or hot chemical baths. The warmth of the water can be enough to kick-start the loosening of pigments, while the acetic acid in the vinegar targets oily residues that often trap color beneath the surface. If you’re curious about the range of plastic types this method supports, think of common workhorse materials such as polypropylene (PP) and polyethylene (PE). These are typically compatible with mild acid treatments when used in controlled, brief exposures. For a visually intuitive sense of how cleaning choices map onto different plastic forms, consider the container’s construction and any labeling you find on the bottom. A quick check can save you from applying a method that might be less ideal for a delicate surface.
To begin, submerge the stained container in the prepared vinegar solution. If the container has a lid or hard-to-reach corners, ensure they are included in the soak by filling those spaces with the solution or by placing a vinegar-soaked cloth inside. The soaking duration matters: aim for at least two hours. For more persistent stains—such as those lingering from curry, tomato sauce, or tea—a longer soak can be beneficial. The acetic acid works by softening and dissolving mineral residues and pigment compounds that cling to the plastic’s microscopic grooves. Time, not force, does the job here. After the soak, rinse thoroughly with clean water, then wash with regular dish soap to remove any stubborn vinegar odor and any remaining pigment fragments. This sequence—soak, rinse, wash—reduces the likelihood of a vinegar aftertaste or smell affecting future foods.
Chemically speaking, the action of acetic acid is subtle but effective. The acid helps to emulsify fats and oils that carry pigment particles, loosening them from the surface where they have embedded themselves. It also breaks down some of the organic pigments responsible for familiar stains from coffee, tea, curry, or tomato sauce. The combination of time and acid makes this approach particularly well suited to plastic surfaces that are labeled as food-safe and resistant to mild acids. The goal is not to strip the container bare of color but to restore a neutral surface that won’t impart flavor or odor to your next meal. It’s worth noting that while vinegar is broadly safe for PP and PE, you should still avoid untested exposure on colored or unusually delicate plastics. If you notice any fading or discoloration after soaking, it’s a signal to discontinue this method for that specific piece and consider an alternative technique.
An important part of using vinegar well is preparing the container properly before soaking. Remove any large remnants of food so the liquid can reach all the stained areas. If the stain is inside a seam or a narrow corner, you can tilt, shake gently, or use a soft brush to help the solution move into those crevices. A soft-bristled toothbrush or a non-abrasive sponge can be useful after soaking to lift away softened residue without scratching the surface. Do not use steel wool or other abrasive tools, as these can scratch the plastic and create new sites for staining. After the soak and rinse, dry the container thoroughly. A dry surface reduces the likelihood of mold growth and helps maintain a clean, fresh appearance.
How often should you use this method? For routine maintenance, a light soak once every one to two weeks, depending on how frequently you reuse containers with staining ingredients, can be sufficient. If you notice a deep, stubborn stain that remains despite soaking, you can reapply the vinegar treatment, perhaps with a slightly longer soak or a gentle brushing session once the container has had time to reabsorb moisture. The key is to observe the container’s reaction to the treatment. If the plastic remains clear and there’s no unusual odor or color change, you are likely within a safe zone. If there is any doubt about a particular piece—especially if it has a unique pattern, dyed surface, or a soft, flexible edge—test the solution on a small, inconspicuous area first.
You may wonder how to handle lids and seals during this process. Lids often present not just a flat surface but threads, grooves, and hinges where grime can cling. For these parts, you can either remove the lid and soak it separately or fill the lid’s inner cavity with the vinegar solution and let it sit for a similar duration. After soaking, a gentle scrub with a soft brush helps ensure every nook is addressed. If the lid is made of a different material than the container, consider a cautious approach: some plastics tolerate vinegar better than others, and a mismatched material could respond differently to exposure. The overarching principle remains simple—avoid concentrated vinegar on colored or delicate plastics and always rinse thoroughly after soaking.
A practical consideration is the odor. Vinegar has a distinct scent that can linger briefly after cleaning. A thorough rinse with dish soap and plain water typically dissolves this odor. If you are particularly sensitive to the scent, you can run a quick secondary wash with mild soap and rinse again, optionally a quick air dry in a well-ventilated area. In most cases, any residual odor dissipates quickly once the container is dry and stored away from direct heat or sunlight. If you want to minimize lingering scent from the outset, you can swap in a small amount of lemon juice during the final rinse, provided you are mindful of the long-term compatibility of lemon’s acidity with your container’s material. However, lemon juice involves additional acidity and potential scent interactions, which you should weigh against the convenience of vinegar alone.
The relationship between cleaning method and material compatibility deserves emphasis. Plastic containers come in various families, each with its own tolerances. PP and PE are among the most forgiving when treated with mild acids over a short period. PS, or polystyrene, is more sensitive to heat and sometimes to strong acids, especially when subjected to prolonged exposure. The vinegar soak described here is designed to be safe for many food-safe plastics when used judiciously, but it is not a universal remedy. If you ever notice warping, softening, or changes in rigidity after immersion, discontinue use and opt for alternate methods that align with the manufacturer’s guidance for your specific container. In short, the vinegar method is a gentle first option that respects the integrity of everyday containers while delivering real cleaning power.
For those who rely heavily on reusable containers in busy households, this approach can become part of a routine that reduces persistent staining. It complements other methods in an orderly progression: start with a vinegar soak for general organic and oily stains; if colors persist, you can try a baking soda paste for oil-based discolorations or a toothpaste scrub for surface-level blemishes. The goal is not to rely on a single method but to know which approach aligns with the stain type and the container’s material so you can choose confidently in the moment. A practical cue is to observe the type of stain you frequently encounter. If it’s largely coffee and tea, the vinegar soak is often sufficient after a thorough pre-clean. If the stains are more stubborn or involve oilier sauces, a combination approach may be warranted.
If you’re curious about related packaging options that often accompany daily use, you can visit product pages that showcase disposable clear plastic cups designed for everyday beverage enjoyment. These pages illustrate how plastics are engineered for reuse and practicality, and they link to a wider family of plastic container solutions. Disposable Clear Plastic Cup product page. While the cleaning method described here applies to many plastic food containers, the broader context of everyday packaging can help you understand why certain materials tolerate mild acid treatments better than others.
In closing, the vinegar soak is a natural, economical, and accessible way to reclaim clarity in plastic containers without resorting to aggressive cleaners. It fits a philosophy of careful maintenance and material awareness. The real measure of its effectiveness lies in your ability to observe the container after treatment: no lingering color, no unusual odor, and a surface that feels clean to the touch. When used thoughtfully, white vinegar becomes more than a cleaning agent; it becomes part of a routine that protects the health of your kitchenware and supports a more sustainable way of managing food storage.
External reference for deeper insights into vinegar stain removal can be found in Real Simple’s guide on white vinegar stain removal for plastic containers. For a detailed description of the technique and its rationale, see: https://www.realsimple.com/home-organizing/cleaning-tips/white-vinegar-stain-removal-plastic-containers
Citric Precision: Lemon-Based Care for Restoring Stains in Plastic Food Containers
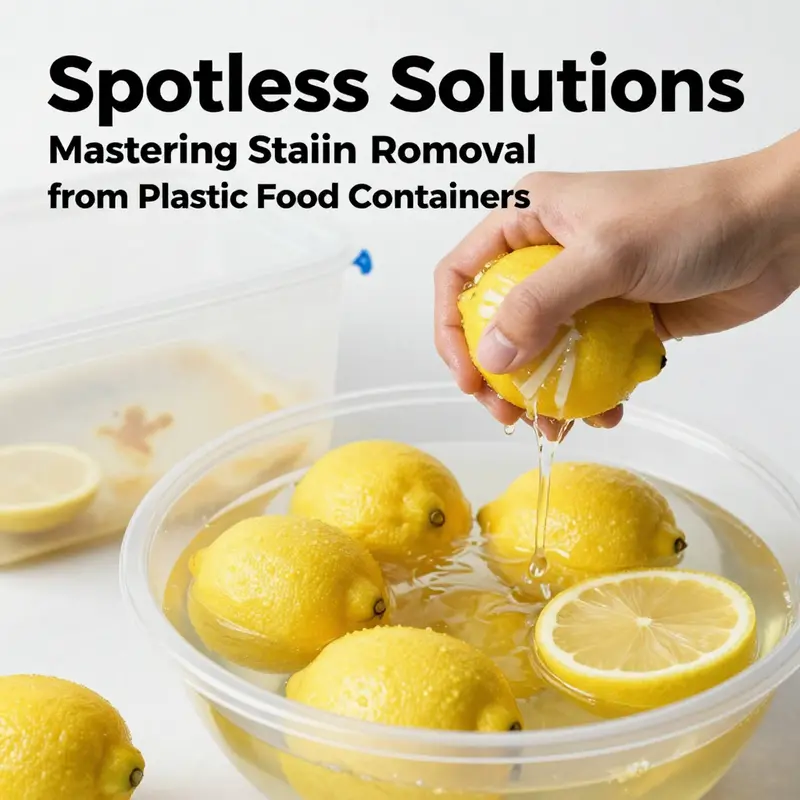
Lemons carry more than brightness for a kitchen basket. Their juice is a light yet effective cleaner, powered by citric acid that can loosen pigment bonds without harsh chemicals. When stains cling to plastic containers, the small but steady action of lemon based methods can restore clarity and extend the life of the container. The science behind this approach is simple and accessible: citric acid acts as a mild bleaching agent, while the natural abrasiveness of salt, the heat of a gentle soak, and even the sun can work in concert to fade or lift stubborn marks. This chapter stitches those ideas into a practical, repeatable routine that respects container material and safety. It is not a single magic trick but a sequence that balances chemical action with physical removal, all while keeping your plastics safe for everyday food use. In practice, lemon driven cleaning is most effective when you tailor the method to the kind of stain and the plastic type you are dealing with. Plastic containers come in several common families such as polypropylene and its variants, as well as polystyrene. Some plastics tolerate heat and acidity better than others. The guiding rule is to start with the gentlest approach that has a reasonable chance of success, and only move up to more intense steps if necessary. This methodical mindset helps avoid warping, surface crazing, or residual odors that can accompany aggressive cleaners. With that in mind, the lemon based strategy can be broken into a sequence of practical steps that address different stain intensities and origins, from surface discoloration to pigment deep inside the plastic matrix. The first step is a surface level approach that leverages both acid and abrasion. For stains from beverages such as tea or coffee, or from fruit juices that leave faint yellowing, a lemon juice plus salt scrub provides a gentle, effective starting point. Fresh lemon juice brings citric acid to the scene, while coarse salt offers a physical scrubbing action that helps lift surface pigment. The method is simple. Squeeze fresh lemon juice into a small bowl, and mix with coarse salt until you have a gritty paste. Apply the paste directly to the stained area of the container, then rub with a soft sponge or brush in small circular motions. Let the paste sit for about 15 to 30 minutes; during this time the citric acid can soften the pigment and the salt can abrade it slightly, working together to dethread the stain from micro grooves and scratches in the plastic. After the waiting period, rinse with warm water and inspect the surface. If the stain remains faint, repeat once or twice with the same easy refinement, always avoiding abrasive tools that could scratch the plastic. The key with this approach is to maintain a gentle touch. Hard scrubbing with steel or abrasive sponges can mar the surface and invite future staining or odor retention. Once you have finished the scrub, rinse thoroughly to remove any acid residue. A quick dry with a clean cloth followed by air drying on a rack ensures no damp pockets linger, which can invite mold or a stale scent. The second approach broadens the idea of lemon cleaning into a temperature assisted soak designed for deeper or more deeply ingrained pigments. This hot lemon juice soak works best when the staining derives from more stubborn plant derived pigments or from residue that has had time to embed into tiny crevices. The method begins with fresh lemon juice, but here you mix it with hot water rather than salt. Warm, not boiling, water is the intent, because extreme heat can distort some plastics, especially if the container is thin walled or older. Use about half a lemon worth of juice for every 200 milliliters of hot water. The mix should be hot enough to feel warmth on the skin but not scalding. Submerge the container in this lemon infused bath, and let it soak for 60 minutes at most. The heat boosts the action of citric acid by encouraging pigment molecules to loosen from the plastic surface and micro crevices. It is important to avoid temperatures that approach the higher end of the spectrum. Persistent heat can warps or soften certain plastics, particularly those that are more susceptible to heat related distortion. Before you begin the soak, inspect the container for any signs of cracking or brittleness. If you发现 cracks, do not immerse, as acids in combination with heat could worsen the damage. After the soak, remove the container and rinse thoroughly, then dry completely. This soak is a practical bridge between the light surface scrub and more advanced options. If the stain persists after the hot soak, you can add a final sunlight based step to brighten what remains. The sun adds a UV driven promo to the citric acid effect. The concept here is straightforward: after the lemon soak, place the container in direct sunlight for a period of 1 to 2 hours. The solar UV radiation helps break down pigment molecules further, especially for tea and coffee stains that have settled more deeply. The exposure should be balanced and careful. A long, intense session can degrade plastic over time, especially if the container is older or thinner walled. It is wise to consider the container material and background wear before committing to an extended sun soak. If you notice any unusual changes in color or material surface after sun exposure, discontinue the step and focus on rinsing and air drying. A small follow up wipe with a light edible oil can sometimes restore surface luster that appears dull after sunlight. The combination of lemon juice and sunlight is powerful but should be used conservatively. Also important in this context is to check the compatibility of lemon based methods with the actual plastic you own. The most common food containers are PP or PP variants, including polypropylene grades often marked with PP or a similar code. These plastics tend to tolerate citric acid and light heat better than others. Polystyrene, while generally safe for short lemon activity, can become brittle if overexposed to acidic solutions or heat. Polycarbonate and some hard acrylics tend to be more sensitive to acidic substances; these materials can undergo surface changes or minor crazing. The practical takeaway is simple: if the container shows visible cracks, brittleness, warping, or cloudiness that concerns you, pause lemon based treatment and switch to gentler cleaning or substitution by mild soap and water. After any lemon based treatment, the final steps are consistent and essential. Rinse thoroughly with clean water to remove any residual acid. This step prevents lingering acidity that could affect food safely stored inside later. Drying is the next critical stage, because damp containers can harbor mold, odors, and even bacterial growth in narrow crevices. The best practice is to place the container upside down on a drying rack or a clean towel, allowing air to circulate and moisture to escape from every corner. If you are storing the container for future use, ensure it is completely dry before sealing with the lid. The simple discipline of prompt cleaning and drying after use helps prevent the very stains lemon cleans can prevent forming elsewhere. In integrating these lemon based techniques, a practical routine emerges. Start with a light lemon juice plus salt scrub to deal with surface stains that are not deeply embedded. If the color remains, progress to a hot lemon soak every few weeks depending on staining. If stubborn pigment persists, consider a daylight step, but always monitor the container for any signs of aging or distortion. You should not apply heat to PS containers for the lemon soak or the sun exposure step because the risk of warping remains a real concern. If your container is versatile and well made, the lemon approach offers a safe and economical way to refresh the look and function without resorting to stronger chemical cleaners that can degrade plastics over time. The beauty of this method is that you can adapt it to the stain’s origin. Tea and coffee stains, which leave milder yellowing, typically respond fastest to the surface scrub. Fruit juice and tomato sauce stains, which can be more vibrant and deeply embedded, often need the hot soak and a brief sun treatment to fade effectively. Stains from beet juice or turmeric sometimes blossom with sunlight in addition to citric action, but you should apply sunlight sparingly to protect the container integrity. Beyond the stain itself, lemon based cleaning instinctively fosters good maintenance habits. Clean containers promptly after use with warm soapy water. Do not let acidic or oily foods linger for extended periods inside the container; prompt cleaning reduces the chance of deep pigment formation. Dry after washing as described, and ensure the container is fully dry before storing. If you do this consistently, you create a positive loop: you minimize pigment build up, you maintain surface integrity, and you keep your containers looking clearer for longer. The science behind these steps is robust enough to support everyday kitchen practice without complicated equipment or specialized cleaners. Citric acid is common, inexpensive, and safe for most food contact plastics when used in moderate amounts. The gentle mechanical action of salt in the scrub works with the chemical action to dislodge surface residues. Heat helps to loosen stubborn dyes while not exceeding temperatures that could damage the structure of the plastic. Sunlight provides a natural boost to pigment breakdown while reminding us that a little light can be a cleaning ally when used with care. The approach also honours the core safety principle of this topic: check material labels before you begin. Look for codes like PP, PET, or PS, and understand their specific tolerances. Avoid heat on PS if there is any doubt about the container having heat sensitive properties. Avoid harsh bleach or aggressive solvents that can leave residues and compromise the plastic. In addition to the practical steps, there is a longer term perspective. The goal is not only to remove stains but to preserve the container for repeated use. Regular cleaning with warm soapy water, avoiding prolonged food stay in the container especially with acidic or oily foods, and ensuring complete drying all contribute to a longer life. If a stain recurs frequently despite careful cleaning, it may be a sign that the particular plastic is starting to show wear or that the pigments or dyes used in the container’s design are more prone to staining. In those cases you might consider a replacement when the container’s integrity is compromised, but in many cases the lemon approach simply needs a slightly more conservative schedule or a shorter exposure to heat or sun. Finally, it is worth noting the value of an evidence based approach to cleaning. The lemon methods outlined here align with a broader set of science backed recommendations that emphasize gentleness, compatibility, and repeatable outcomes. While various blogs and guides present similar steps, the core idea remains consistent: lemon juice can provide a safe and effective cleaning boost when used thoughtfully. For readers seeking a broader perspective on restoring shine and reducing cloudiness in plastic containers, a reputable guide on the topic provides additional context and confirms the value of lemon based strategies as part of a multi step approach. External resource: https://www.thespruce.com/restore-shine-to-cloudy-plastic-food-containers-4126398
Sunlight and Baking Soda: Restoring Clarity to Plastic Food Containers
A clear, odor free container can make leftovers feel more appealing. The sun can help lighten yellowing on common plastics like PP and HDPE when used with a modest amount of baking soda. Start with a gentle preclean to remove loose debris, then place the container in direct sun with its lid off. Add a tablespoon of baking soda inside so it can act as a mild abrasive and deodorizer. Let the sun and baking soda work together for a period of 24 to 48 hours, then rinse thoroughly and dry. This method is not universal; some plastics such as certain polycarbonates may react poorly to prolonged sun exposure. If you notice warping or increased flexibility, discontinue and consider milder approaches. Always check the manufacturer guidance for your container before starting. When used with care, the sun and baking soda approach can reduce cloudiness and odors without harsh chemicals, supporting safer, more sustainable cleaning.
Final thoughts
Maintaining cleanliness in your plastic food containers is vital for any food-related business. The effective methods outlined – from baking soda paste for oil and grease stains to the refreshing effects of sunlight – provide you with the knowledge to keep your operational tools in top condition. Empower your staff with these techniques, ensuring that cleanliness becomes a core value in your service quality. A clean container not only fosters hygiene but also enhances the overall dining experience for your customers.