

Anyone who has served cold drinks in custom disposable plastic cups with dome lids knows the one flaw that keeps coming back. Condensation gathers inside the dome, finds the straw slot, and lands on the customer’s hand, the table, or the receipt. In a busy shop it happens hundreds of times a day. Cold liquid chills the air trapped under the lid, water vapor condenses on the plastic above it, beads up, and follows the slope to the lowest opening it can reach, which is usually the straw slot. The drink is fine; the packaging is what failed. That makes it a specification problem, and it can be settled before the order goes out. Start by checking the cup formats we stock for cold drinks, since lid options change with cup diameter and rim style.
A vent spec is the written description of the venting you ask the factory to mold or punch into the lid: how many vents there are, how wide each one is, where they sit relative to the straw slot, and whether they are molded during forming or punched afterward. It is the short set of numbers your supplier needs so that every production run matches the sample you approved. Two 0.8 mm pressure vents on the dome shoulder, 25 mm from the straw slot, is a spec. A note reading “add a small air hole” is not.
What follows covers how condensation forms inside a dome, how slot geometry decides where the water goes, which vent parameters to write down, a checklist to run before ordering, and the questions buyers raise most often.
How Condensation Forms and Travels Inside a Dome-Lid Cup
A drip on a customer’s sleeve looks like bad luck. It follows a predictable path, though, and once you can name the steps you can interrupt them.

Cause #1: Two temperatures meet at a thin wall
A chilled drink pulls heat out of the air around it. Because the cup wall is thin, the air just above the liquid surface cools fast, while the room air outside a clear plastic cup for cold drinks stays warm and often humid. That gap between the two temperatures drives everything that follows.
Cause #2: Vapor pressure pushes moisture upward
Warm air holds a lot of invisible water vapor; cold air holds much less. In a sealed headspace the vapor spreads in every direction, including up against the underside of the lid. The warmer and more humid the room, the more vapor that headspace has to shed.
Result #1: The inner lid drops below the dew point
Air that was saturated when the lid went on becomes supersaturated as the drink chills it. Once the inner surface of the dome sits below the dew point of that air, the excess vapor turns back into liquid on the plastic. This is where dome lid condensation starts, and it is why the moisture arrives overhead rather than on the walls, which are in contact with the drink and drain quietly.
Result #2: Droplets form, then merge
Microscopic beads appear first, often collecting around tiny scratches and molding marks. As more moisture lands, the beads run together into heavier drops. A fogged dome is thousands of those drops, sitting in place.
Result #3: Gravity collects the water in the low spots
Once a drop is heavy enough, it slides. The curved dome acts as a shallow funnel, steering water toward the lowest parts of the lid, which are the straw slot and the rim seal. That is why the first drips show up at those two points even when the rest of the dome looks clear.
What makes the puddle bigger
Four conditions increase the volume of condensate in any setup:
- A wider temperature gap between the drink and the room air
- Iced or blended drinks that keep the liquid surface very cold
- A tall headspace holding a large volume of humid air
- Cups waiting in warm, steamy conditions before pickup
Why the vent hole matters
The vent does two jobs. It gives the trapped headspace air a path to the room, so the pressure difference across the lid stays small and some of the vapor leaves instead of condensing on the plastic. And when a customer draws on the straw, air enters through the vent rather than through the slot, so condensate sitting at the slot is not pulled down the straw. Set the vent spec before you order clear plastic cups with dome lids, and far less water reaches the slot.
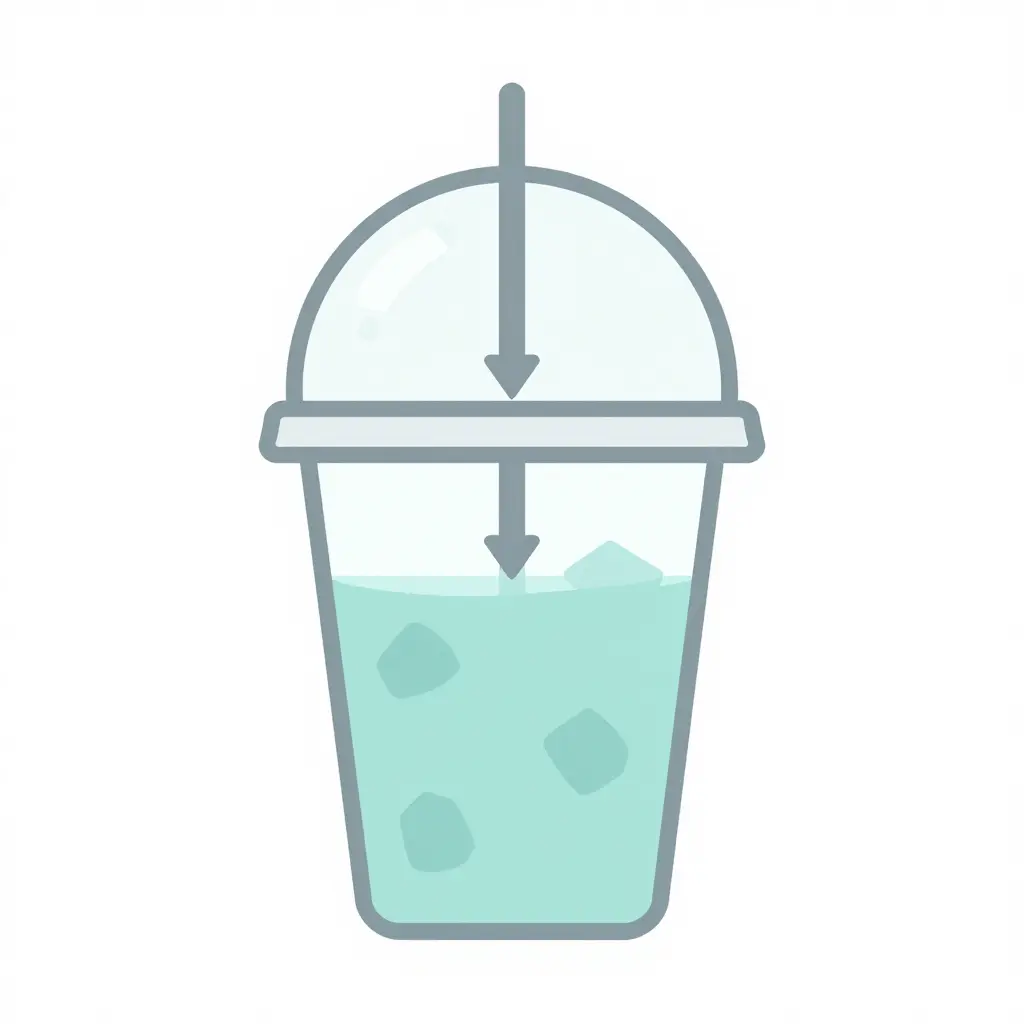
The drawing above puts the sequence in one view. Vapor leaves the cold drink, collects in the headspace, and condenses on the coolest surface it meets. Gravity does the rest: the drops bead up, slide along the curve, and most of them funnel straight through the straw slot, which is why the customer’s hand gets wet and the cup looks innocent. A correctly sized vent on the opposite side of the dome gives that trapped air somewhere to go, so condensate drains back toward the drink instead of out the top. If you are still matching lids to cup sizes, compare plastic cups for cold drinks that are already spec-matched for vented domes.
Why the Straw Slot Becomes the Drip Channel
Leave a cold drink on a counter for ten minutes and the first drop appears in the same place every time: the straw slot, not the rim and not the seal. The opening is where condensation finds its way out, and the geometry of that opening decides how fast it happens.
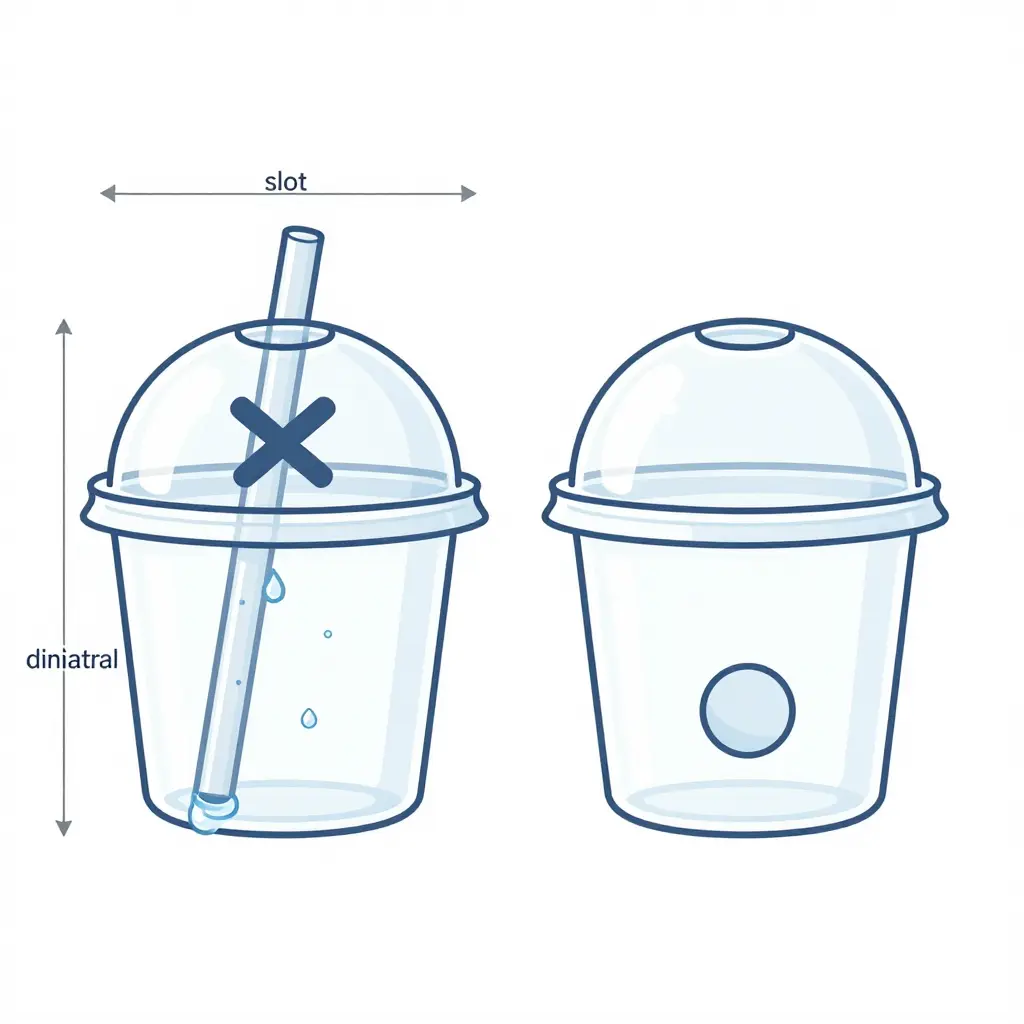
Slot width versus straw diameter: the gap is the drain
Slots are usually cut for the widest straw on the menu, not the average one. Push a 10 mm straw into a 12 mm opening and a crescent of bare plastic stays open, often 0.5 to 2 mm at its widest. That crescent is the real drip orifice. Pair the slot spec with the cup straws you actually serve, and the leftover gap shrinks toward zero.
A cross-cut slit is not a round punched hole
A round punched hole is a rigid circle with a clean lip that water beads off. A cross-cut slit is four flexible flaps that hug the straw without sealing, and the four cut tips form corners where liquid collects. The slit works like a set of pre-formed channels, so an X-cut dome releases water faster than the same lid with a punched circle.
Capillary action and surface tension along the slit edges
Water clings where two cut edges meet at an acute angle. Below roughly 0.5 mm, capillary pressure can hold a thin column of condensate in place until gravity or a vibration pulls it through. Once the underside of the lid film wets out, the slit edge stops acting as a barrier and starts acting as a siphon.
Burr and flash from the cutting tool
A dull blade leaves a burr, and hot-wire cutting can leave flash. Both pin a bead of water to the slit edge instead of letting it roll back into the dome. Ask for deburred, flash-free slots in writing, and check a sample under a light before the bulk order ships.
Lid-to-cup rim fit: a loose rim lets liquid pool
A lid that does not snap flush sits high on one side, and the slot tilts with it; that tilt matters more than most buyers expect. A loose rim also lets air move under the skirt, so condensate that would have stayed on the dome wall collects around the slot instead. Quote rim diameter with a tolerance when you order custom disposable plastic cups to match.
Slot position relative to the dome low point
Dome lids are rarely level, in the hand or on a tray. The lowest point of the dome collects the most condensate, so a slot that sits uphill of it lets water pool, wait, and then release in one annoying drip. Put the slot at or near the low point, or mold a shallow channel toward it, and the drip becomes a slide.
Geometry sets the drip path before venting gets a chance to help. That is why the vent has to be designed along with the slot rather than added at the end.
Dome Lid Vent Spec Options at a Glance
Before you lock in a dome lid spec for the next container order, here is a side-by-side reference for the common configurations. If the lid and the cup are still being paired, start from a cold-drink cup range so both are specified as one system.
| Vent configuration | Typical hole diameter | Placement on lid | Airflow and pressure behavior | Best-fit beverages | Drip and leak risk note |
|---|---|---|---|---|---|
| No vent | No hole, sealed lid | Not applicable | Suction builds, lid flexes inward | Thick shakes, ice cream, frozen desserts | Highest drip risk through the straw slot |
| Single small round vent | Approx. 1.0-1.5 mm | Offset from the straw slot | Gentle pressure relief, steady sipping flow | Hot coffee, milk tea, lattes | Low drip risk, mild condensation relief |
| Single larger round vent | Approx. 2.0-2.5 mm | Offset, away from the lid seam | Fast pressure relief, easier draw | Iced tea, cold brew, fruit smoothies | Moderate risk in tilted cups, watch thin liquids |
| Twin micro-vents, opposing each other | Approx. 1.0-1.5 mm each | Opposite sides of the lid rim | Balanced airflow, less suction lock | Bubble tea with toppings, thick drinks | Low risk, even pressure limits drips |
| Slit-style vent, offset from straw slot | Approx. 1.0 mm wide slit | Offset from the straw slot | Wide relief, fast vapor escape | Hot drinks, frothy iced drinks, cappuccino | Medium risk on hot drinks when tipped |
Vent diameter and placement have to match beverage temperature and viscosity, so spec the lid to the drink, not the drink to the lid.
Vent Spec Parameters to Confirm on Every Purchase Order
A dome lid without a defined vent spec is a promise, and promises do not survive a lunch rush. Before you sign off on custom disposable plastic cup lids, each value below should appear in the specification sheet as a number with a tolerance rather than a description. If you need a starting point for cup and lid pairings, our cold drink cup range shows the common rim diameters these vents are tooled for.
Vent quantity per lid. State a whole number, typically one or two. “One vent per lid” is acceptable only when the factory cannot add or omit the second vent at will.
Vent hole diameter in millimeters, with tolerance. Write it as a paired value, for example 1.5 mm plus or minus 0.15 mm. An untoleranced diameter drifts between molding cavities and quietly changes how much vapor escapes.
Vent shape. Choose round hole or slit, and quantify the choice. A round hole is defined by its diameter; a slit needs both length and width, such as 4.0 mm by 0.30 mm, plus a note on whether it has to stay closed at rest.
Vent position relative to the straw slot. Specify an offset angle or a center-to-center distance in millimeters, for example 90 degrees from the slot or 25 mm away. Keep the hole off the stretch of lid that drains straight into the slot: a vent sitting immediately above the straw opening turns escaping vapor into a drip that runs back down the straw.
Lid material thickness and hole integrity. Give the nominal wall thickness with its tolerance, such as 0.80 mm plus or minus 0.05 mm. Thicker walls hold a clean, round bore; thinner walls stretch or tear at the punch, and that is usually where poor anti-condensation vent performance starts.
Molded-in or pierced after forming. Declare the process explicitly. A molded-in vent holds its geometry from cavity to cavity over the life of the tool, while a post-formed pierce has to state the punch tool, the pierce timing, and the minimum distance from the pierce to any rib or slot edge.
Acceptance criteria for the finished vent. Define pass and fail: vent fully open and unobstructed, no flash or stringing, no visible stress whitening, a stated airflow rate in liters per minute at a reference pressure, and the sampling plan used to check it.
Undefined tolerances cause more drip complaints than any other single item on the sheet, so treat every blank field as a complaint waiting to be filed.
Reported Condensation Drip Rate by Vent Configuration
Before you lock in a lid spec, it helps to see the trend in one place. The chart below compares five common dome-lid vent setups by condensation-related drip complaints per 10,000 lids. Complaints fall as soon as a vent is added, and an offset slit vent comes in roughly seven times lower than a closed lid.
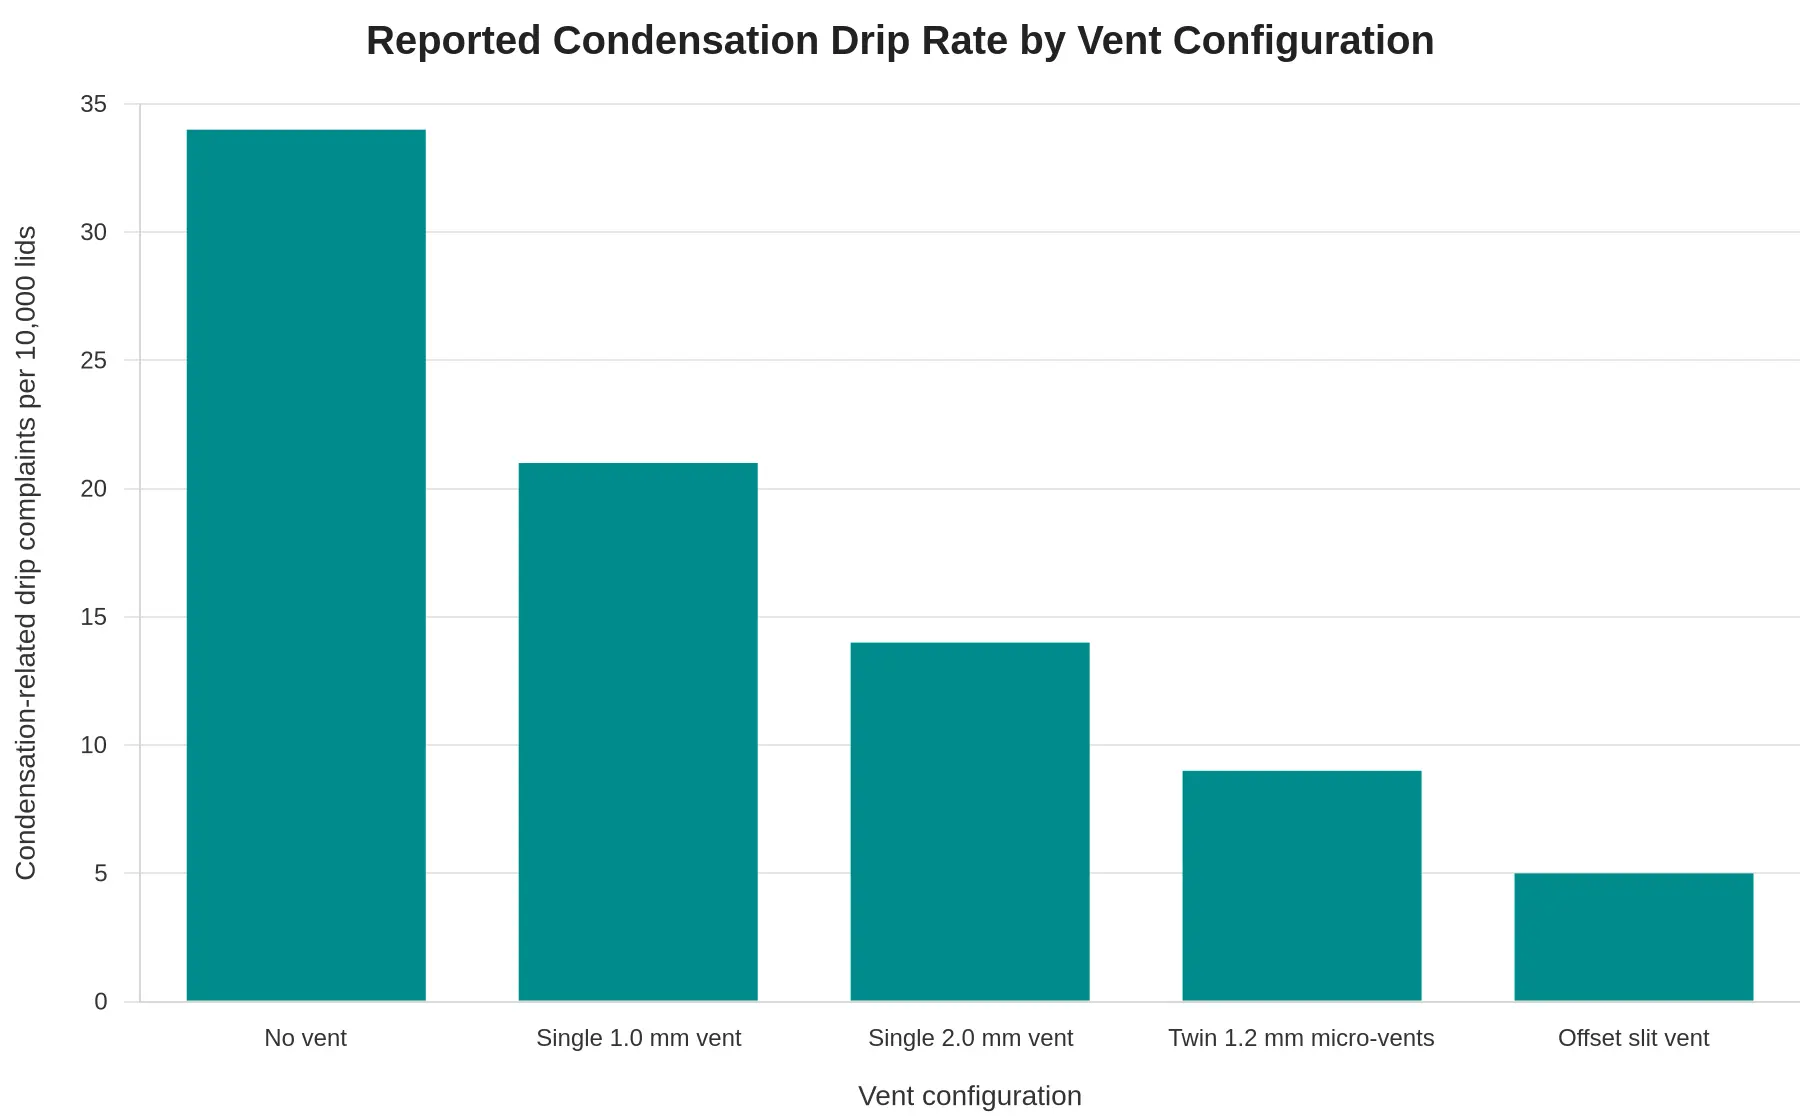
Figure: Reported condensation drip complaints per 10,000 lids by vent configuration. These values are indicative benchmarks for comparison only, not guarantees of performance. Actual results depend on drink temperature, fill level, ice ratio, ambient humidity, lid fit and handling.
What the ranking tells you
| Vent configuration | Drip complaints per 10,000 lids (indicative) | Relative to no vent |
|---|---|---|
| No vent | 34 | Baseline |
| Single 1.0 mm vent | 21 | -38% |
| Single 2.0 mm vent | 14 | -59% |
| Twin 1.2 mm micro-vents | 9 | -74% |
| Offset slit vent | 5 | -85% |
Any vent beats no vent: a closed dome traps vapor against the lid ceiling, and that water has nowhere to go but down the straw slot. Vent area matters more than vent count on its own, which is why a single 2.0 mm opening outperforms a 1.0 mm one, since the pressure difference levels out faster. At the top of the range, placement counts for more than size. The offset slit lands lowest without having the largest total opening, because it keeps the hole away from the drink line and the straw path.
Turning the chart into a purchase decision
For iced and cold drinks served in a warm room, start with twin micro-vents or an offset slit. For drinks that sweat heavily, offset the vent and size it at the upper end of the range. Pair the lid spec with a cup that holds its roundness under load, since a distorted rim lets vapor escape around the seam instead of through the vent. You can browse cold drink cups for bubble tea and smoothies to match lid geometry to cup diameter, and straws that fit the slot without widening the escape path.
One note for procurement teams: ask for the vent drawing, not just the vent description. A 2.0 mm nominal hole can arrive at 1.6 mm after mold wear, and that difference shows up in complaints long before it shows up on a spec sheet.
Vent Spec Checklist to Set Before Ordering
Before you approve a purchase order, turn the technical back-and-forth into eight decisions your supplier can quote, sample, and repeat.
- Fix the lid diameter and cup volume first. Lock the exact rim diameter, cup capacity, and fill line in millimeters and milliliters before anything else, because vent geometry only makes sense once the lid interface is fixed.
- Match vent diameter to the coldest beverage you serve. Size the hole for your lowest-temperature, highest-condensation drink. Iced blended tea and slush-style drinks need a wider opening than a simple iced Americano.
- Specify the vent offset distance from the straw slot. Give a measured center-to-center distance so pressure releases away from the straw instead of running down it.
- Define the tolerance band and inspection method. State an acceptable range, for example ±0.2 mm on hole diameter, and say how it will be checked: pin gauge, optical measurement, or visual AQL sampling.
- Request a sample lot for a 24-hour chilled storage check. Ask for production-representative samples, fill them with your actual beverage, and hold them chilled for a full day before judging drip performance.
- Confirm the vent does not interfere with straw insertion. Test your real straw calibers, including wide bubble tea straws, to make sure the vent does not weaken the lid or block the slot.
- Confirm compatibility with cup sleeves and cup carriers. Check that the vent position still clears corrugated sleeves, ripple grips, and multi-cup carrier bases during stacking and delivery.
- Lock the spec into the repeat-order document. Write the final dimensions, tolerances, material grade, and sample approval reference into your purchase agreement so every reorder matches the approved sample exactly.
With all eight signed off, the vent spec stops being a conversation and becomes a repeatable order. Browse our plastic cups for cold drinks range to shortlist lids and cups to test together.
Vent Specs Matched to Each Beverage Category
Bubble tea and toppings-heavy drinks. Set vent hole diameter at 2.0 to 2.5 mm and place a single vent on the shoulder of the dome, offset from the straw slot and clear of the topping zone. If pudding, jelly, or cheese foam regularly sits above the liquid line, add a second 2.0 mm vent on the opposite shoulder. Cold, viscous bases plus dense toppings hold air and build pressure in the headspace, and that pressure is what pushes condensate out through the slot, so the vent needs room to release before a straw pierces the lid. Compare straws sized to match your lid openings before the spec is locked.
Iced coffee and milk-based drinks. A 1.0 to 1.5 mm vent set near the rim, roughly 10 mm from the straw slot, suits thin iced Americanos and cold brews, while milk-based builds with cream or oat milk hold up better at 2.0 mm. Keep that opening on the high side of the lid so the air pocket, not the drink, sits underneath it. Very cold, low-viscosity liquids condense quickly and splash easily, so a small, well-placed hole equalizes pressure without carving out a direct path for drips. Blended and smoothie-type drinks need more room: 2.0 to 2.5 mm, or two 1.5 mm vents on opposite shoulders of the dome, placed on the widest flat area rather than the center peak. Thick, aerated blends hold air and often leave the blender slightly warm, so a larger opening lets expanding foam vent sideways instead of pushing liquid up through the slot.
Juice and fountain drinks. For still juices, lemonades, and iced teas, a 1.0 to 1.5 mm vent at the rim edge opposite the slot is enough, and carbonated fountain drinks should stay at the tight end of that range so CO2 vents gradually without flattening the serve. Position it above the liquid line and never on the lid’s lowest slope. These drinks are thin and served over ice, so they sweat heavily and shift quickly in transit, and reviewing cup carriers and holders for multi-drink orders is a practical follow-up to getting the vent right.
Above roughly 3 mm a hole stops behaving as a vent and starts behaving as a drinking hole, which is why the ranges here stay small. Wider openings belong on thick builds where the contents will not pour, and even then they cost you heat and carbonation.
Match vent diameter to viscosity and temperature, wider for thick and foamy builds, tighter for thin and carbonated ones, and always offset the vent from the straw slot so pressure escapes there instead of through the drink.
Where the Vent Should Sit Relative to the Straw Slot
Agree on position before you finalize the spec. The top view below marks the three zones to put on every dome lid drawing: the straw slot, the hatched arc where the vent belongs, offset from the slot and never over it, and a crossed-out patch on the centerline directly opposite the slot. Supplier conventions differ on that last zone. Some factories vent opposite the slot, others offset to one side, and both work provided the hole stays at least 20 mm from the slot and sits on the shoulder rather than the low slope of the dome.
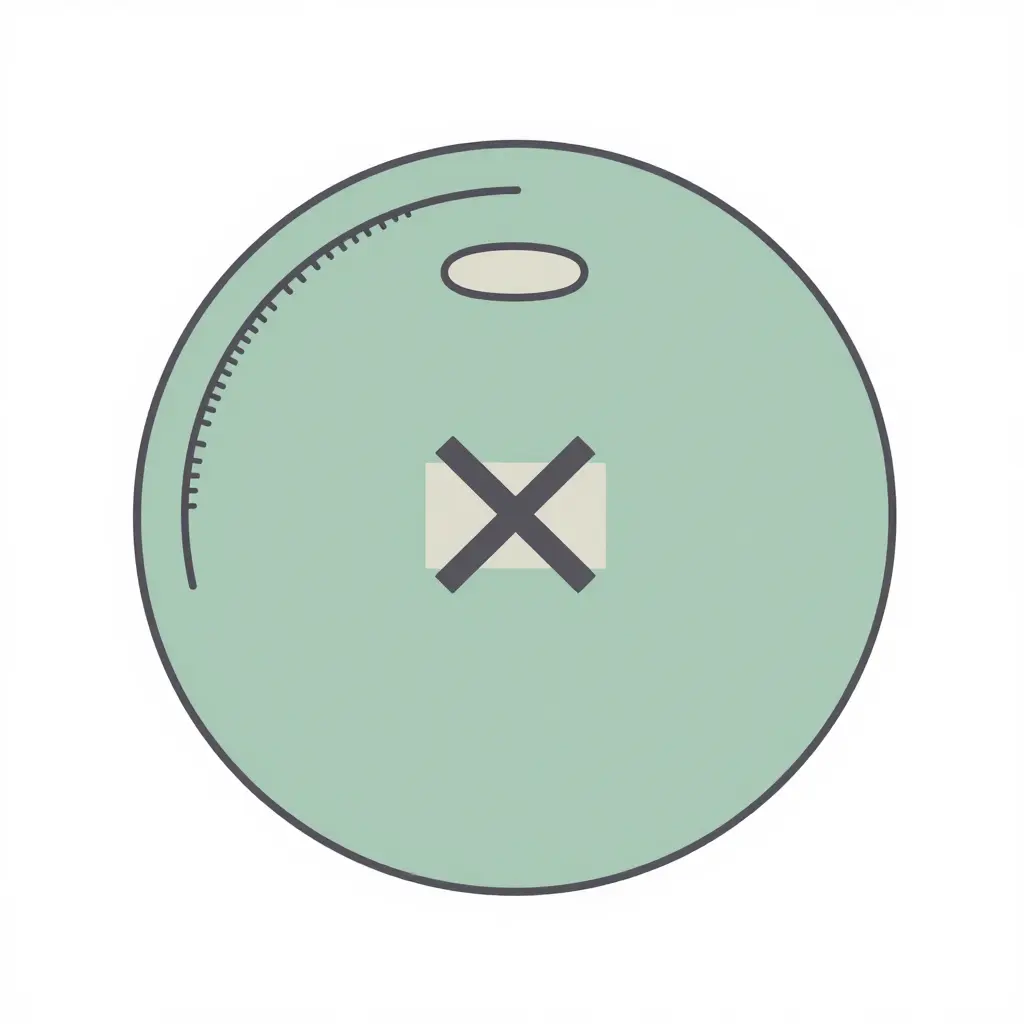
Use it as a talking point with your supplier: hand over the diagram with your slot dimensions and vent diameter, and confirm the angle between slot and vent in the same message. Pairing lids with the right cup straws helps too, since a slightly slimmer straw leaves more room in the slot for air exchange, a small detail that measurably reduces drips during transport.
Beyond Venting: Lid Grade, Fit Tolerance, and the Packaging That Protects Both
Material grade and clarity do more work than most buyers expect. A food-grade PET or PP dome lid with consistent resin quality holds its shape under cold fill, stays optically clear so customers can see the drink, and resists the stress whitening that appears when a brittle lid is snapped on and off. Cup wall rigidity matters just as much. A thin wall flexes when a hand grips it, that squeeze pumps air and condensate upward, and the moisture finds the exit of least resistance at the straw slot. Thicker walls, a firm rolled rim, and a well-supported bottom keep the headspace stable so droplets run back down instead of out.
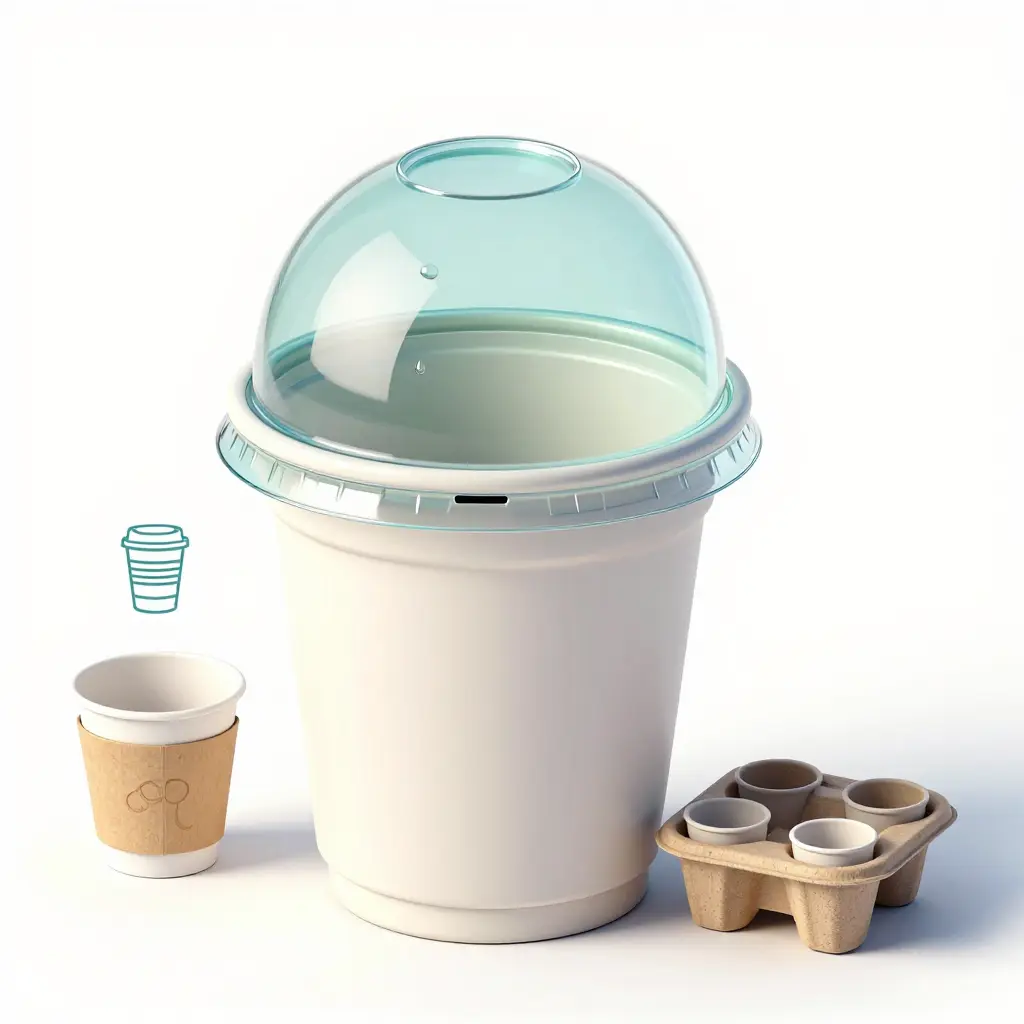
Dome lid fit tolerance is the variable that gets overlooked. A skirt that is too loose allows micro-movement, and capillary action pulls liquid into the rim channel where it eventually drips. A skirt that is too tight fights the operator, cracks at the rim, and lets lids pop or dome upward. Specify a tolerance band rather than a single number, and confirm it against your actual cup rim diameter. Straw slot reinforcement follows the same logic: a thicker boss or ribbed zone around the opening stops the slot from tearing when a straw goes in at an angle, and an intact slot is a sealed slot.
In transit, the packaging around the cup becomes part of the seal. Rigid kraft cup sleeves and cup carriers add a second barrier against hand warmth and grip pressure while keeping cups upright, so condensate stays pooled at the lid’s perimeter instead of tilting toward the straw opening, and handling-related spills drop noticeably on multi-drink orders. Buyers moving away from plastic can look at a bamboo pulp range that offers a familiar hand feel with a different material story. The supplier’s lines are built around food-contact safety, durability testing, and eco-friendly material options, from disposable plastic cups to paper formats. Either way, vent specification and fit tolerance are complementary controls: the vent manages pressure, the fit keeps moisture where it belongs, and neither works well alone.
FAQ: Straw Slot Drips and Vent Specs
These are the five questions buyers ask us most often before signing off on a lid and cup spec.
Why does condensation drip through the straw slot rather than elsewhere on the lid?
In an unvented lid the straw slot is the only opening, so it becomes the path of least resistance for pooled moisture. Vapor rises, hits the cooler underside of the dome, condenses into droplets, and those droplets run down the slope to the nearest gap, which is the slot. That is why custom disposable plastic cups with domed lids drip at the slot first, while flat lids collect water in the rim channel instead.
Can adding a vent make the drink go flat or lose temperature too quickly?
Not if the vent is sized correctly. A pinhole vent of 1.5 mm or less restricts gas exchange enough that carbonation typically holds through a 20 to 30 minute consumption window, and heat loss through an opening that small is negligible next to the heat leaving through the lid surface itself. A vent of 3 mm or more is a drinking hole, and that is what actually causes flat drinks and fast cooling.
What vent diameter should I specify for chilled versus hot-fill applications?
For chilled drinks, specify 1.0 to 1.5 mm. It releases vapor and light pressure without splashing the customer. For hot-fill, go to 2.0 to 3.0 mm or a cross-slit vent, because a vent under 2 mm can load up with foam or condensate on a 90 °C fill and let pressure build until the lid lifts. Always confirm the final number against your cup’s rim diameter before the tooling is cut.
Are vents compatible with domed lids used on paper cups?
Yes. Vented domes are produced in both PP and PET and are molded to standard 90 mm and 98 mm paper cup rims. The vent sits on the dome shoulder, so it stays clear of the straw slot and the lid’s locking ring, and no lid redesign is needed.
How do I test a sample lot before a bulk order?
Run a 24-hour bench test. Fill 20 cups with your hottest and coldest menu items, lid them, and hold half at room temperature and half at 4 °C. Check every 15 minutes for the first hour, then hourly, watching for drips at the straw slot, lid lift, and pooling. At the end, tilt each cup 30 degrees to simulate carrying and cup-holder transport. Approve the lot only when no drips reach the cup wall and every lid stays fully seated.
Closing Recommendation and Order Summary
Condensation reaches the straw slot by a path you can predict: vapor rises inside the dome, cools against the lid, beads into droplets, and runs down the inner surface until it finds the opening. Because that route repeats with every cold fill, the fix repeats too. A defined vent specification, with an offset placement and a stated tolerance range, keeps the drip from forming where your customers drink. It is a small design decision, and it is the one that separates a clean lid from a wet sleeve.
Work through the order in one sequence: define your beverage range, choose the vent diameter, set the offset, set the tolerance, and validate with a sample lot. On custom disposable plastic cups with dome lids, the supplier supports buyers through spec consultation before the build, sample validation so the vent behaves as specified in real service conditions, and after-sales support once the order ships, all while keeping safety, durability, and eco-friendly practices in view. If your serve style pairs lids with straws and sipping accessories or disposable stirrers, review those alongside the cup spec.
Before you commit to a production run, confirm your vent spec with the team. Bring your beverage range, your expected fill temperature, and your tolerance needs, and the specification can be locked down in writing.