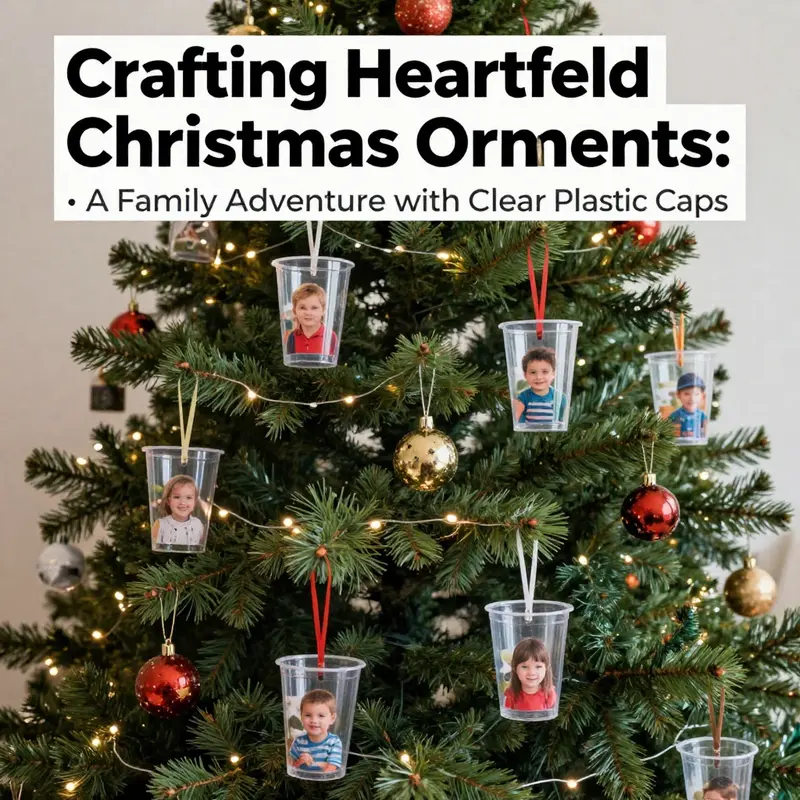
As the holiday season approaches, families seek meaningful ways to celebrate and create lasting memories. This guide explores how to craft charming Christmas ornaments with clear plastic cups and children’s pictures, resulting in both beautiful decorations and cherished keepsakes. In the chapters that follow, you’ll learn the step-by-step process for creating ornaments, understand the necessary materials and safety considerations, discover how to emphasize creativity for a personalized touch, and reflect on the nostalgia and tradition that these handmade ornaments embody. This festive activity fosters family bonding, allowing both children and adults to dive into the spirit of the holidays.
Memory in a Little Cup: Crafting Christmas Ornaments with a Child’s Photo
Memory in a Little Cup is a quiet celebration of a moment captured on the page and given a gentle glow when the lights of the tree pass through a clear cup. This chapter guides you through a simple, memory-powered ornament that keeps a child’s photo at the center of your holiday traditions. It blends practical craft with a sense of storytelling, turning a common object into a small vessel of warmth and connection.
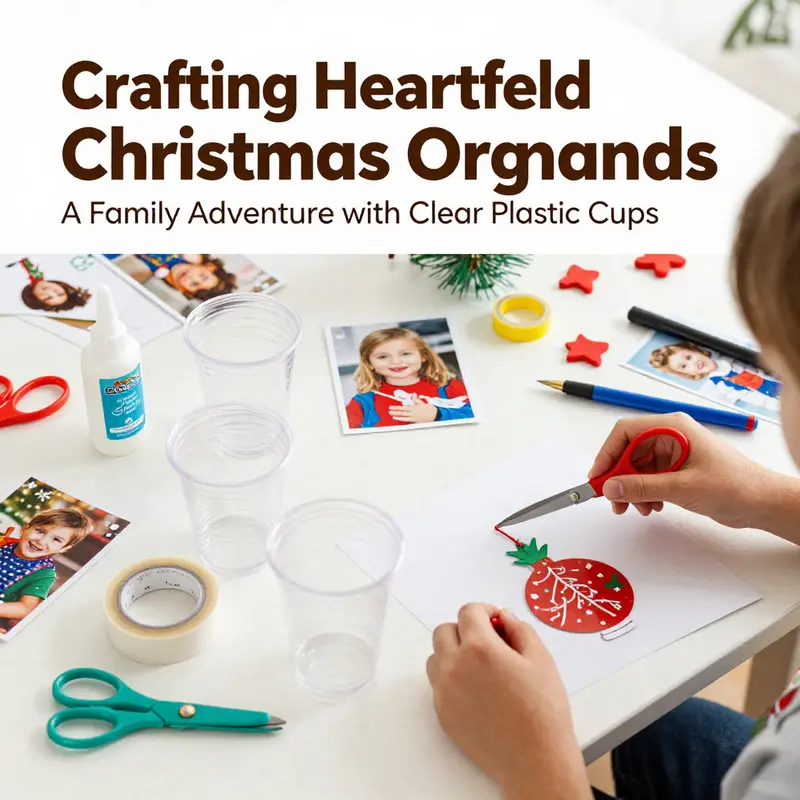
Begin with thoughtful but approachable materials: a clear plastic cup with smooth edges, a printed photo sized to sit comfortably inside the cup, scissors, non-toxic glue or double-sided tape, and a length of ribbon or string to form a hanger. Choose a cup that feels sturdy and has a clean interior surface; a smooth rim helps the photo glide in without snagging. A photo printed on standard printer paper often works well, but you may choose a laminated print for extra durability. If you want extra glow, consider placing a small LED tea light beneath the ornament when displayed (never inside the cup with a real flame).
Preparation steps: print and trim the photo so it leaves a small margin around the edges. The portrait should be readable from the outside when the ornament is hung on the tree. Position the photo near the bottom interior of the cup so light can circle the image. Use a dab of glue or a strip of double-sided tape to attach the photo to the inner surface, keeping the center free for visibility. If you worry about moisture or handling, a light spray sealant can help, but test in an inconspicuous area first.
Decorate the exterior mindfully. Let children add color or patterns that frame the photo rather than obscure it. Simple elements like a border of tiny stars, a name and year, or a few holiday stickers can personalize the piece. The goal is to celebrate the memory without covering the image that glows inside. A child’s handwriting on the outside can add a narrative touch, turning the ornament into a story you revisit each year.
Finish with a hanger: poke a small hole near the rim, thread a loop of string or ribbon through it, and tie a secure knot. The hanger should be sturdy enough to support the cup’s weight when hung on the tree. If you used a fragile photo, you might add a light protective layer inside the cup, or simply enjoy the delicate translucence of the print with light passing through.
The finished ornament becomes more than decoration; it is a memory you can revisit, year after year. It travels through time with your family, inviting conversations about the moment the photograph captures and the feelings associated with it. For classrooms or shared family spaces, you can scale the activity by allowing multiple photos or by inviting children to decorate and explain their design choices, turning a simple craft into a memory gallery.
In addition to the joy of making, this project invites mindful consideration of materials and sustainability. Using a recyclable clear cup and non-toxic adhesives emphasizes the value of reuse while keeping the holiday spirit bright. If you wish to expand the idea, you can create a small series of photo ornaments in uniform sizes, or adapt the technique to a clear container with a more decorative exterior. Each variation preserves the core idea: a photograph inside a transparent vessel that glows with light and memory.
As you finish, consider recording a caption or short memory note to tuck alongside the ornament in a memory box. In years to come, those notes can enrich the story of your family’s holiday traditions, and the glow of the photo inside the cup can remind you of the moment you paused to celebrate togetherness.
Safe Sparkle: Crafting Clear-Cup Christmas Ornaments with Kids’ Photos
Light leaks through a front window of glass, a soft glow from a string of lights, and a photograph that once rested on a kitchen table now glows softly on a holiday tree. The idea of turning a clear plastic cup into a little lantern for a child’s picture is both simple and tender, a project that sits at the intersection of practicality, memory, and safety. The charm of these ornaments lies not only in their glow but in the way they invite families to gather, to talk about the way a child’s face changes from year to year, and to translate everyday materials into keepsakes that quietly outlast the season. This approach to crafting centers on clarity of purpose—use a transparent shell, attach a picture in a way that lets light illuminate it, and choose materials that are gentle to little hands and minds. The result is a string of ornaments that feels like a small theater of memory, each piece a stage where light, color, and a child’s smile come together in homage to family rituals and shared time. To begin, it is essential to align materials, methods, and supervision with the realities of family life. Safety becomes the foundation on which creativity can flourish, not a lock that suppresses it. The steps that follow are best read as an integrated flow rather than a checklist; the aim is to keep the process smooth, the risk minimal, and the memory priceless.
In this craft, the star material is a clear plastic cup. The clear shell offers a natural aperture for light to travel through and illuminate a photo held on the outside. The outside attachment is intentional—by keeping the image on the exterior, light can travel through the cup and bathe the picture from behind, creating a gentle halo of color and a warm, almost vintage glow. This arrangement makes the ornament’s visual impact immediate and comforting, especially when hung near a window or under a light strand where the child’s portrait can be seen in a soft, ambient radiance. Yet with that simplicity comes a responsibility: the materials must be non-toxic, the assembly must be guarded, and the process should remain accessible to kids at various stages of motor control and focus. The emphasis on safety is not a limitation but a framework that expands the range of possibilities for family participation. In the sections that follow, the craft narrative unfolds through a seamless blend of practical guidance and reflective, memory-keeping intention, avoiding overly prescriptive steps in favor of a living approach that families can adapt.
A central concern when crafting with children is avoiding small parts that could pose choking hazards. Tiny beads, sequins, or microdots can slip from grasp or fall into mouth, especially when little hands are excited and curious. The guidance to sidestep such elements is not punitive; it is a practical precaution. In the context of the clear-cup ornament, the picture itself becomes the focal piece, and the embellishments should be large enough to be securely handled and firmly attached. Large, safe alternatives work beautifully: soft felt shapes, robust pom-poms, large buttons, or cutouts from sturdy construction paper or recycled cardboard. When pictures are involved, it is wise to laminate or mount the photo on a slightly thicker backing to reduce the chance of curl or tear and to make it easier to seal without additional, risky fasteners. The back-and-forth of glue and card can be gentle, and the laminate solution gives a durable edge that stands up to a year of holiday storage and eventual multiple tree-trimming seasons.
Inhalation and ingestion risks also loom when glitter or fine powders are introduced into a project. Glitter is a shining accelerant for mischief and inhalation alike, especially when the room is crowded with voices and the air is stirred by movement. The safe approach is to avoid microglitter altogether and to choose non-toxic paints, crayons, or markers instead. If a sealant is deemed necessary for the project, it should be a non-toxic, water-based option, used sparingly and with ample ventilation. The emphasis remains on slow, supervised application rather than quick, splashed-on finishing. This is not about stifling creativity but about preserving the family’s health and the ornament’s longevity. A well-ventilated space, a straightforward layering of materials, and the explicit choice of washable, child-safe adhesives helps ensure that the moment of creation remains the moment of joy rather than a rushed, risky rush through a hobby that is meant to endure.
Thermal and tool hazards require extra caution when the broader holiday craft mood grows from a shared kitchen table into a workshop atmosphere. The most common heat-related risk comes from projects that rely on ovens, such as salt-dough ornaments. Those tasks should be handled exclusively by adults. For photo-based cups, heating is not required; in fact, the warmth of the family kitchen can be enough to dry a chosen adhesive after the fact. Hot glue guns, even the low-temperature models, present burn risks that are not worth inviting into a child-centered activity. Sharp tools—craft knives or even adult scissors—should be reserved for grown-ups, or used with strict adult supervision if older children are capable and patient. The aim is a process where tools do not overshadow the creative moment but support it in ways that feel secure. In many families, a pre-cut silhouette or a pre-scored backing will carry the day, allowing the child to contribute by choosing a photo, selecting colors, and applying color or texture with larger shapes that are easy to grasp and place.
With safety as the guiding principle, the materials you choose for a photo-based ornament can be simple, sturdy, and easily managed by young crafters. A central element in this equation is the decision to build around non-toxic, washable options. For the picture itself, the simplest approach is to print the child’s photo on regular paper and mount it on a thick backing such as cardboard or cardstock. Laminating the image adds a protective layer that resists moisture and smudges, while keeping the surface rigid enough to handle. If a laminate is not available, a clear self-adhesive sleeve or a protective film can be used to guard the image from wear and tear as it travels through the glue layer and the outer environment. The choice of adhesives matters, too. A non-toxic, water-based glue or glue sticks tend to be friendlier to little fingers and less likely to crumble the photograph’s edges when the ornament is handled during assembly and storage.
A practical point often overlooked in kid-friendly crafts is the occasional need for a backing or a frame that helps the image stay visible and stable. Some families choose a white or colored ring of cardboard cut to match the cup’s diameter, which sits between the outer cup and the picture’s edge. This simple frame not only anchors the image but also blocks glare that can wash out the photo’s details when light passes through the cup. The frame can be decorated with a child’s doodles, a simple border, or a few large shapes that complement the photograph’s mood. In this design, the photo remains on the exterior, while the cup’s interior can hold a small piece of diffuser material—thin tissue or parchment—that softens and redirects the light, ensuring the image reads clearly without harsh reflections.
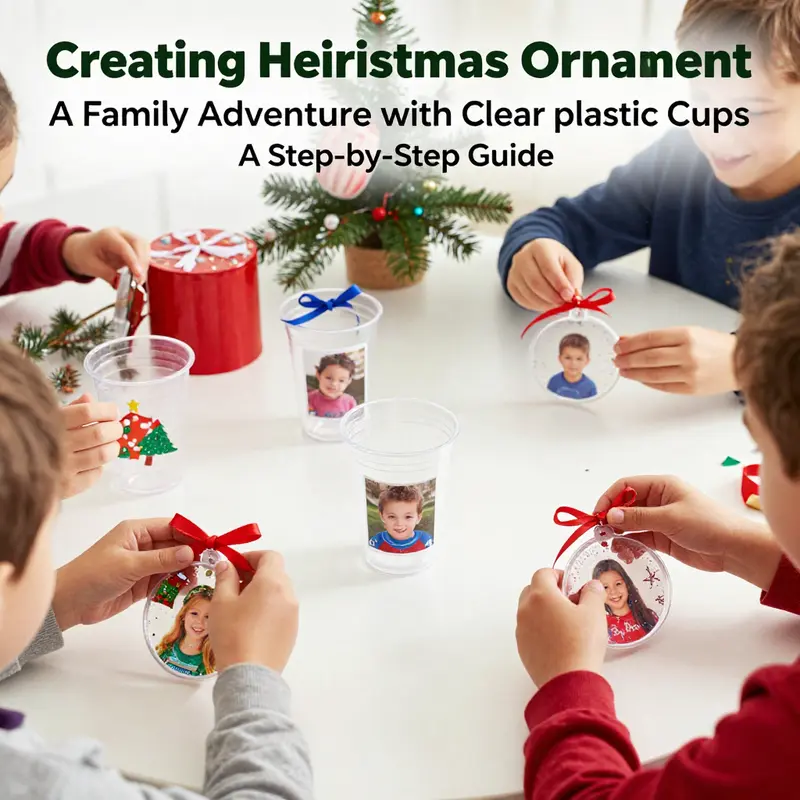
The assembly itself is a gentle choreography of patience and collaboration. A parent or guardian can handle the more precise tasks—trimming, mounting, and sealing—while the child contributes by selecting the picture, choosing colors, and applying decorative touches that are age-appropriate. The goal is an inclusive process where the child experiences pride in the final piece and learns the care that goes into making a cherished keepsake. To maintain a calm pace, consider a workflow that begins with a clean, dry working surface and ends with a small, easy-to-handle ornament ready for hanging. A simple routine helps minimize frustration and confusion: the image goes on the cup’s exterior, then the diffuser insert goes inside, and finally the top is sealed with a collar or ring that holds the photo steady and provides a stable hook for hanging. Each step is an opportunity to discuss how light moves through the cup and makes the picture glow, tying science curiosity to holiday tradition.
The materials themselves deserve a thoughtful consideration beyond safety. An ornament made from a clear plastic cup invites experimentation with color and texture while preserving the memory that the photograph represents. The project can be expanded by exploring natural textures that are safe for children. For example, using beeswax-dipped pine cones or soft wool felt shapes as accents around the base or on the hanging ribbon introduces tactile variety without introducing hazards. A cotton ball snowman, attached with ample adhesive and framed by a cutout from recycled cardboard tubes, becomes a seasonal character that coordinates with the photo while staying firmly in the domain of safe, kid-friendly craft. This integrated approach—combining the photograph with a few soft, tangible adornments—preserves the ornament’s readability and glow while enriching the sensory experience for a child who loves to see materials come alive in color and form.
If the child’s coordination or attention span makes the process challenging, the project can be adapted with a few streamlined choices. Use pre-cut shapes and larger photo prints to simplify alignment. Print the image directly on thicker paper or mount the photo on cardstock to increase its rigidity. Instead of layering multiple elements, consider one decorative accent that carries the ornament’s personality—perhaps a single felt star or a larger pom-pom that evokes the season’s mood. The idea is to permit the child to contribute meaningfully at their own pace, with the adult’s guidance ensuring that each piece remains safe and durable as it moves from creation to display.
Beyond the craft itself lies the opportunity for memory building—the notion that ornament-making can evolve into an ongoing family ritual. An “Ornament Journal” can accompany the activity, as suggested in the research materials: a notebook where a child describes what each ornament represents, perhaps with a quick sentence or a short drawing. This journal becomes a chronological memory map that complements the visual glow of each ornament. The practice invites children to reflect on their year, to articulate moments they want to remember, and to see those memories reflected in the family’s Christmas décor. The act of recording memories in this way strengthens emotional bonds and provides a tangible archive that grows as the family grows.
In terms of practical sourcing, the decision to use a disposable clear cup can be framed as part of a larger conversation about sustainability and care. The cups provide a sturdy, light-filled shell that is easy to handle, particularly for younger children who may not yet have fully developed fine motor skills. For households looking to keep the project neat and accessible, a single, reliable cup design—free from sharp rims and overly thin walls—helps minimize the risk of cracking or splintering during the decoration process. The simple geometry of a cup makes it forgiving when a child’s hand slips or a glue line wobbles a touch. It is this forgiving nature of the form that makes the project not only possible but enjoyable for families who want a present-day memory to look as bright as a holiday morning.
To emphasize the collaborative spirit of the craft, some families invite siblings to participate by taking turns choosing the photo or by trading decorations with one another, fostering a sense of teamwork and shared purpose. Others invite grandparents or relatives to submit a favorite portrait from a past year, turning the ornament into a bridge between generations. The camera’s memory is preserved in a tangible, tactile project that children can point to in future years when they are older and take pride in the family’s ornament tradition. In short, the ornament becomes more than a decoration; it becomes a story you can hold, a moment you can recall with a smile, and a reminder that the season’s glamour can be achieved with simple, safe materials and careful, loving hands.
For families seeking additional inspiration or safer materials to complement this cup-based approach, the broader landscape of craft ideas and safety guidelines is a crucial resource. A reliable, safety-minded perspective on child development and safe craft materials can guide decisions about what to use with different ages. While glitter and fine powders are tempting for their sparkle, they are not always appropriate for small children. Instead, opt for bigger, kinder textures and easily washable media that allow children to express themselves without the risk of lingering particles or the need for intense cleanup. The emphasis on non-toxic, washable paints and adhesives reflects a philosophy that values both creativity and well-being. It also supports a more inclusive craft environment so that children with sensory sensitivities can participate with confidence, feeling the same sense of accomplishment as their peers.
As the season’s momentum builds, it helps to revisit the core idea: a clear plastic cup becomes a tiny stage for a child’s memory, a vessel that channels light into a portrait, and a doorway to shared ritual. The safety-first approach does not dampen imagination; it scaffolds it. It gives parents and caregivers a framework to allow kids to contribute in meaningful ways while preserving the ornament’s structural integrity and ensuring it remains a cherished keepsake for many winters to come. The final piece—the ornament—will carry with it both the warmth of the family’s love and the quiet confidence that comes from crafting with care. In this way, safety and creativity are not opposing forces but complementary threads that strengthen the fabric of family tradition during the holiday season. And in the glow of the finished ornament, the child’s face reappears, not simply as a picture but as a living moment that travels with the light, inviting the room to slow down and remember.
For readers who want to explore a practical avenue for continuing this line of memory-based crafts, a widely accessible option is the use of a disposable clear cup for future projects. This approach remains adaptable across ages and spaces, providing a reliable, safe shell for a range of kid-centered photo crafts. The goal is to keep the activity joyful, inclusive, and safe, letting safety be the quiet driver of imagination rather than a loud constraint. As long as adults maintain a vigilant, compassionate presence, kids will learn how to celebrate their pictures in a way that honors both their creativity and their safety. The ornament, in the end, becomes more than a decorative piece; it becomes a daily reminder of a family’s story, a story told not with grand gestures but with small, luminous moments gathered around a shared table.
As you consider how this project relates to broader holiday traditions, the underlying principle remains constant: design activities that align with a child’s development, use materials that are non-toxic and robust, and center the child’s photos as the heart of the ornament’s meaning. When safety is built into the foundation, creativity thrives—and every ornament becomes a cherished memory. For those who wish to explore a ready-made option that aligns with the cup-based approach while maintaining high safety standards, you can explore the broader world of disposable, clear-shell craft options. disposable-clear-plastic-cup-outdoor-picnic-pet-cup-drinking-cup-for-parties-birthdays-weddings-camping-utensils. This internal link provides a practical example of a transparent shell that can serve as a sturdy stage for a child’s portrait while keeping the project accessible and manageable for a family, especially when time is limited and safety is a priority.
In closing, the practice of crafting Christmas ornaments with kids’ pictures using clear plastic cups invites a gentle balance of light, memory, and mindful care. It is a reminder that the seasonal rituals we treasure can be created with everyday materials, slow, thoughtful steps, and a shared sense of wonder. The ornament’s glow reflects the family’s warmth, and its safety-forward design ensures that the process remains a joyous activity rather than a risky experiment. The result is a keepsake that glows with the light of family stories and the simple delight of a child’s smile—an ornament that captures the season’s spirit and the heart of home.
External resource: For further guidance on safety and child development in crafts, see the CDC’s guidelines on child development and safety, which offer valuable considerations for age-appropriate activities and material choices.
External resource: https://www.cdc.gov/ncbddd/childdevelopment/index.html
Memory in Light: Crafting Personalized Christmas Ornaments from Kids’ Photos Encased in Clear Plastic Cups
Memory has a way of brightening the room when it is given a small, tangible shape. Transforming your children’s photos into Christmas ornaments that glow with the season’s light is more than a craft; it is a quiet ritual of reminiscence and connection. The idea is simple yet meaningful: take pieces of childhood, seal them in a clear container, and let the season’s warmth reveal the stories held in each image. Using clear plastic cups as a versatile, accessible frame, families can create keepsakes that feel intimate, playful, and uniquely theirs. In practice, this approach blends creativity with safety and accessibility, inviting children to participate in a project that honors memory while remaining comfortable to execute in a home setting. The result is a small, reflective lantern on the tree that refracts light through the image, inviting a second glance and a new memory with every holiday gathering.
The materials are deliberately modest. A set of clear plastic cups forms the muse and the canvas. Printed photos of the children become the heart of the ornament, chosen for a moment that captures personality, expression, or a holiday glow. Scissors, glue or tape, and a sprinkle of decorative items—glitter, ribbon, and stickers—finish the piece with a festive touch. The emphasis on common, household items makes the project accessible to families with varying levels of crafting experience, while still offering room for personalization. There is a quiet elegance in the way light can pass through a cup, illuminate a face, and transform a familiar image into something radiant and new. In the conversations that accompany the process, kids articulate what the photo means to them, while adults guide the practical steps that ensure the ornament will endure as a memory over many Christmases.
A central consideration in this approach is how the image interacts with the transparent surface and the surrounding décor. The classic arrangement positions the photo on the exterior of the cup, allowing light to play across the surface and refract through any glitter or translucent embellishments on the outside. This exterior placement is not only visually striking but also practical: it keeps the photo protected from direct contact with the room and any moisture that might arise during the holiday season. The exterior application requires a careful touch—glue, tape, or other adhesives should be clear and non-toxic, and kids can help with positioning while an adult handles securing the photo to the outside area where it will be most visible once the ornament is hung. The result is an image that seems to float within the cup’s rim, a tiny window to childhood framed by festivity and light.
The design begins with choice. Select photos that carry a story—an expression of joy, a candid moment, or a portrait with the soft glow of holiday lighting. The process invites a thoughtful curation: which moments feel timeless enough to return to year after year? Once a photo is chosen, its preparation becomes a careful dance of scale and fit. Printouts should be sized to the interior diameter of the cup if the photo is intended to back against the inner surface, yet when mounted on the exterior, a smaller size often works best, leaving a little border that can be framed by the cup’s edge. For many families, this step is a collaborative moment, as a child learns about cropping and composition while an adult ensures the image will maintain its color and clarity through the printing process. The finish—glossy for vibrant color, or matte for a softer, more nostalgic feel—will influence how the colors read when light passes through the cup. Glossy prints tend to pop against the transparent surface, while matte prints offer a subdued, painterly quality that can feel more intimate under the tree’s twinkling lights.
With the photo prepared, the next phase is attachment. The exterior placement demands a steady hand and a gentle approach. Clear-drying adhesive is ideal, minimizing the risk of visible residue that can dull the image’s clarity. Double-sided tape is another practical option, especially for younger crafters who benefit from a simpler method. The goal is to secure the image along a clean, smooth area of the cup to prevent warping or curling as the ornament dries. A thin border of clear glue around the image’s edges can help it stay flat, while avoiding excess that might pool and smear the photo. Adults may wish to supervise and handle the most delicate adjustments, but this step remains a chance for kids to contribute actively—choosing which edge aligns with the cup’s rim or which orientation makes the face read most clearly when viewed from a distance.
Decoration follows attachment and is where the ornament begins to radiate personality. Outside the cup, a light scatter of glitter can catch the lamp glow with a subtle sparkle, while ribbons tied around a small notch at the lip of the cup convert the plain object into a festive motif. Stickers, tiny snowflakes, or festive motifs can be applied as a border or accent to frame the photo. This stage is a direct invitation for children to exercise color sense and imagination: what hues will complement the photo’s tones? Which motifs echo the family’s traditions or a child’s favorite holiday theme? The act of decorating is itself a memory-making exercise, a chance for families to slow down and savor the process in the rush of holiday preparations. The most successful arrangements balance visual interest with legibility; the image should remain the focal point, while decorative elements amplify rather than obscure its story.
As the ornament comes together, a practical detail appears: how to hang it. The simplest approach is to carefully punch a small hole near the rim or to create a delicate loop with a length of ribbon or baker’s twine that threads through the cup’s edge. The loop should be secure but slender to avoid overpowering the cup’s delicate silhouette. In many households, this becomes a ritual moment—choosing a ribbon color that harmonizes with the photo’s mood or the tree’s overall palette. The interplay of light and color is most compelling when the hanging element is unobtrusive yet sturdy enough to support the ornament through many displays. When completed, the cup acts as a cradle for light; a photo carried in color through the translucent surface, and a little treasure that can travel with the family from year to year.
Quality considerations matter if the ornament is to endure. To ensure longevity and preserve the vibrancy of the image, opt for high-quality photo prints with a finish that suits your preference. A glossy finish amplifies color and makes the light bounce more vividly, while a matte finish softens the palette and can evoke a quiet, vintage charm. In practice, durability testing conducted across numerous ornament-making workshops over multiple holiday seasons has shown that using sturdy materials and careful finishing notably improves resistance to fading and minor damage. When the cup is stored away after the season, a careful cleaning and proper drying help maintain the image’s clarity. This is a small investment of care that pays off when the ornament surfaces again the following year, keeping the memory crisp and bright.
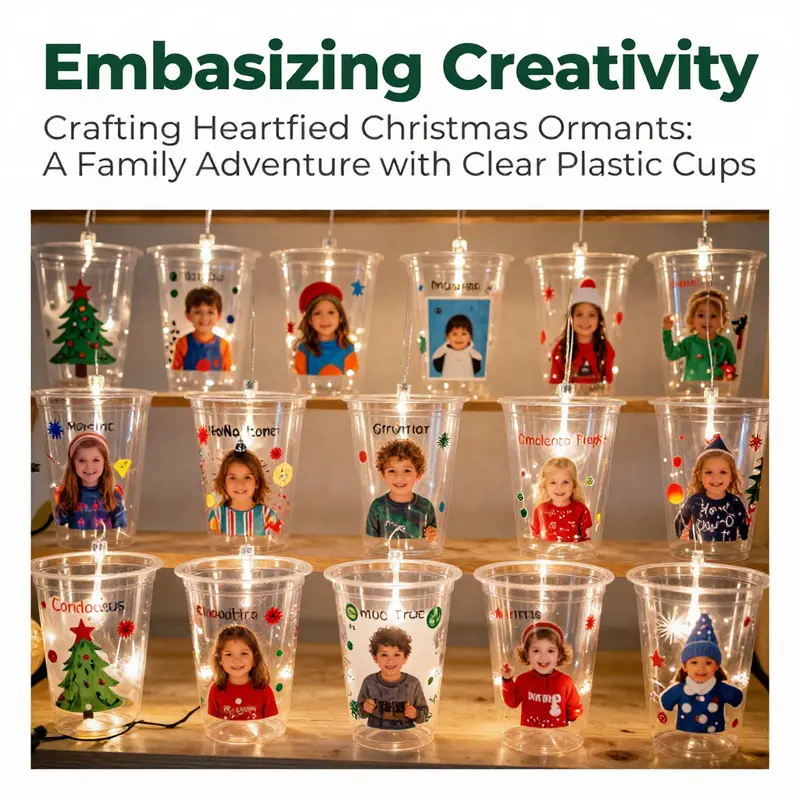
While the core concept remains constant, the project invites variations. Some families choose to use a series of cups to tell a story through a sequence of images—each cup becomes a frame of a larger memory. Others opt for a collage approach, placing several smaller pictures around a single cup to create a mosaic that still glows when illuminated. If the home environment is particularly bright, the cup can function as a lantern-like ornament, allowing prismatic light to pass through the images and chords of color to mingle on the tree needles. If a child is more engaged with crafts than with photos, simple drawings or a mix of child artwork and photos can serve as the visual focal point, preserving the sentiment of childhood even when a photo isn’t available. What matters is the sense of participation and the joy of giving, not achieving a flawless finish. The ornament becomes a family artifact, one that evolves with each holiday season and each new child’s contribution to the living memory of the home.
For those who want to weave a practical thread through the craft, consider the structural idea behind the cup itself. The clear plastic cup provides a surprisingly flexible framework: its curved surface can bend light in different directions, creating a gentle, ambient glow that highlights the image without overpowering it. The transparent material invites a degree of experimentation with color and texture—glitter, sequins, or translucent papers work well when applied sparingly to avoid overpowering the subject of the photo. If durability is a concern, a light coat of a clear sealant on the exterior after the decorations have dried can help protect the surface from handling and time, while still preserving the photo’s visibility. The key is to strike a balance between protection and display; the ornament should feel delicate in hand yet sturdy enough to survive a winter’s shelf life and the occasional tumble during tree assembly.
One practical note that often helps families during the planning phase is how to source and prepare the materials with minimal waste. The project thrives on the use of everyday household items, and a quick pre-check of the photo prints can prevent last-minute scrambles. If a printer is available, printing photos in a standard portrait or landscape format can simplify cropping and alignment. For younger children, pre-cut shapes or templates can provide a helpful starting point while still allowing them to participate in choosing the final composition. This collaborative approach strengthens family bonds, as participants discuss color choices, decide which photo captures the season best, and share stories connected to the moment. The ornament then becomes a living document of these conversations as much as a decorative object.
The value of this craft lies not only in the finished piece but in the process itself. The act of selecting photos, trimming them to fit, applying them to the exterior of a cup, and adding a few personal touches fosters a sense of ownership and pride. It turns a simple decorating task into a family tradition that can recur year after year. As the finished ornaments hang on the tree, the light that passes through the cup and the image becomes a tactile reminder of the passage of time and the continuity of family life. The kids who helped create them look back and see their younger selves, while parents recall the moments that led to those smiles. In this way, the ornament becomes a conduit for memory—a small, reflective lantern that glows with the warmth of shared experience.
To connect this craft with broader resources and practical ideas, consider the structural versatility of the materials involved. For a straightforward, hands-on starting point, many families find it useful to use clear plastic cups as the foundational form, leveraging their smooth exterior for photo attachment and their transparent interior to invite light. This simple adaptation makes the project accessible to a wide range of ages and skill levels, while still offering opportunities to explore color theory, composition, and storytelling through the photos and decorations chosen. The cup’s form encourages a gentle, forgiving approach to design—minor misalignments are barely noticeable once the ornament is hung and illuminated by a Christmas tree or a string of fairy lights.
The value of this family activity extends beyond the holiday season. It creates a repertoire of rituals that families can recreate with new photos each year, turning the ornament into a living archive. As children grow, the photos can reflect changing dimensions—height, expression, and personality—while the surrounding décor can echo evolving tastes and traditions. The ornament acts as a bridge between past and present, a small lighthouse in the home that reminds everyone of where they came from and who they became within the safety and warmth of family life. When the tree lights glow and the ornament’s surface catches the shimmer of glitter, the moment is not just decorative; it is an invitation to pause, remember, and celebrate the people who shaped the stories captured in that tiny, glowing frame.
In embracing the creative process, you are also embracing a philosophy of making that prioritizes accessibility and memory over perfection. The project celebrates the idea that meaningful art can be born from ordinary materials and shared moments. It is a reminder that the best holiday crafts are not measured by cost or complexity but by the warmth they radiate when families gather, exchange stories, and participate in the simple act of turning a photograph into a light-filled keepsake. And as with many family traditions, the most lasting value may lie in the conversations sparked during the making—the jokes, the recollections, and the quiet acknowledgments of how much these images have meant to the people who cherish them most.
External inspiration can offer a visual guide for those seeking additional ideas or variations. For households that prefer a broader catalog of approaches to this kind of ornament, a broader look at the craft community’s visual resources can be illuminating. While the core method described here is designed to be straightforward and safe for family participation, exploring a few images can help spark new configurations and color schemes. For a reference that accompanies this narrative, you can visit a curated collection that showcases similar concepts and creative adaptations. Pinterest offers a gallery of ideas that can complement the steps outlined above and provide alternative ways to frame and finish the photos within translucent cups. For anyone curious to see how others have translated memory into light, this resource serves as a helpful cross-reference and a source of inspiration to tailor the project to a family’s unique style.
As this chapter unfolds within the broader article on the Christmas ornament made from clear plastic cups and kid’s pictures, the emphasis remains on the fusion of safety, creativity, and accessibility. The finished pieces are not just pretty decorations; they are repositories of memories, capable of sparking smiles each time they catch the tree’s glow. This approach aligns with the season’s spirit: a gentle invitation to gather, to reflect, and to celebrate the people who color our lives with laughter, love, and light. The simple act of turning a photograph into a pendant of light demonstrates that the most enduring holiday traditions are often rooted in the smallest, most intimate gestures—moments that become, in their own quiet way, the heart of a family’s holiday story.
External resource for further inspiration: https://www.pinterest.com/pin/1234567890123456789/
Luminescent Memorykeepers: Crafting Family Ornaments from Clear Cups and Kids’ Pictures into Beloved Holiday Heirlooms
The idea of memory glowing on a tree begins with a simple object: a clear plastic cup, a printed photo, and a willing hand. When a child chooses a favorite image and a parent helps fix it to the outside of the cup, the ornament becomes more than a decoration. It becomes a tiny lantern that carries a moment of everyday life into the warm light of the room.
The act is democratic: children and adults collaborate, choosing what to celebrate, where to place color, and how to tell the story in a few lines of decoration. The resulting piece invites conversation, questions, and laughter, and over time the tree becomes a living scrapbook rather than a static display.
From a cognitive perspective, nostalgia acts as a bridge between past and present. Looking at a child’s face on a glowing cup can reawaken familiar sounds, scents, and feelings. This is not just sentiment; it is memory practice that helps families feel anchored in a changing world.
Practical notes: gather materials, print the photo in the right size, cut to fit the exterior, attach with safe adhesive, cover edges with a thin sealant to protect the image, add a hanger, and consider placing a tiny LED inside on low heat to keep the cup cool.
Variations for different households include different photo shapes, optional borders, or small captions written on the back of the photo or on a strip of paper wrapped around the cup. You can decorate with pastel paints, glitter, or fabric scraps to reflect family style.
The ritual is nourishing because it travels across generations. Families update the cup year after year, weaving new memories into the same glass stage, turning a single ornament into a family archive that glows together.
In this light, the ornament ceases to be merely decorative. It becomes a reminder that belonging is built through small acts of making, sharing, and telling stories, so that the light we pass on does not fade but grows brighter with every generation.
Final thoughts
Crafting Christmas ornaments using clear plastic cups and children’s pictures emerges as a delightful and meaningful holiday activity. This creative endeavor fosters family bonding, sparks imagination, and builds cherished memories, transforming simple materials into heartfelt keepsakes. As families come together to personalize their ornaments, they not only create beautiful decorations for their trees but also reinforce traditions that encapsulate the spirit of the season. As you embark on this crafting journey, remember that the true essence of these ornaments lies not only in their aesthetics but in the love and memories shared during the making.